
In today’s blog, we continue the 4 part series on replacing the plumbing in your boat. The is part 3 of 4 and at the end of this part, most all of the work will be complete. Today we will cover running the PEX lines and good placement within the boat. We will also show in detail how to crimp the PEX crimp on style connectors and then connect the system together and install fixtures.
Like most things this one also starts in the Bilge so we gain access to the bilge and stretch out the PEX into runs long enough to go where we want it to travel so that we are not fighting the heavy curve of the stored PEX lines. We just bend 3-4 foot sections the opposite way of the role as we uncoil it and that really helps.
This works best with 2 people but certainly can be done with 1 person as well. Have on person feed the lines from the starting points (For me it is easier to start at the fixture side and feed toward the central connection point, but whatever works best for you will be fine. Feed the lines and try to ensure they are placed in such a way that the movement of the boat won’t cause undue wear due to rubbing with other items.

We like to install the lines just a foot or 2 off to the sides of the under floor access panels. That way they are easily accessible if needed for repairs, but also because they can then be “hung” from the bottom of the sole with nylon pipe clamps it is like nylon strap, but has holes in it to run a stainless steel screw into an expect mounted block or wooden stringer depending on what your boat has.
After the bulk of the line is run from connection points to the main junction area, it is not a good idea to get a lesson in how to install the clamp on style PEX connectors. (Check out the video below for more details), however we will step you through it here as well.)

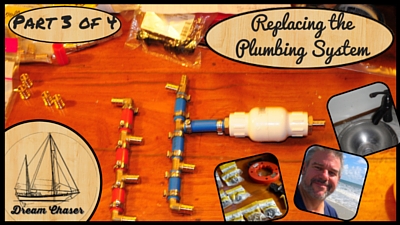
Slide a clamp over your PEX line down an inch or two. Slide the fitting your connecting to, onto the end of the PEX until the PEX butts up against the ridge on the fitting barb. (This may sound a bit confusing, but will be very obvious when you are pushing the pipe onto the fitting). Once that is in place, you slide the clamp back toward the cut end of the PEX and stop 1/4” from the end of the PEX and insert the raised/bumped edge of the Clamp into the end of the PEX crimper jaws and start to ratchet the tension onto it. Once the crimpers have a solid hold on the raised portion, there is no reason to hold the parts now, they are solidly held in place on the crimper. Continue to squeeze the crimper until you see the LED light on them light up indicating that the correct pressure has been reached. I highly recommend these styles crimpers. They are small for tight spaces (Critical on a boat) and the ratcheting action of the handle allows one handed operation in most tight quarters.Now it is a matter of connecting all of the ends, Tee’s, 90’s, etc to the system according to the plans you created in Part 1 of the series.

In our case we created a “water manifold” as a distribution for hot and cold water to all connections. These are sold as stand alone units in stores, but they are very costly and we didn’t need something quite that fancy for our installation. It is easy enough to make up your own out of PEX and T Connections.
The purpose of this manifold is to allow each water fixture/supply to have it’s own “home” run to the distribution center. For houses it leads to less connectors, but on a boat, just be smart about what you believe needs a separate feed of not. For example in our heads, we know 99% of the time, nobody would be using the rear head sink at the same time someone is taking a shower in that same space, so we just Tee’d off the same line to feed one or another. Same with the Front head, but if someone was using the sink in the rear and the shower in the front, they would both be on separate runs, so pressure is only limited by the capacity of the pump at that point (and the 1/2” line I have chosen)
After connections are made, it is time to dry fit any new fixtures being installed. On DreamChaser, we installed new fixtures on all sinks over the last couple of months or during this project, so part of this work was already done for us.

Consider any special circumstances you have, by example, one of our counter holes had to be increased in diameter due to the size of the single connection for hot and cold and the mount itself. We did have to get a special drill bit to widen the holes in Marble for under $20 so it was not bad at all.
Install the fixture to the sink counter, tighten nuts and bolts and make connections to the cut off valves you should have installed at each of the end points via the cut off valves.
It is now time to visually inspect the system and if all looks good turn on the pressure water and wait a moment for all air to get out of the system. Then you should be ready to use it. I always recommend opening all hot/cold spigots a bit to ensure all of the air trapped in the system is released from the work on the plumbing system.
Please do share this video on your social network and sailing forums. Like it on Facebook or share it on Facebook and please subscribe to our channel to get updates on what is new and upcoming. We are working very hard to get update out every week on the Blog (Friday mornings when possible) and a video with almost every blog post is also published to our Youtube Channel.
Safe sailing, see you next time on Part 4, the final and last of this series.
In the next part of the series, we will show how to finalize the last steps and talk about a fresh water filtration system for your drinking water.
Please don’t forget to comment, like or share what you see here on social media or your favorite forums if the topic is relevant.
Below is a link to Part 3 of the 4 part series on Youtube. I hope you enjoy some of the bloopers from the last video, today we included some audio voiceover Bloopers from the recording of this episode.
[embedyt] https://www.youtube.com/watch?v=70FVGs23PoM[/embedyt]