
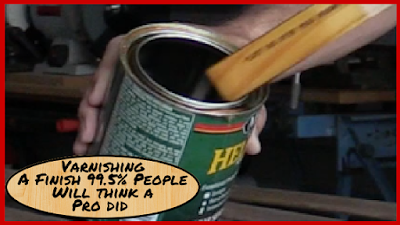
Classic Sailboat = Varnish jobs. Period. End of Story. No way to Avoid it.
But that is ok, if it were not something we anticipated we would have looked for and bought a nice shiny plastic white production boat. Nothing wrong with those, as a matter of fact deep into some teak work, sanding, varnishing or other task o’ the day, I have wished that is exactly what we had. BUT, it is usually just a fit of anger or reaction, there is still something magical and heart warming for me when I see varnished teak trim, or a teak deck, or beautiful wooden scroll and carving work. It makes my heart go pitter patter.
I have been married to my lovely bride now for 24 years and love her dearly, but I think we will both agree that the feeling we get when we see a beautiful classic sailboat all decked out in her finest of finishes, gives both of us that feeling we had when we first found those feelings for each other. They are still there, but now our mistress is the boat. The good news is we share this mistress 🙂
 We have now varnished quite a few different boats, boat parts and done it both on the boat, outside and in the garage. We have researched this to figure out the BEST way to get the BEST finish. We then followed those methods and got phenomenal results. We are also human and at times inherently lazy. So with the best of intentions, I have cut some corners as well. And what I learned was really something just this side of incredible. What I learned is that if perfection takes 100% of your effort and gets 100% of the results, I have found that REALLY REALLY good, takes about 50% of the effort of Perfection and gets about 95% of the results.
That seems like a very economical and beneficial decision to make.
Here is how I justify it in my own head. If I were entering my boat in a classic sailboat show on a weekly or monthly basis, or if I owned a varnishing business that was marketing to high end show boats, I might make a different decision. But I am not, I am wanting my boat to look AWESOME from a few feet away. When I walk across the deck of my boat and l look down to my toe rail I want it to look great and it does. If I get on my hands and knees and then move my eyes down to about 6-8 inches away, I can see a slightly warped reflection of my face, rather than a crisp mirror like finish. But make no mistake about it, I can see the reflection still.
So it is with this learning that I have modified my approach to varnishing woodwork on my boat.
Please don’t read more into this post to think this is shoddy work or something that won’t last, quite the contrary, this is using the methods and approaches of professional brightwork professionals and modifying them to save a lot of time and cost. This approach will last just as long as one that takes you twice as long. This has been my experience over the refitting of 3 boats now and living aboard them in the southern US where the sun and temperature conspire to ruin all things varnished.
 So enough with the intro, lets talk about how to do it. The process varies a little bit depending on the wood and whether it is inside or outside, bare wood or previous finish, etc. Please search this site for “Varnish” and you can see other boo posts depending on the surface and state of the material.
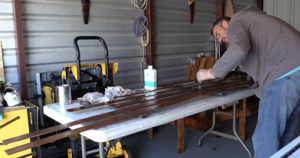
In this case, we are going to be focusing on the teak trim that span the overhead in the lower salon. These are 3″ wide strips or so of thin teak that are a contrast to the white panels on the overhead. I removed the trim pieces as we were insulating and replacing the white overhead panels, so it made sense to prepare and varnish these off of the boat, but it could have been done in place as well. I must admit, over-head varnishing tends to leave drips. It doesn’t matter how careful I am being, I drip, so this is a good way to keep from getting varnish drops on the floor :).
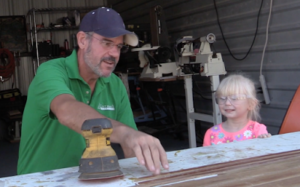
I removed any fasteners from the teak trim pieces. In most cases these are screwed in place, in our case, they were not screwed but rather glued to the beams and also tacked place with small brads. These pieces of wood had a finish on them from many years ago, but it was faded and dirty and in some places starting to come up. I decided to start these fresh, so after removing the brads, I sanded them down with 150 grit paper to bare wood. I only sanded the side that was visible and rounded the edges, but did not worry about the part that would be fixed up to the beams.
 Once sanded with 150 grit, I went over them quickly with 220 grit as well for a smoother finish. It is important to keep dust out of varnish work, so as I sanded these in my storage locker, I was careful not to get dust everywhere. I do this using a portable dust collector/shop vacuum style machine. I use the Fein Turbo 1 model that allows me to plug my portable tool into the unit itself and then it automatically comes on and goes off when the power tool is turned on. It comes with about a 15 foot hose that is very flexible so it doesn’t make it hard to use your tools the way you would if it were not connected to this. Even when sanding it does a really good job of keeping the dust down to a minimum. It is not going to keep any dust from getting off the work, but it cuts it down by about 85% or so when sanding. Even more for things like the jig saw.
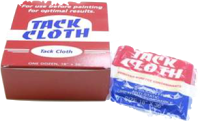
After I am finished with the tool, I can use the same Fein to clean up the area, get any dust off the edges of the wood, etc.
Now before finishing it is still best to use a tack cloth or microfiber cloth to get any sawdust off the wood itself.
W hen using 200 grit paper, the dust is really fine, almost like baby powder, so you really want to be sure things are clean.
My preference is the Tack Cloth, but I have used the micro Fiber towel in a pinch as well. When I do this, I am sure that I carry the towels far from where I am working and beat them out on something to keep getting the dust out of the surface. I am an avid Amazon shopper for my products and tools because they can be found very inexpensively. I also am an Amazon Prime member which means shipping is free, so I often will find products that are “prime” eligible to save even more money. I will put links throughout this article on the tools that I use. If you order from one of these, there is no additional cost to you, but Amazon will provide me with a small affiliate fee.
 Once the material is cleared of a dust. It is time to apply the finish. This is important when applying
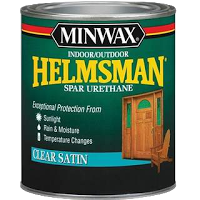
directly to raw wood. You want the material to really absorb into the wood. In order to do that, you want to thin it so that it penetrates deeper. This is done by thinning the varnish. I like to order relatively small quantities of Varnish so I am not storing it much longer than needed. I have stored varnish for almost a year sealed up very well and had it still be good, but if I am doing a smaller job, I tend to buy quart size cans of varnish so that they get used up a little more frequently. It costs me a little bit more but it is my preference. I have had really good luck with several of the different brands of varnish, but I have found that Helmsman Spar Varnish from Minwax is really pretty good. It is much less expensive than some of the more specialized ones that you can get for outdoor marine use.There are still 2 products that I want to try, but haven’t and will be doing some experimenting on outdoor teak with them. One is Awlwood MA that I have ordered but not tried yet.
I mix my varnish about 60-70% varnish and 30-40% thinner for the first coat. I then continue to thicken it a little bit. The next one I do about 80/20 and then the 3rd coat about 90/10 and then use full strength varnish for coats 3 or 4 through 6 or 7. I usually stop between 5 and 8 coats when the finish looks the way I want.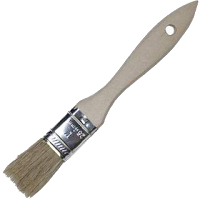
When I apply the finish, I use chip brushes (disposable jobbers). Deb prefers the sponge brushes, but
I don’t care for those, they work well for her, I like these. Both work well. I am sure I can get a smoother finish if I were to use a really good beaver hair brush, but I struggle in the cleaning and storing of brushes and have never been able to store and clean a brush all that well short of suspending the bristles in paint thinner as I stored it.
This worked well in a garage or wood shop, not as well on a boat that moves around. So I have went to the chip brushes and for pennies I can use one and throw the darn thing away when done.
 (I even resorted to cutting off the bristles of the old brushes and saving the handles to mix small batches of epoxy as a way to save a few bucks and get the most out of the things I use)
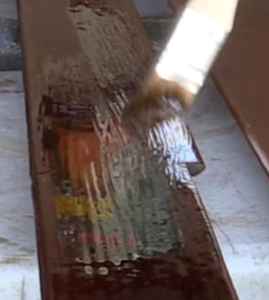
I apply the finish on about 18″ or so of the material using a back and forth motion to be sure that I get good
coverage on the surface. I then use long gentle strokes in the direction of the grain to smooth out any areas from lifting the brush while going back and forth. I then move to the next 18″ section or so and then again blend it with long gentle strokes. I start to move my hand in the direction I want to go and lower my hand down until the brush makes gentle contact with the surface and then lift it while still moving as well. This provides the most gentle blending where the brush meets the material.
In order to check your work, get your head low and use a light source ahead of you to see any ripples, runs or valleys or gaps in the varnish.
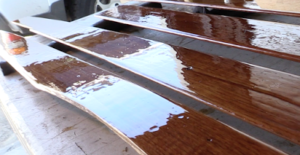 Fix these while everything is still wet, once the varnish starts to get tacky, your brush strokes will form dents and brush marks in the material that won’t flow out. Working “wet” will allow the top of the wet surface to smooth even. Think of a pool of water that gets disturbed, it tends to settle while wet and the varnish surface does too. See the photos here for a before and after. The first picture is while the material is still wet and I have just brushed the material on and lightly feathered it. The second picture is who the material flows out to something smooth.
Below is a video we shot of the process for getting this started. There will end up being more than 1 video in this series, so check back for the link to Part 2 next week as the work continues.