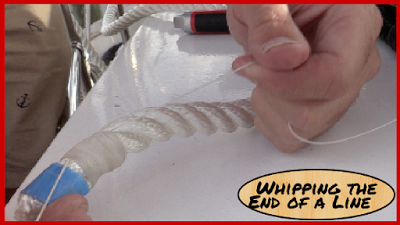
There is a great pleasure I get in doing something in a nautical way, or in a way that shows seamanship (keep snickering down please). This holds true with treating lines. We all have had some lines where the ends are frayed, and we see a haphazard knot tied in them. Heck, I even have some scrap lines that are just like that.
But there is something really calming and prideful in seeing a properly whipped and treated line.
The small details show that you are the Skipper in Charge, the person that “Runs a tight ship”, wants it all in “Ship Shape”, or whatever addition nautical term you want to toss into the mix.
It is with this in mind as I was working on the project of extending the anchor rode. We had a few hundred feet of chain, but were adding another 150 feet or so of 5/8″ in line to that rode. In the previous post, I said it was 3/4 however I believe It is 5/8″. On the Chain end, we went ahead and spliced the 3 strand line onto the chain and recorded a blog post with video on how we did that.
Click on the image to the right to be taken to the blog post for that.
So the question is how do you do it. Frankly, it is pretty easy. There are very few supplies needed and it looks great when you do this. The first thing you will need is some whipping line. This is a waxed line that is perfect for the job. You can always pick some up at your local Marine Store but I find like with most things Amazon has good deals on these kinds of things and it makes it easy. You can order it when you’re thinking about it and it has arrived when you are ready to do that next project.
| I will put a few links below for the supplies I used in this video. But honestly, they are all things you likely have lying around with the exception of the whipping line.
If you already have a bitter end of the line you are going to be whipping, you are ready to get started. If you are cutting from a longer set of lines, you can whip it first and cut next to it. I am writing this from the position of having a fresh cut end and are now needing to whip the line to keep it from fraying. There is a rule of thumb on how far up the line the wrap should be in order to form a good solid whipping that will last and remain tight. That rule of thumb is you want the length of the whipped portion of the line to be a minimum of the diameter of the line. So if you are whipping a 1/2 inch thick line, you will want to have a whipping that is 1/2″ wide.
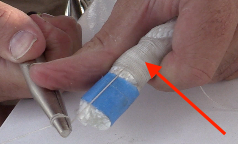
You start by putting the bitter end of the whipping line at the bitter end of the line to be whipped. Create a loop about 2-3″ up the line and then start to wrap the longer strand end of the whipping line around the line to be whipped. You just continue this process until you have the length of whipping based on the thickness of the line. For more details on this and to see it, see the video at the bottom of this blog post.
|


 In my case, I was doing this on 5/8″ thick line so needed a pretty good length of whipping line to go around at that length.
 Once you have wrapped it around enough times for the proper length, put the end o the line through the loop and pull the bitter end of the whipping line to cinch the line together. Here is where it gets a little bit tricky. Because we are not actually tying a knot here or sewing these ends through the rope itself, we have to cinch it the correct way. That way is to continue to pull the bitter end of the whipping line until the cinch is half way down the whipping. So if you have a 1/2″ whipping, you pull the bitter end until that cinch is buried 1/4″ from each end of the whipping. The video below show this very clearly as you can see the cinch actually moving under the lines.