I like Coffee. Period.
There is no apology here; it is just a fact. I enjoy trying different coffees and coffee drinks but am still a purist at heart. I like a “cup of Joe” as they say and it doesn’t have to be fancy, BUT I do want it to taste good. I have found that I like a blonde or light roast if I am going to drink it without cream. If I have any milk (soy, almond, whole, 2% or skim), I like a medium roast, and if I am going to have any non-espresso coffee, I like to have half & half in my dark roasts.
So in the past few years, I have started to become a little bit of a coffee snob (Said entirely tongue in cheek). I do find my morning routine to be a little bit therapeutic. It has become my way to get on my game face. Sometimes the game is something I need to do for work or just to relax or doing some boat chores or projects.
I will share with you the routine I use and the tools I have found that make a great cup of coffee. I suppose the total time, from putting the water on the stove to my first sip, is about 5 minutes or so and that is my “me time.” I hate to sound too Zen-like, but I almost find this like meditation time. I have done this enough now that I don’t think much about the steps taken to make the coffee, so instead I can start to think through my tasks of the day, or priorities or just reflect on what I consider to be a pretty great existence for myself and my family.
I am going to reference a few of the items that I use in this post and every time I do this; some folks will reach out and ask me where they can get these products or items. I will put links below to the ones that I use and if you are going to purchase any of them or you already use these I would love to hear what you think in the comments below.
American Press – http://ow.ly/bTNI307yJuj
JavaPresse Manual Coffee Grinder – http://ow.ly/evff307yJPz
AeroPress Coffee Maker – http://ow.ly/Ml7d307yK7x
I start by gathering up all of the items I will need for making my coffee. It not difficult because I keep it all very close by in the galley as it is used a couple of times a day typically. I start with the tea kettle which is almost always on the stove top unless we are under way. I get out my manual coffee grinder, whole coffee beans, and my American press.
 Step 1 – Boil the water
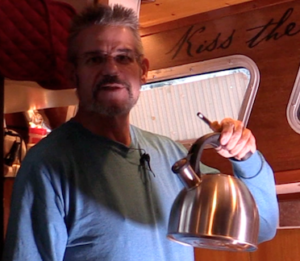
My routine starts with me putting the kettle on the stove. We have a gas stove, and I use a whistling steam kettle. It lets me know as soon as my water is ready and that helps me save on the use of propane aboard the boat. I only put about 16 ounces of water in the kettle, so it boils very fast. When I make my coffee, I make about 12 ounces or so at a time, so by starting with 16 ounces, this lets me have a little bit of room for loss through steam.
I must admit some days; I do put extra water in if I am also going to fix myself a bowl of instant oatmeal.
Step 2 – Select your coffee
Well ahead of this step, you will need your beans. Here are some of my favorites, but frankly there are so many, and taste buds are so different, you have to decide this for yourself what you like best. The best way I have found to experiment is to go to a bulk coffee section of a specialty shop and buy just a few tablespoons of a bunch of different ones and have a little taste comparison for yourself.
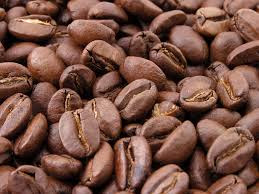 I like a variety of coffee, and I can have several different types of whole beans on hand because they last a lot longer whole than they do ground. I often go between a light roast for my first-morning cup of coffee and then will have a medium roast later in the day. My favorite light roast coffee is Blue Mountain Coffee from Jamaica. The only place in the world this bean grows in in the Blue Mountains in the central part of Jamaica. It is expensive, and typically it runs about $60-80 per lb, and I just can’t bring myself to spend that often. I used only to buy it when we would go to Jamaica and take home a couple of pounds of it, but recently I have found a decent blend at Fresh Market grocery. I am not sure what the % of Jamaican Blue Mountain coffee there is, but it has been good enough for me to enjoy between trips to Jamaica and the whole beans are only $12 per pound. It is an excellent substitute for the real thing. Jamaican Blue Mountain Coffee (The one we get on the island) can be purchased on Amazon as well
For my medium roast, I am a bit of a sucker for Starbucks Pikes Place flavor. It is so commercial, I feel stupid even stating that here, but I like it. It tastes good to me. It is one of their original blends and named after the first store they opened in Pikes Market in Seattle.
You can buy it in any darn Starbucks and likely even in some US grocery stores as well. If you are already an Amazon member and get your pantry items from there, feel free to use the link below to order if you would like.. Pikes Place Whole Beans on Amazon
Step 3 – Grind the Beans with a Manual Grinder
I like the freshness of grinding my beans. It is certainly easier to buy pre-ground beans at the store, and I go through coffee fast enough that it still tastes decent by the time I finish a one pound coffee bags of ground beans. I feel I need to let you in on a little secret, though, fresh ground is so much better. If you have not tried it, you need to. If you don’t want to invest in getting a small grinder (about $25 bucks or so) then next time you are in a market, and they sell fresh beans, get a small amount and have them ground fresh at the bulk coffee section. Take it home and compare it to the pre-ground you have. It is noticeably different, noticeably better!
 You can certainly buy one of those little $10 electric coffee grinders you see at the local big box store, but I hate them. I have used them, they are loud, and frankly on a boat, it is just too much of a power suck to have on hand. There is something Zen-like about hand grinding the coffee. I mentioned this earlier about it being almost therapeutic, and this is part of my day I anticipate with excitement. That is strange as I type it, but I really do.
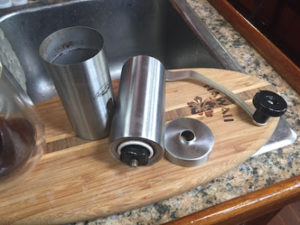
My product of choice here is the manual ceramic burr grinder from JavaPresse. The grinder is a small cylinder about 7 inches tall and about 1 and a half inches in diameter. It is three parts that fit into each other. The bottom is the catch for the ground coffee; the top is the place where you put in the beans, and the lid closes it all up. There is a removable handle to grind with, and the whole thing fits into the side pocket of a travel bag if you want great coffee where ever you happen to be. I must admit, I travel for work and have taken this with me along with a small zip lock of beans. I am sure a few TSA agents at Airport security think I am crazy but have never said anything to me about it.
I start by putting one scoop of coffee beans in the top portion of the grinder (about a heaping tablespoon or so two) and then I put the lid on it and slip on the handle. 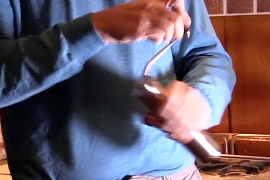 Holding the cylinder in my left hand and cranking with my right, I grind for about 90 seconds to 2 minutes depending on how fine the ground is I want to make. It is not loud like the power hungry plugin do-hickeys, and it doesn’t bash the heck out of the beans, nor does it heat them up from the friction which tends to give the coffee a more bitter or intense taste than the roaster had intended. You can purchase a JavaPresse Manual Coffee Grinders on Amazon and if you are a Prime member the 2-day shipping is free. http://ow.ly/evff307yJPz. As a side note, if you live on a boat, I think everyone should be a prime member. For about $100 a year, you get free 2-day shipping on almost anything you order, and most marina offices have a place you can ship something and have them hold it. Purchasing this way is an excellent way to get staple items such as groceries and toilet paper, etc. What makes Prime so good is the fact that you get online photo storage, streaming music, streaming video and now includes audio books through Audible. When you consider what you get for about $8 bucks a month, it is phenomenal !!
Step 4 – Brew the coffee with an American Press
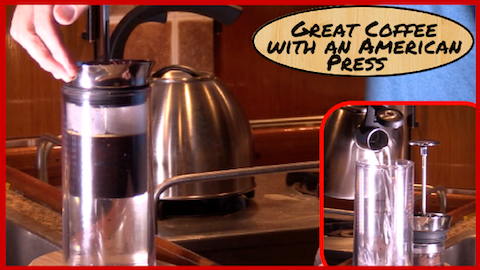
here are several ways to brew coffee, and in today’s post, I am going to talk about my new favorite way to do this while on the boat. I have a favorite for when I want an espresso and also when traveling or staying in a hotel room that is different, but this article will focus on my American Press and how I make a great cup of coffee with it.
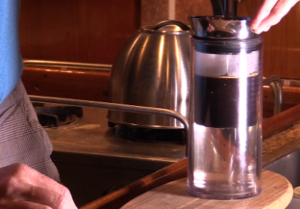 I also find it a bit beautiful, which you can see in the video at the end of this post because of how it appears to magically convert the column of water to coffee in front of your eyes.
An American press is a relatively new product that takes the best of several great methods of making coffee, and it combines them. A French press immerses the grounds in the water, and the screen holds the coffee grounds at the bottom of the vessel. You pour from the top and hope to keep ‘most’ of the wet coffee grounds (what I call mud) out. The American Press uses pressure which helps to reduce the bitterness that can happen when the coffee grinds remain immersed in the water for too long.
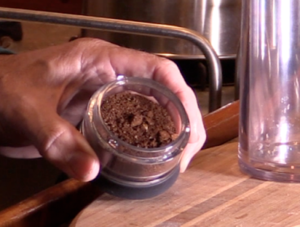 So we start with putting our grounds in the small pod that has a screen on the bottom of it. Once the coffee is in the pod, you attach it to the plunger and lid by placing the small pod like portion onto the lid and turning it about a 16th of a turn to lock it in place. The process may be easier to see in the video below than it is to describe it, but it goes on a lot like a jelly jar closes. You know how you put the jam jar lid on and turn it just a little ways and it seems to lock in place. The coffee ground portion closes the same way.
The way you grind the coffee here is important and if people are interested in the different grind types and when to use them feel free to comment below and I will be happy to do a follow-up or answer any questions. I will start by letting you know you can’t grind it so fine that it looks like powder or what you might see in an espresso ground at your local coffee shop. Doing so is too fine and will not allow the water to flow through the coffee and the screens with just your arm applying the pressure to the press/plunger. The way I like to grind my coffee for the American Press is to make the grounds about the size of granulated sugar or a bit larger. You don’t want it to start getting to the size of salt as that will be too fine.
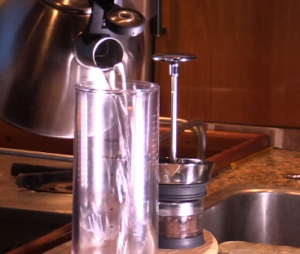 Pour your boiling water into the clear portion of the American press and fill it up to the level of coffee you are making. I typically make 10-12 ounces depending on the cup I am going to use for my drink. My default mug is 14 ounces, so the 12-ounce amount is perfect for this cup and leaves room for a bit of cream if I want it. Once the water is in the vessel I put the lid with the plunger and coffee pod you attached all into the water leaving the plunger up (out of the water at this point). I then push the plunger down just long enough to see the water flow up through my grounds and start to seep over the top screen on the pod. Then I stop. Stopping is important as I like to pre-soak the grounds for about 30 seconds before I begin the step of applying pressure to the handle.
When the 30 seconds are up, I then use slow and steady pressure to the plunger to allow it to press the water up from the bottom through the pod and onto the top portion of the plunger as fresh pressed coffee. Continue pressing the plunger down until it hits the bottom of the vessel and the water is no longer visible below it. Pushing the plunger down is not a race so take your time, I like to take 60-90 seconds to reach the bottom of the press.
As soon as you have placed the plunger at the bottom, you can now just pick up the entire vessel and pour the coffee into your mug of choice. Here is a link to Amazon where you can order the American Press – American Press Link
Step 5 – Sip and enjoy

I sometimes drink my coffee with just some sweetener in it and sometimes with cream of some kind. I am curious how everyone else likes to drink theirs. I still use sweet and low. I think I am one of the last humans still buying those little pink packets of saccharin, but I like it. I have tried sugar but feel I need too much of it to make it as sweet as a packet of sweet and low. I have found some decent alternatives, but I keep going back to those darned pink packets. I have tried raw sugar, honey, monk fruit extract, stevia, Truvia, etc. You name it, and I have likely tried it to sweeten my coffee.
Step 6 – Cleaning the American Press
When you are about to clean the American Press, just lift up the plunger and remove the lid from the press. I like to angle it about 45 degrees before I take the lid and plunger off of the vessel to avoid a drip or two of coffee onto the counter.
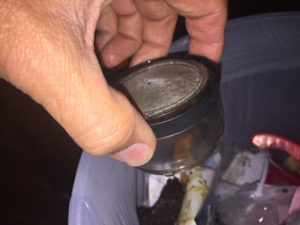 If you lift it straight up, a few drops sit on top of the pod and will drip on your way to the sink.
Clean up is easy but I recommend letting it cool for 10 or 15 minutes before you wash it because everything is still pretty darn hot and the plunger and parts are stainless steel, so they absorb that heat. When cool, unscrew the pod and just tap on the side of the trash and let the coffee grounds fall out.
If you are into composting, indeed you can save the old coffee and add it to your compost pile. I do at times just pop these overboard on the boat if we are under way. It seems when I do that I almost always get a few grounds on the side of the boat, so it is easier just to use the trash can.
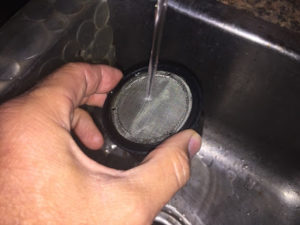 I then rinse the pod base and top under hot water. I rinse the inside of it and then let any additional grounds that were on the sides of the pod to fall to the screen then I run hot water over the screen while holding the pod upside down. Doing it this way tends to get the last of the grounds out of the mesh and leaves it nice and clean. I also rinse the lid connected to the plunger as well under hot water and just rub it with my finger. I don’t go crazy with soap and water with each use. I do this about once every week or 2, but for the most part, it is just rinsed and left out to dry. I rinse out the vessel and set it aside to dry ready to make my cup of happiness the next time.

