This week was another good week of progress. For those that have been following some of our earlier blog posts on the deck core replacement, you know that we patched a section of the deck core about 2 feet by 5 feet. We have decided to add an additional new skin of epoxy fiberglass to the entire deck after we repair any soft spots.
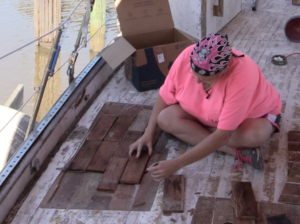 So this week it was back to more tap testing. I found some hollow sounding “thud” sounds indicated delimitation at best, core rot at worst. I had a friend of ours that does boat repair, new construction and reconstruction take a look at the deck and provide his opinion as well. He suggested that we make a few more inspection holes in the deck to determine if the core is rotted or just delaminated. So I did. The good and bad news is that the core was damp, but not rotted. I am not sure what to make of this, if this was just humidity forming in the delaminated sections or if this was from the removed screw holes where I may not have patched it 100% yet as I filled those holes.
Either way, it indicated another section of the deck that needed further exploration. Deb was the star of the show this week while we made progress on the deck core. I cut the upper skin, and she removed the skin and removed all of the core pieces. The good news is that while it was damp, it was completed dry within an hour indicating it was not soaked even after the rains prior.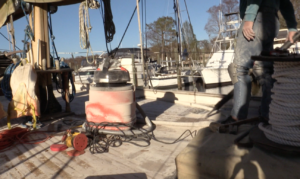
Deb removed the core, and we ended up making the hole in the deck larger to correct a bit more delimitation we saw. We were able to re-use most of the core material as it was still VERY solid and not damaged. We sanded the boards rough and cleaned them in acetone to be sure that they would allow for high adherence of the epoxy resin we would be using to create the mechanical bond between the lower skin of deck glass and the bottom of the core.
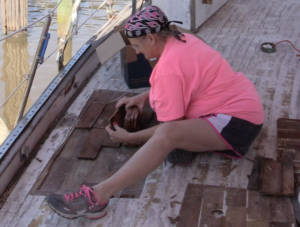 Deb did a dry fit of the pieces of wood and marked each one so that we knew where they would go back into the deck once the resin and harder was mixed. She also marked any boards we had to cut, and we took them over to our workshop to cut there.
The day before this activity, I was grinding the deck. Not just a little bit, but grinding like crazy. I used a 4 1/2” angle grinder with a carbide cup blade (36 grit) and ground the entire length of the deck from bow to coach house on the starboard side of the boat. I removed all of the stanchions and stanchion bases as well as the inner jib main sheet deck
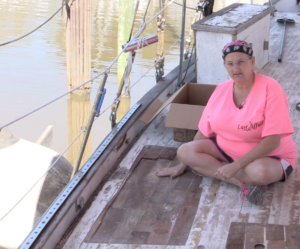 connection so that everything could be prepped correctly for these new layers of glass that will be going down on deck. This work was loud and knowing that I was going to be doing a lot of grinding, I had my dust collection system that I have talked about in a previous post (Click here for POST) and also a shop vac for regular cleanup. I wanted to be sure that we were not getting fiberglass in the water or in the air to get on our neighbor’s boats. Sadly I did grind for about 6 hours. It was brutal on the knees and back, but we got it all done. Someone did complain about the noise to the marina just as we were finishing. I do feel bad about that, but hoping that by focusing all of the work in one day, we were able to get the noise behind us. In hindsight, I may need to take off a day during the week if I was going to do this rather than on a weekend when more people are at the marina.
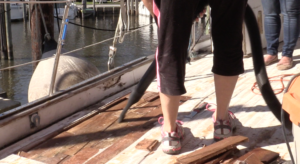 As I was grinding, and cleaning up my dust every foot or 2, Deb continued her work by keeping the area of deck she is repairing clean as well. She got done with her work before I completed grinding, so she started to polish the Dorade vents. We have these massive 30lb solid bronze dorade vents for air flow. The finish is a horrible green/gray/brown mess of 40 years of exposure to salt air. Deb polished this thing, and it started to look shiny and beautiful. The shine was all the motivation she needed.
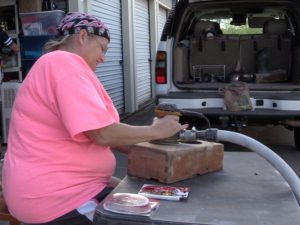 Deb picked up some bright red oil based paint at the store and will be painting the inside of the dorade bright red. That wouldn’t look great on an old dorade box so those were both plucked off the deck and she sanded these down to bare wood. I had re-done one of the dorade boxes last year, and the finish I put on it just did not hold at all. It goes to show that proper preparation is key to a long and lasting finish.
She sanded them all the way down to wood and put a reddish tinted stain on the teak boxes so that it 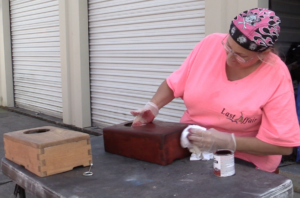 comes closer to the red color that will cover the inside of the dorade cowls. We still have more polishing to do on the bronze, and sadly if we don’t do this a few times a year, it is going to turn green and patina again, but for now she looks great.
To quote our friend Thomas (who I know got this quote from somewhere else). “Run she may, but Shine She Must.”
Sadly our boat has been 180 degrees to that saying in that she runs good, but there is nothing that shines on her until Deb polished those large bronze dorade cowl vents.
More to come soon, including a video of laying fiberglass to build up thickness over repaired sections of the deck and in preparation for several layers of reinforcement over the entire boat deck. We will have a stronger than original boat deck when finished. It will be leak free AND much easier maintenance wise than the teak.
The tools we use for this job are listed below if you find this a convenient way to shop for them. If you use these links, you get the same great Amazon pricing, but we get a small affiliate link credit. Thank you.

