Welcome to the last and final post on the 4 part plumbing replacement series. In the first three posts we learned how to plan and draw out the project details, including creating parts lists, we removed all of the old system components and then ran the PEX line, made all of the connections and fittings as well as installed new fixtures.
In this last post, we will talk a little bit about some lessons learned throughout the project, as well as how to build a fresh water filtration system for drinking water in your galley.
As we progressed through this project, there were a few great lessons learned.
- We ended up making more parts runs than we had originally anticipated. To that end, it is a good idea when making your parts list, to overestimate or at least over purchase from a reputable place that will allow you to return unused parts.
- For example, we found that it was better to buy extra PEX fittings and return the unused given that we made more trips that needed without doing this.
- Projects that span a few days or weeks tend to leave a live aboard boat very cluttered and messy. We were always pulling out tools, and parts and without wanting to put them all away after each working session. We ended up having this mess on the table for the better part of a few weeks (we spread this project out over time, but it could have been done in 1 solid weekend working long days).
- The solution Deb came up with was a simple and good one. We have some clear bins with locking lids just about twice the size of a shoe box. We labeled one of those “Current Boat Project” and all plumbing fittings nd what not all went into that when a project was done. When we picked the project back up, it was easy just to open the bin and find what was needed.
- PEX is easier to work with if you can set it in the sun for an hour or so. It helps soften it just a bit, and it is a little easier to straighten out and feed into the path or locations you want it to go into.
- The biggest lesson is not to leave the bilge hatches all up and open while taking a break from a project. They are dangerous and easy to trip or fall on.
- Deb stepped backward, and her foot slipped off the ends of the sole and into the shallow bilge causing her to fall backward onto her bottom right on the other edge of the opening. Luckily she didn’t break an ankle or leg, but she certainly had a 6″ bruise on her butt that was pretty gnarly. Thankfully it was the shallow bilge and not the deeper one otherwise there could have certainly been some knee or leg damage.
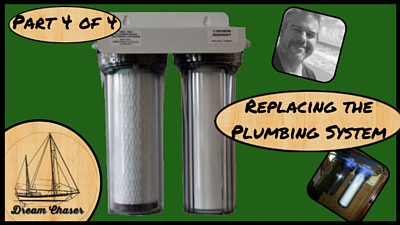
 We ordered our filter housings from Amazon (see links below) and then connected up the fittings so that it would all fit with our PEX plumbing. We chose a 2 stage filtering system where the first stage is just a paper or fiber 5-micron filter. This is also referred to as a sediment filter, and after a month or two, these would turn a rusty color from filtering out some of the sediment and iron in the water.
The second stage is a 2-micron carbon block filter. This not only filters the impurities from the water, but the carbon block will remove any bleach that we may add to the tanks to purify any suspect water we may take in.
The filter housings we like are the ones that have a clear housing like in the photo so you can easily see if the filter is getting dirty or needs replacing. We chose the Pentek brand and preferred the ones that have the red push button pressure release button. This allows you to unscrew the canister easier by pressing the pressure release button first. Below you will also see the fittings and filters we chose.
|
|
Please don’t forget to comment, like or share what you see here on social media or your favorite forums if the topic is relevant.

