This weeks blog is the continuation of the challenges we had last week with replacing the starter on our Perkins 4-108. We ended up getting the wrong one when we had the guy at the AutoParts store look it up. We special ordered it and it was wrong. So I looked it up myself (Proof that it is always better to do your own research first or second before you do a job or buy something. We all make mistakes, but somehow it is more annoying when the professionals that are supposed to know this stuff make it. I seem to get more annoyed when that happens then when I make my own mistakes.
So in the last blog post we removed the starter after the boat would not longer start (not firing the gear out onto the flywheel). As it turned out the clerk ordered the wrong one in the blog post last week, I provided all of the correct part numbers and links from the major US Auto parts stores to get the Delco Remy replacement starter.
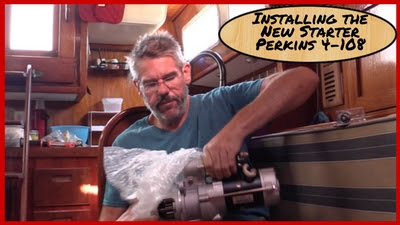
I picked up the new starter (that was $75 more or so than the last one we ordered) and as soon as I opened the starter (picture above), I was able to validate that the orientation on this one was correct and what I expected it to look like since it matched the old one.
I installed it finger tight with the 3 bolts to ensure that it would fit in place. The good news is that it went in relatively easy. It is about 20%-30% smaller in size than the one that came out of there so it actually was easier to put in than the original one was to take out. Once it was installed, I validated that the wires were all going to be the right size and length to connect to the solenoid connections. They were so that was a good sign for sure.

During these starter troubles we have had, it has been a bit of a pain to troubleshoot because I would have to go up to the cockpit, attempt to start the motor, then come down and inspect or check something then go back up into the cockpit, and repeat. (it was kind of the nautical equivalent of the stair stepper).
I decided that when I installed the new starter to also install a push button remote start method in the engine room itself. This was pretty easy to do by picking up a remote starter button at an auto parts store. As a matter of fact, they are very similar to the ones that are on DreamChaser for both starting and stopping the engine.
These are actually very easy to install. There are just 2 terminals on the back of the start button. The idea is that you wire one line to the main power source that goes to your starter solenoid (the large diameter wire) and then you wire the other terminal to the small pin on the starter solenoid that has the yellow/red wire on it. This is the same one that sends 12volts dc power to the solenoid when you turn your key. I used marine grade wire and ran it under the engine along with a couple of other large cables that were there already and then up a cable trace on the starboard side of the engine room wall. I mounted it high and just inside the door of the engine room so if I want to start the engine from down below, I can do that very easily.
After getting the starter bolted to the engine, it was time to connect the wires to the starter. Because I wanted to avoid any possibility of a short or spark while I did this, I turned the main 12volt battery selector switch to the “OFF” position. This allowed me to use one of those small lights on a headband (headlight) to still connect the wires without risk of shorting something out.
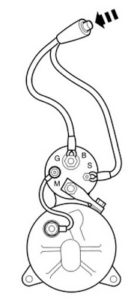
I started by removing the tape I had wrapped around the small terminals when I disassembled everything. From there I put the Yellow/Red wire on the small post (S in the diagram to the left) and then also installed one of the 2 terminal wires from the remote start button to the same S terminal on the back of the starter solenoid. Because this is in a marine environment, I did use a closed ring crimp connector so that it was not loose wire or a forked connection that may come loose.
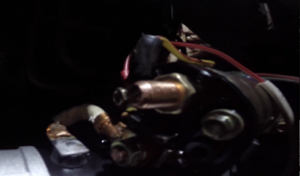
After getting this nut finger tight, I used a socket to gently tighten the nut to the connection lugs. Now it was time to focus on the large diameter 12volt line for high amperage, as well as the smaller 2 wire harness connection that powers up the ignition, instruments lights and gauges in the cockpit. Before I connected these wires I used some 220 grit sandpaper and just rubbed the connectors on both sides to be sure any corrosion from all the arching I was doing on the last trip was cleaned off and the electrical current had a nice clean path to travel.
Once I had all the wires connected, I gave the remote start button a quick tap and heard the engine start to turn over so I quickly let go. That was a good sign so I went up to the cockpit and turned the key to a nice fast turning and quick starting engine.
The funny thing is after all this time that I have had this boat, this was the fastest I have ever heard the starter turn, so clearly this thing has been dying a slow 3 year death on me and I am shocked at just how much faster she turns and quicker she starts.
With that, we have a replaced starter. If you watch the video below (link to youtube is also below) we took our time installing this as well as troubleshooting this old one. The video will go into detail on how a starter works, what makes it crank as well as what makes the gear engage with the flywheel.
Please feel free to share this blog post as well as our youtube videos. I have even allowed you to embed the video on your page if you want, so feel free to use this and share with others. This is part 2 of the 2 part series on how to remove, repair/rebuild and replace the starter in a Perkins 4-108.

