
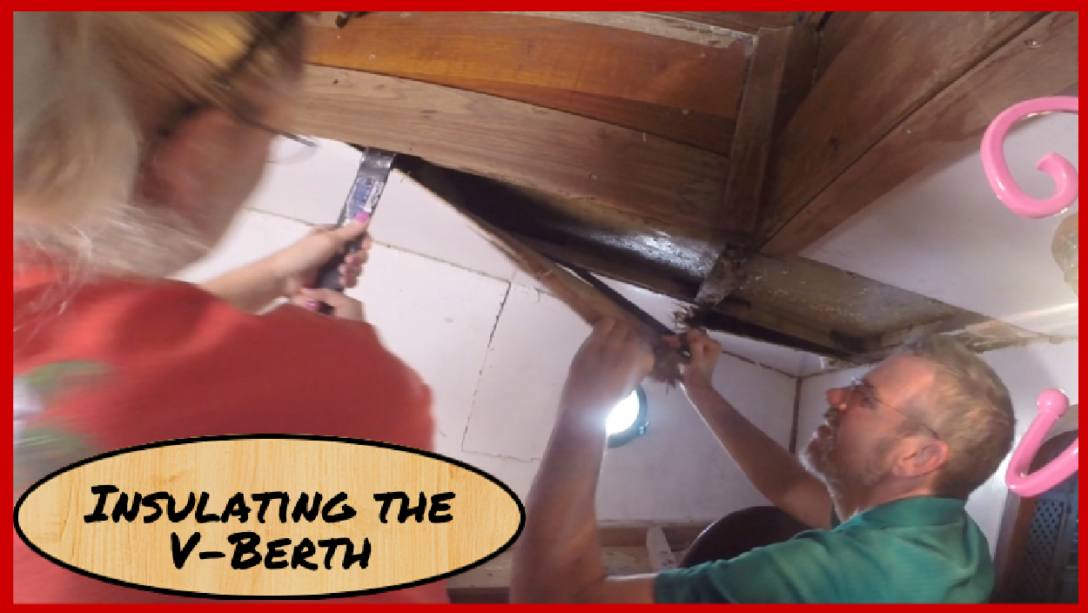
This week we decided to start working in the V-Berth as a way to continue projects after dark and when there is just not enough motivation to take another screw out of that darned teak deck we are removing (See article here The Teak Deck Project continues (Part 2))
The current ceiling and overhead are made up of 1/4″ plywood sheets that are painted white. I think the white is somewhat critical in here given that there are not large ports on this boat as there are on modern vessels. The v-Berth has two opening 10″ round bronze ports and a companionway that we never open. So the white surface is useful for reflecting the light from those ports as well as any lights that may be on after dark.
When I removed the overhead in the double berth, it came down relatively easy, so I expected the same here. Boy, was I wrong. We started by finding a small spot between the joints of plywood that we cold get a paint scraper into the opening. We had to start with something that thin. We would then widen it enough to get a flat blade screwdriver into it and if all then work it up to a flat bar and then a crowbar. It was crazy slow doing this, and I was surprised at how hard this was.
The structure under the plywood is tabbed in 2″ x 1″ hardwood supports
The boat has a standard fiberglass deck with a wood core, and then down below there are small 1″ by 2″ hardwood supports that are tabbed to the deck that support the plywood skin. The process was difficult because when the shipyard installed the plywood an adhesive was used in addition to the screws so even with the screws out, they are just not coming off. Add to that the fact that it seems like either they installed the plywood before the bunks being put in, or they had to bend the plywood and get it in place so it fits just in behind the edge of the bunk supports along the hull.
The tools we use for this job are listed below if you find this a convenient way to shop for them. We make a lot of purchases on Amazon because our Prime account gives us free shipping. It is a great deal for us with Amazon TV, Music, Free Shipping and the other benefits we get from Prime. If you use these links, you get the same great Amazon pricing, but we get a small affiliate link credit. Thank you.
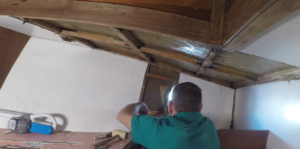
Using a rigid paint scraper to start the “prying” of plywood process
We have begun this process by removing the trim along the edge of the ceiling and walls and floor. It came down very easy because these are held up with nails. I am not sure if this is the way the Ta-Shing shipyard in Taiwan built this originally or if this a previous owner put new trim up. I suspect it is original and they held up very well even being just nailed (almost 40 years at this point). The good news is that because they are nailed they come down very easy. I just used a paint scraper and (I like these tools) they have a flat edge like your average scraper, a point on one side and a curved section that is designed to squeeze paint off a roller. I have no used for that part, but they are much more rigid than a flexible scraper, and I end up using these things for a variety of jobs. They are robust enough to hammer on the back of them as well which helps in tight spots like this trim work.
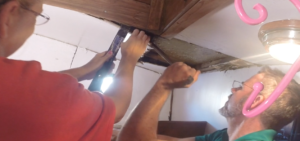
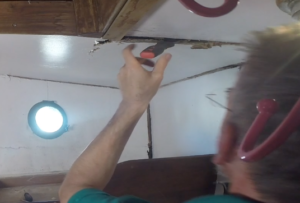
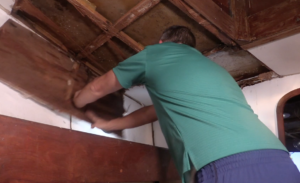
Alternating between scraper, flat bar, and crowbar to pry wood off
I was able just to tap the tool between the overhead and the trim and give a gentle pry by hand. Once that first section was loose, the rest could just be done by hand and didn’t require the mallet any longer.
Once the trim was down, we started on the ceiling and used the scraper to get a little “bite” between 2 pieces of the plywood. When we widened it out enough to get a flat bar prybar in the slot, we would move to that. Much like the way we removed Teak (see teak deck removal post here Teak Deck Removal – Part 7), we followed the same process here. We started where we could make a little progress and get the plywood loose. We then used the flat bar to pry a bit further and then moved along the wood inserting the larger crowbar as far along as we could.
Notice the support structures and residual glue and plywood remnants
The significant difference in this job, however, was the fact that these plywood sheets have adhered very well to the supports, unlike the teak decks which came up easier than they should have. We were never able to remove an entire sheet of plywood which is what our initial intent was. We wanted to do this for a few reasons. First, clean up is easier and the job feels more rewarding and quicker to finish. Second and more importantly we wanted to use the pieces of wood as templates for making the replacement parts. Because of the adhesive, the wood just broke at every support beam. It slowed progress because we didn’t want to pry so hard we broke support structures off of the tabs from the fiberglass, so we will end up needing to sand each one to make it smooth for putting our replacements in place.
We didn’t finish the job this weekend so will be getting back at it. This job is one that Deb is going to make some progress on during the week while I am working, so hoping we can get some continued motion on this project.
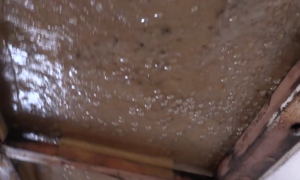
Condensation on the bottom side of the deck under plywood
What we found underneath this was surprising to us. We had so much condensation on the inside of the hull in that dead air space between the plywood ceiling and the fiberglass hull that it looked like it was ready to rain. We wanted to insulate to help the air conditioners and heaters work less. It also tends to reduce outside noise. After seeing this amount of condensation, I also want to be sure to select the correct material for the job. I am researching this now. I am seriously considering some thick closed cell flexible foam similar to what they use in industrial applications for insulating tanks, ducts and what not. It is specifically designed to block condensation and moisture and has good soundproofing quality. Decisions still need to be made, but I have more demolition to do so I have time to think about it 🙂
If you want to see the video from this week showing this in some more detail, check it out below. Also feel free to subscribe to our channel on youtube and or follow us on Facebook where we will do facebook live videos at times as well. You can click the following link for our facebook page at https://www.facebook.com/SVDreamChaser/
Feel free to repost this article with embedded video to your favorite sailing group, sailing club or even point them to our youtube channel or Facebook channel for more info as well.