One day it will happen, if it hasn’t occurred yet, it will. Sitting down below in a good rainstorm or with green water flowing over the deck and you will see water. Hopefully, it is only a drop, but likely it will be more than that soon.
Boat leak, it is just that simple. They flex, and in doing so, hatches, ports and other seals get loose and need repairing.
Don’t worry; the repairs are not as daunting as you may have thought they would be. Sit back and relax, let this information provide you some information, comfort and a sense of “I can do it myself.” I suspect you can as the work is not that hard, it is the information that you need to ensure it is a lasting repair.
On the Last Affair, I started to see two leaks, I got a bit lazy about the first one and just popped a bowl where it dripped. But then it got worse as they always do. With that in mind, it was time to inspect and repair any hatches that were leaking or even suspect of possibly leaking in the future.
For this blog post, I am going to focus on a leak that occurs on a deck hatch between the glass and the frame. There are other places that leaks may occur, such as around the bedding of the frame to the deck, but this post will not cover that topic.
Materials that are common for hatches will be Glass, Polycarbonate, and Acrylic. Most deck hatches (meaning they may be stepped on) are usually not made of glass. To make the identification of material harder, people often refer to the items by their trademark name rather than the product itself. Think of people referencing Fritos rather than corn chips. Fritos are a brand of corn chip. The same confusion happens in the marine hatch circles.
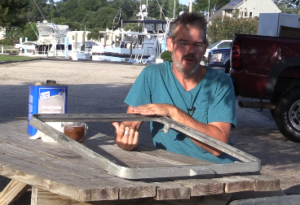 Polycarbonates are often referred to by their trademark name of Lexan.
Acrylics are often referenced as Plexiglass.
In general, Polycarbonates are stronger, come in thicker sizes, but over time a bit more likely to craze. Crazing occurs when the surface heats and cools. Over time this forms microscopic cracks in the layers of polycarbonate, and it looks dull.
Acrylics are less expensive and typically more clear however not at strong. If the hatch may be stepped on, I would recommend Polycarbonate.
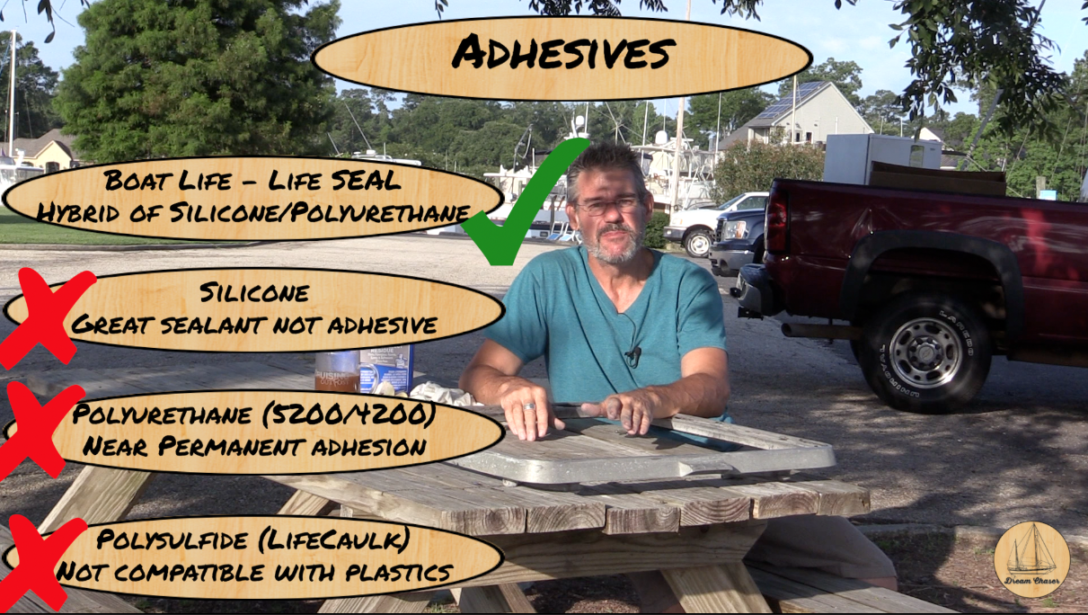
Now that the materials are out of the way, it comes down to the sealants and adhesives we need to choose from. There are essentially four primary categories of sealants/adhesives used on boats and available at your local chandlery.
Polysulfide – This is something that is more often used in teak deck joints. You will see this sometimes in a 2part mix and sometimes in caulk gun style dispensers. LifeCaulk by Boatlife and Teak Deck Systems material fall into this category. Polysulfides are not compatible with plastics and can break them down over time.
Polyurethane – These are construction grade adhesives. They are often leveraged for the hull to deck joints and other permanent bonds. 3M’s 5200 and 4200 are both in this category. While they may seal plastic to the frame, removing them may crack your lens.
Silicone – Silicone gets a bad reputation on a boat, and for a good reason. But it is worth mentioning as it is one of the best sealants you can use. The downside is that it doesn’t’ have an adhesion quality. That means it is not a suitable bedding material.
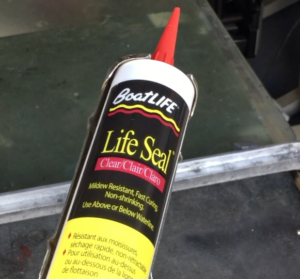
Hybrids – The use of a hybrid material is still somewhat new in the marine sealant world. These are materials that combine the characteristics of several materials for the best of both worlds scenarios. For hatch lens bedding such as this project, the ideal solution is a polyurethane-silicone blend. Boat Life makes a product called LifeSeal that does this. Be very cautious not to confuse LifeCaulk with LifeSeal. The products look almost identical so be very careful you use the correct one.
Back to our project at hand. We removed the lens from the frame using a utility knife and cutting along the lens and again along the frame. Applying pressure from the back side will push the lens out of the frame. Clean the frame very well to remove all the old material. Do the same with the lens itself. I like to use a razor blade to scrape it and some acetone on a rag to clean the frame.
Be cautious using acetone on polycarbonate and acrylic as it will scuff the surface. If avoidable, try to get as much off as possible with a razor first. If you must use acetone, wipe it only in the places that will be hidden by the frame.
After the surfaces are clean, lay a bead of LifeSeal along the base of the frame. Insert the lens into the frame. Be sure to center it leaving an even sized gap all the way around it. It 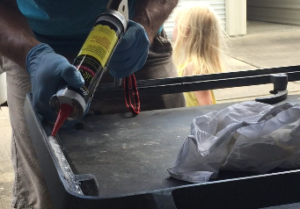 is best to apply a thick enough bead of LifeSeal so that the lens will sit higher than the frame. This height difference helps to allow water to run off the hatch rather than puddle on the lens.
Now it is time to run a bead of LifeSeal all the way around between the lens and frame. Allow it to fill the gap completely and rise higher than the frame and lens by 1/8 – 1/4 of an inch in height. Once complete, allow drying for a full 24 hours.
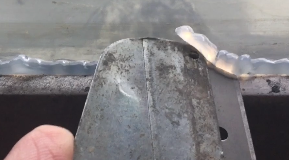 Once dry, come back with a razor and laying it parallel to the surface, cut the excess material off. The preferred method is using the frame and lens as a guide to keep the cut nice and flush with the surface.
That is it, you installed and bedded a new lens in your frame. This project can be done in a couple of hours, with an understanding that it takes a full day to cure completely.

