
The work continues on the boat and progress is slow and steady. By the way, slow and steady is exactly the process we need. As the boatyard is doing the work, Deb and I are getting some other work done as well to prepare for it. For example, we took all the old ports out and had a glass company cut all new Safety Glass ports for us. I went to pick up the glass and was VERY disappointed in the workmanship. The glass was not cut the same as the templates, and in some place was more than an inch off of the pattern. Certainly, I needed the company to recut the glass to make it work for us. They agreed, but I will see how it looks when I go back to pick it up.
There is something about watching a craftsman do his work. I can recall early on when I saw Lionel from Mayer Yacht Service doing the fiberglass work; I thought to myself, “This can’t be all that hard, it looks fairly easy.” Then I recalled the work I had done on my small fiberglass project. While I am happy with the little deck box I did, it took me as long to fiberglass that 2 X 1-foot box as it did for Lionel to fiberglass the anchor well and gunwales of my boat. I have come to realize that a good craftsman makes the work look easy. I was joking around with him one day at the yard and shared this with him.
He just smiled and humbly said, “Yeah I have been doing this for a couple of years.” A couple of years is an understatement, Michael already told me he had been working for him since he first opened his shop 35 years ago. So yes, a “few years” I would say.

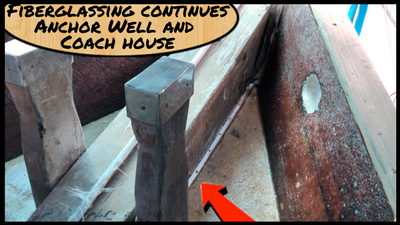
In the Anchor well, the yard did something I found to be unusual. There is a small gap below the bow sprit, by design. As that boatyard did the work in this area, they didn’t want to fiberglass up onto the sprit nor did they want to have a sloppy edge right at the sprit. Instead what they did was outlined the area, including the Sampson posts with starboard strips. This allowed them to glass right up to the piece. When this area is complete, the strips will be removed and trimmed. At this point, I will have a choice to either pour resin along that small crack to allow the resin to “flood” into the void under the sprit. The other option I have is to caulk/seal between the trim piece and the sprit thus preventing water from getting down under there. This method is likely the route I will go because in the future this anchor well could be covered in mud and dirt as the anchor chain is rinsed off when coming aboard.
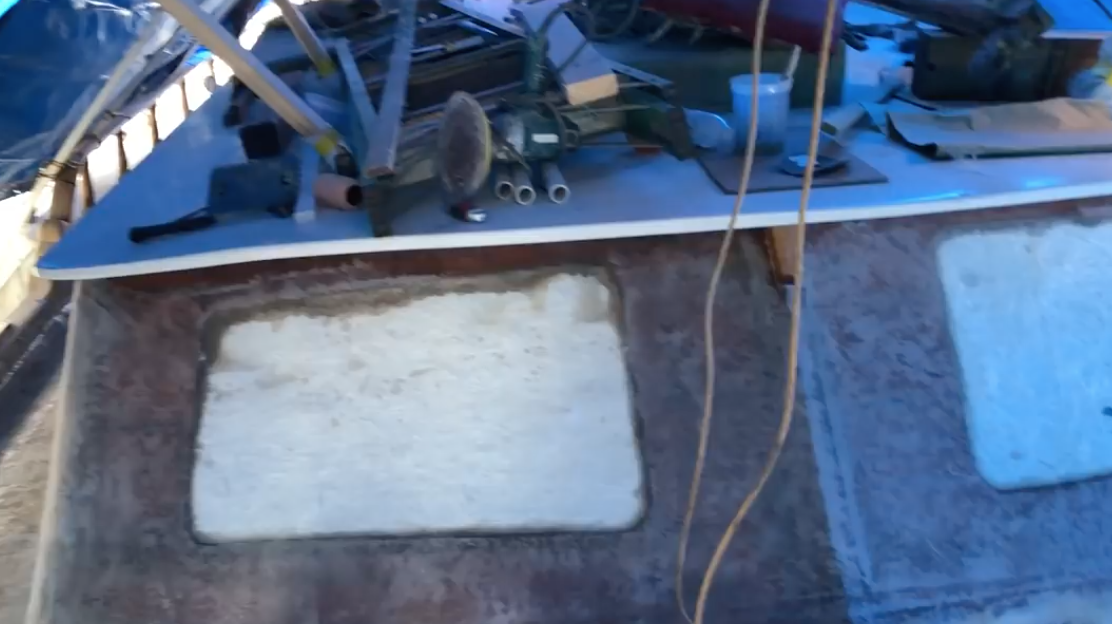 In addition to the work in the anchor well, the coach house has also been done as well. I never considered the way they are doing the job but now that I see it, it sure is logical. Rather than attempt to glass up to the edge of all the window opening curves, the yard just glassed right over the openings. You can see in the picture that the glass has been wetted out, sanded and a second layer was added. This area that you see as white is the glass without any resin on it and that is in the center of the port openings.
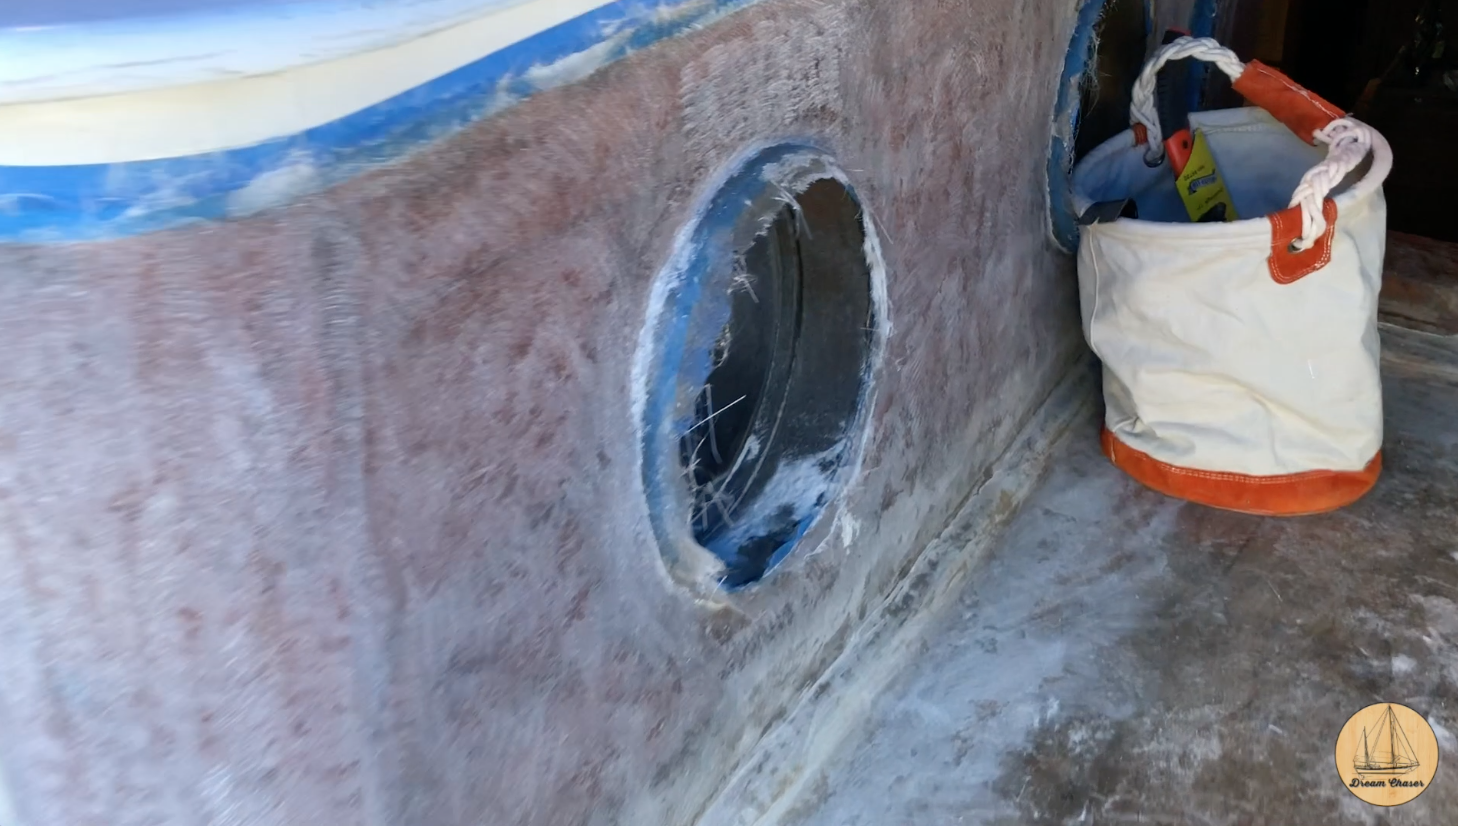 For the round opening ports, they just trimmed the glass right around the edge of the ports themselves which remain taped and covered to keep the resin from getting on the port itself. This method allows the glass to go right up against it, and be trimmed right at the opening, remove the tape and then I can cover this backup and seal it with the ports decorative ring. I had originally planned to put teak trim around the round ports and the six fixed ports, but I have recently started to consider a bronze flat ring for the round ports. I am still thinking about it and haven’t made up my mind yet.
The last thing on my list of to-do work was to cut the belaying pin rack base from around the mast. The old belaying rack had four spindles on the corners that rose from the bottom around the mast, and up to a rack that had the pins in it. The problem was that the base was screwed down to the deck from the underside and put in place before the interior ceiling because the screw heads were behind and under one of the bulkheads and the ceiling frames that hold up the panels below in the double berth. Additionally, the top of the belaying pin rack was “bolted” down through the four spindles with an 18 inch threaded rod that was through bolted from the top of the rack, through the base, through the deck and the nuts were inside. These were a constant source of leaking, and also the results were a small part of the deck core that was delaminated and corrected months ago.
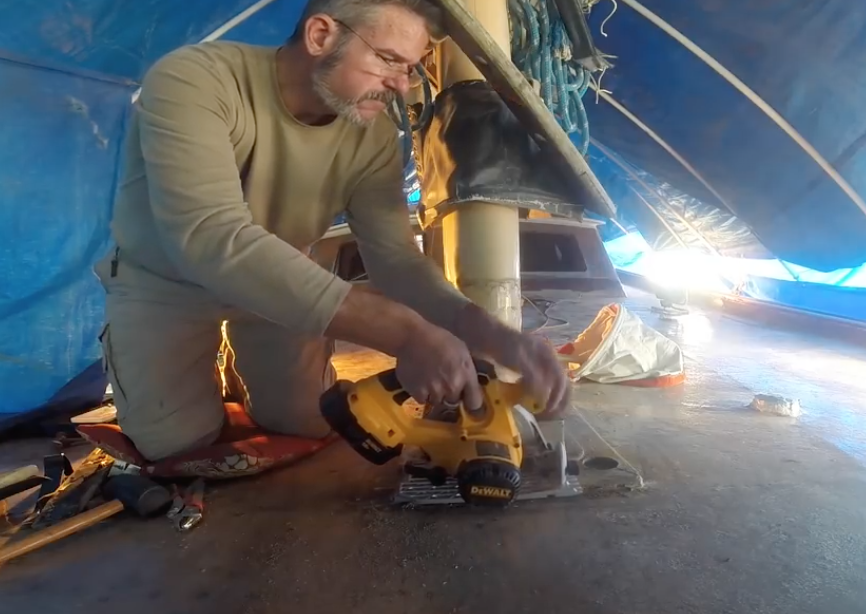 With that, it was time to cut the base of this rack off the deck. This would allow the yard to fiberglass right up to the opening in the floor for the mast to pass through. When it was time, I would make a new base, adhere it to the deck and rebuild the belaying pin rack. I considered leaving the rack off, but it adds to the character of this style boat, not to mention the functional nature of it. I love that I can have 12 different lines all attached to it and with the pull of a pin, the line drops free for quick use.
The next project is to continue wiring the mast and preparing the mizzen for stepping.
See the step by step details in this weeks video.
[embedyt] https://www.youtube.com/watch?v=mHdw-uV7GB8[/embedyt]