Last week the yard was working on the deck and preparing the transitions between the gunwale and the deck as well as the deck to the coach house. With the work progressing quickly, it was time for Deb and me to jump in and lend a hand to save some of the labor.
One of the things I appreciate about
Mayer Yacht Services is that they are fair and open about the work being done. For example, there is a certain amount of labor that needs to be done on any job. The yard is going to charge their hourly rate for that work and if it is something that we are capable of doing, then we can do that labor to save some money. This may not work every time with every yard because they also have a desire and a need to move boats in and out fairly quickly to reduce the possibility that your boat is taking up space that prevents them from working on other ships. The good news for us is that there is enough room for several boats to be operated on at the same time here, so they have been generous with allowing us to do certain parts of the work even if it means they are holding off on work for a few days or so.
We met with
Michael Mayer last week to go over the current work statements and really get a feel for what is remaining on several of the jobs. I can imagine the challenge of estimating this kind of work and it makes sense that the estimate was provided with a plus or minus 15% expectation. Since we are having several different “projects” done, we have estimates that are broken down by the job as well as the total job. For example, we had prices for Lifting and blocking the boat, putting up scaffolding around the boat, painting the bottom, painting and prepping the hull, Cleaning and painting the bilge, Relocating the rear air conditioner unit, removing the mast, rebuilding and stepping the new mast, etc.
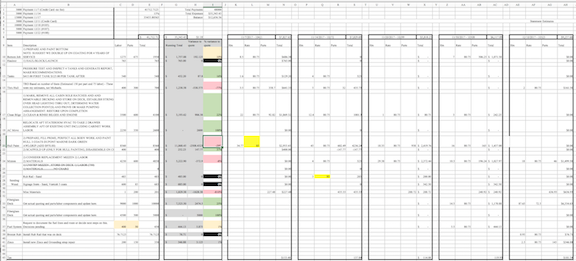
Blurred so actual costs are not seen, but the format can be. Downloadable copy from our website for tracking your projects
Each week or so we get a bill, and a statement for the work performed, but there is not a reconciliation by the job, so I wanted to track that as well to keep a good understanding of what each job costs and where the effort is being spent. And because I am a complete nerd, I put together a big ole spreadsheet that lets me do just that. I can input the details from each invoice by the job that is was for, and that shows me where we are over or under budget for each task. Sadly my spreadsheet also needed the ability to accommodate the things we have been adding since getting the original quote. Things like sanding the toe rail, Varnishing and sanding the nameplate on the stern, Fiberglassing the Deck, Fiberglassing the coach house, and redesigning the fuel draw and return system for more natural management and control between the 3 tanks and 2 engines So my spreadsheet needed to also accommodate the ability to add rows and jobs.
If you think you would find value in having a similar tool for tracking any work you are having done (or even doing yourself) feel free to go to our
website and download a template I saved for your use. Click on the link below to download the e
xcel template or the
google sheets template. Once downloaded, you will see several tabs in the spreadsheet. The first is a summary of how all the calculations work and how and where to enter data in the spreadsheet. There is also a blank template and an example sheet.
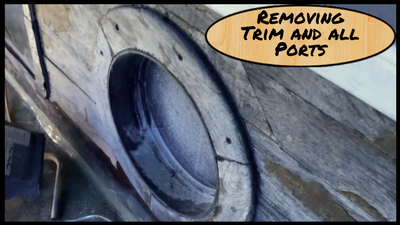
From that meeting with Michael, we had a list of the things that we could do and one of those items was to remove the ports and trim around them so that the yard could do the fiberglassing of the coach house. We discussed how I wanted to have them do the fiberglass work around the ports. There were several options, and we needed to determine this to figure out what the next steps were and the prep work required.
Option 1 is a modern design and method for ocean-going boats these days. It consists of having a thick Lexan type material for the ports and have them larger than the openings by about 2 inches or so on all sides. These are then bedded against the flat surface and through bolted to the inside of the boat. This allows any future leaks that may occur to be seen and repaired. It is also theoretically stronger as you have a broader surface that the port is seated against (2” all the way around).
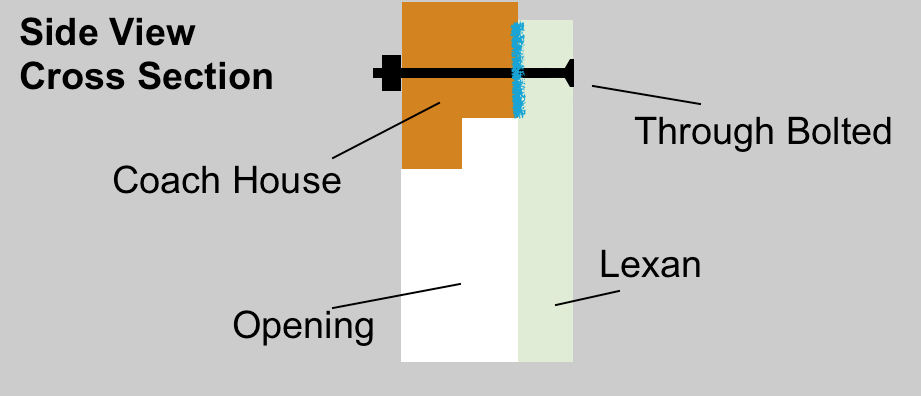
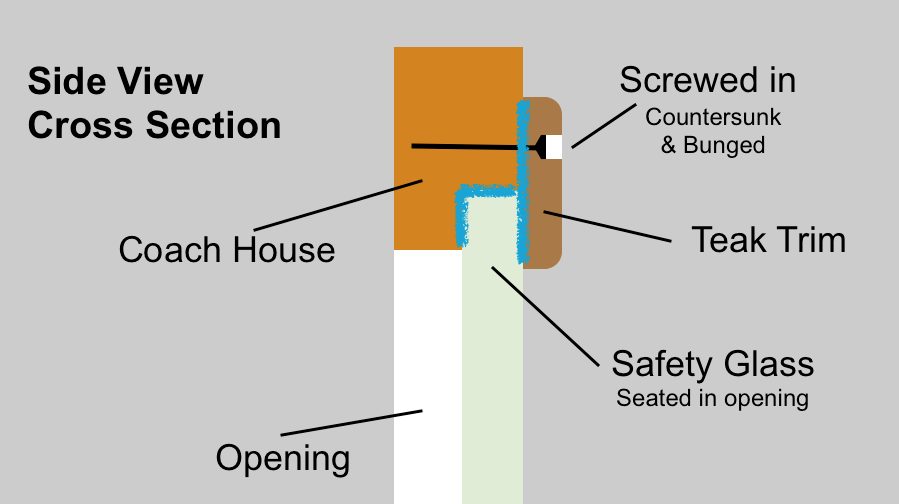
The downside of this solution is that it would require a bit more “finish” work along the current opening of the coach house as it would be seen with the port further out from the coach house than they currently were seated flush with the outside of fiberglass walls. The diagram here is a cross-section of the existing frame and how the new Lexan solution would work. The Blue line would be a bedding material. This solution allows the bolts to be tightened to seat the bedding tighter up against the coach house.
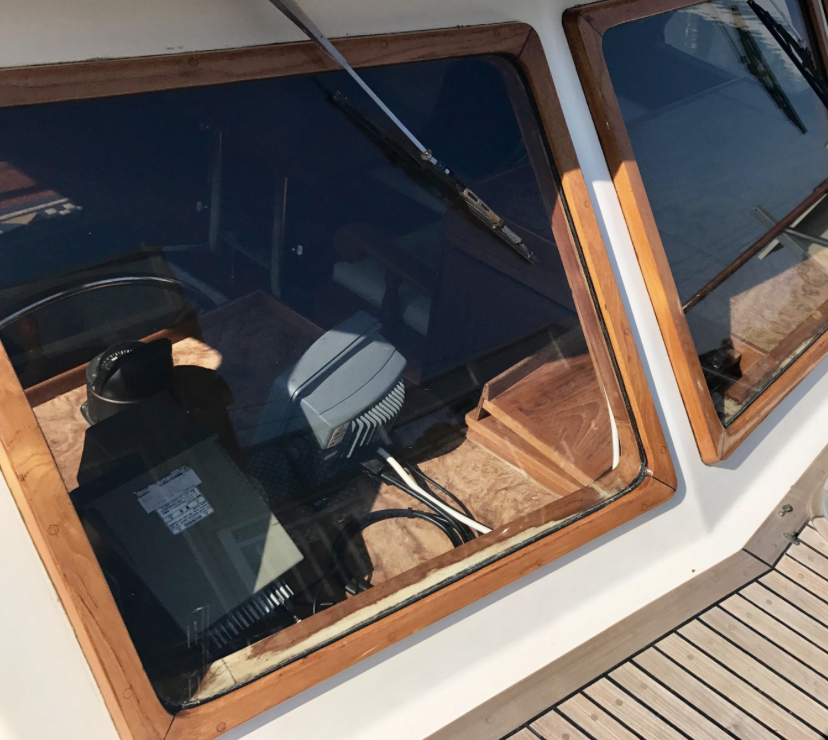
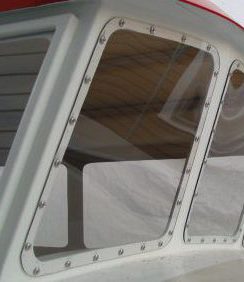
Option 2 is a more classic look and would be very similar to the way the ports were before the fiberglass work being done. This method leverages the inset groove in the coach house to sit the glass into. The upside is that this allows for a more classic look that would match the vintage and style of the boat. To install this, we would need to put some spacers on the bottom of the port and seat it in the opening against bedding on the inner lip. It would then require bedding to go all the way around the glass, so the lens is mostly “floating” in the sealant as opposed to resting on the lower hard edge of the frame. Once seated, it would also be held in place with a frame that would be screwed into the coach house (or even through bolted if we chose to go that way.
The downside of this option is that if there is a leak in the future around the glass, it may go unnoticed and essentially seek into the wooden core of the coach house. This is likely what the problem was on the original design and part of the reason why we had so much rot in the house structure. I struggled with this solution, and I believe we are leaning toward option 2. I am hoping to mitigate the risk of leaking and rot in the core by sealing the entire exposed opening where the glass goes in with multiple coats of epoxy to blend it from the outer new fiberglass structure to the inside of the house. My thought is that by doing so, any water that leaks in the sealant, would then pool and drip inside which would be a signal to us that we have a sealant issue and can repair it, as opposed to it leaking into the core for years and not seeing that drip in a visible location.
With option 2, the yard could have also run the fiberglass across the house and then do all that finish work of blending the mat and glass across those two lips and insets in the house. This would have added quite a bit of labor as the time and labor is in the detail work like that. By way of example it took about five times longer to do the small channel along the gunwale then it did for them to fiberglass the large flat area of the deck.
The decision was made, we asked the yard to just glass up to the opening and that we would do the finish work on the inside of the lop as I described in the second option. Now that we knew our solution we also determined we needed to keep the existing trim so that we could use it as a template for making new trim for around the ports. One of the things Deb and I love so much about these Formosa classic boats is that they have that vintage sailboat look. Since we have removed the teak decks and are about to fiberglass over the teak coach house, we felt that we wanted/needed some teak for accents and to keep that classic look. The trim we make for the ports will be teak but the existing trim pieces were in rough shape, all slightly different in shape and size and would have looked horrible on all the new work being done.
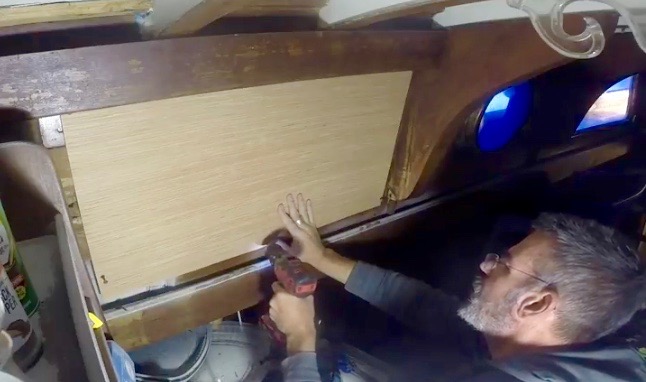
To remove the trim, I first located each of the wooden bungs (where they were still in the frames) and used a small punch to put a notch in the center of each one. This notch prevents the drill bit from wandering off the center of the bung when I first start to drill it out. I have had feedback from others that say a great way to remove bungs is to put a drywall screw right into the center of the bung and when it drives through the plug and hits the screw head below, it essentially lifts the bung right out. I have to give that a try, but I didn’t have that feedback before I did my work.
My method is to drill the bung with a bit just about the same size as the bung and then use a small flat head screwdriver to remove any small pieces of the plug that are still in the opening. The downside is that if someone glued the plugs in or worse yet epoxied them, it is tough to remove the screw below it because the slots on the screw head are filled with something preventing the screwdriver from ‘biting’ in the head.
Once the bungs are out, I use a screwdriver to remove the screws I can, sometimes I have to cut them with an oscillating tool or other times I will try to pry the trim from around it and then remove the damaged screw with a pair of vise grips.
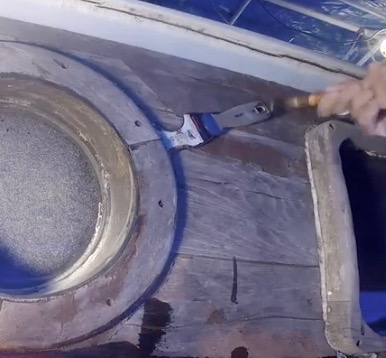
Once I have the screws out, I use a flat scraper to cut any of the sealants that are between the trim and the surface. My favorite tool for this is a “Paint Scraper” These are inexpensive, and if you get one of the slightly more sturdy ones, you can use your mallet on them to pound them into a groove between 2 surfaces. The front edge and pointed edge of these scrapers are somewhat sharpened, and I often will sharpen mine on a sharpening stone to aid in this process. I usually have 2 or 3 of these and will use one to “pry” the trim up, while putting the second one in and cutting the bedding material as I work around the port or surface.
This process works on a variety of jobs, not just on ports. I have done this same thing to remove the Lexan from the aluminum frames of our other sailboat. I have done this to get under bedded materials on the deck as well when they need to be removed. I do break the scrapers from time to time, but at about $6 they save a ton of time, even if I replace one every year or 2.
I have had several people ask about these scrapers we use.
Here is a link to the ones we get, and also a link to some of our favorite
inexpensive tools that have been invaluable for the work we are doing on the boat. We followed this same process on all of the ports. For the round metal ports, we just removed the trim but didn’t pull them out because these are mounted from the inside and are not an issue. The flat large glass panels needed to be removed. As each frame was removed, I bundled all of the species of the frame together in some blue painters tape so that I can bring them to the storage unit for templates to make the new frames. I believe I am going to make them out of Poplar or Pine to make sure they are all the correct size and fit on the boat and then I will come back and make them again out of Teak. Since the teak will cost between $35 and $50 per board foot, I want to practice to make sure I can maximize the use of the wood with different layouts. By making them in a cheaper wood, it will also let me see how much of the teak I can get in 4” width versus something broader which drives up the cost.
Once all the ports were removed, I cleaned the edges of the frames to remove any old sealant and scrutinized the glass. Of the six ports, 3 had cracks in the glass, and since it was safety glass it was still all held together and even reasonably stable, but I don’t want to do all this work and put a window back with a crack in it. We took the glass to a few different glass shops to get a quote for this same kind of laminated safety glass that has an internal UV protection film between the glass panes. It surprised the difference in quotes we received. They ranged from $100 per port to $225 per port. I couldn’t believe the difference between the same glass. Heck, they even order from the same supplier. So our choice was an obvious one. We will be putting all new glass in the coach house.
Removing the glass from the openings was done very carefully so as not to break the panes. I wanted to be able to provide them tot he glass shop to use as templates. As you can imagine, it is a boat, so nothing is standard or simple or even the same. The two front large ports are mirror images of one another. They are not rectangular since the outer edges are not as tall as the inner edges. They all have rounded corners as well.
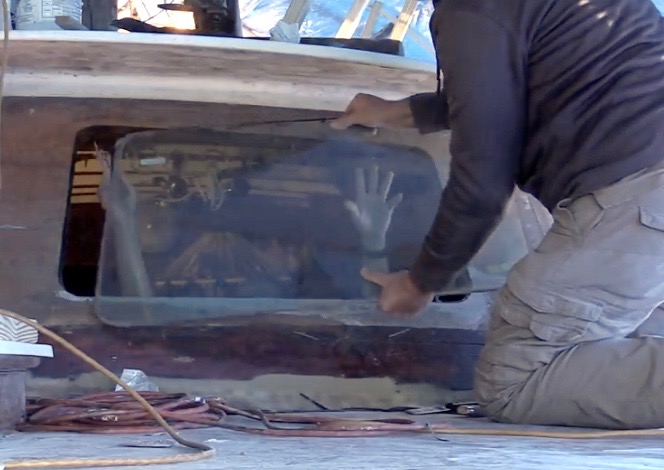
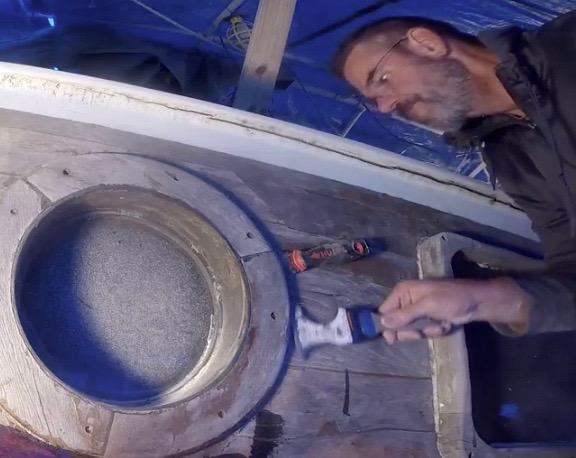
The two forward ports on the starboard and port side are trapezoidal shaped with rounded edges all the way around. And the two after side ports are also mirrored images of one another but again not entirely rectangular and with rounded edges. I will be taking them back to the boat to dry fit before the glass gets trimmed around the ports and ahead of me doing the finish work on the exposed core in the window frames. To remove the front ports, I had deb help by putting gentle pressure from the inside of the glass, while I used the sharpened paint scraper to work through the bedding on the inset lip and worked it all the way around the glass to free it up. Then it was a matter of gently pulling it out. The video below will show the details of how we did this and everything else discussed above.
See all of the details from this blog post in video form where we show in more detail how each of these jobs was accomplished.
[embedyt] https://www.youtube.com/watch?v=MfKVguf15K4[/embedyt]