
Mayers Yacht Service has been making tremendous progress on the fiberglass work on the boat. If you are new to this blog, by all means, check out the information already posted in written or video form to get caught up to where the progress is today and where this weeks story starts.
- Stories and photos of the refit projects and progress on our Blog
- See the Refit Video series on the SVDreamChaser Channel on Youtube
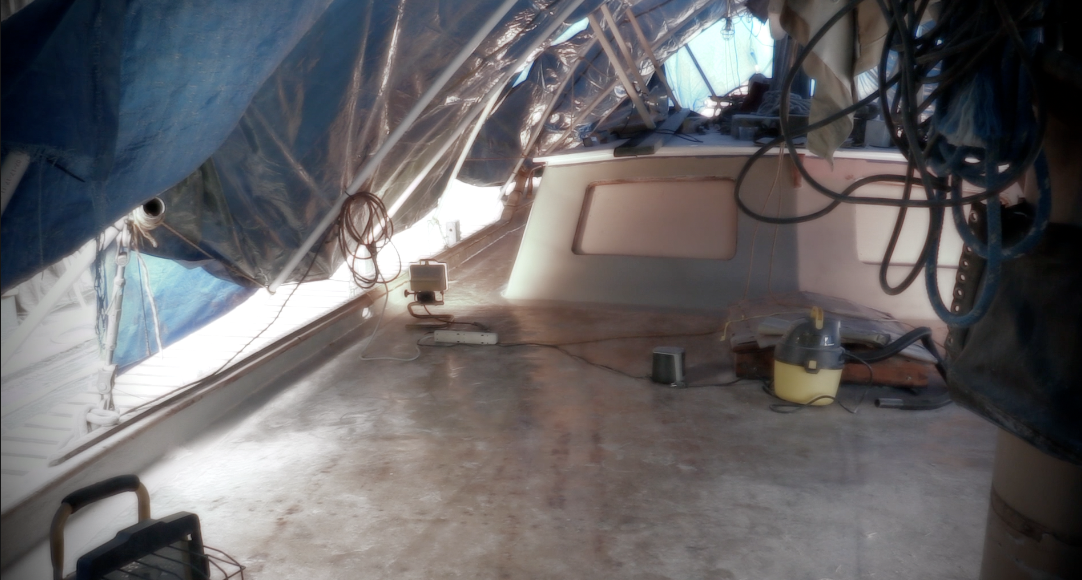 The week started out with tremendous progress on the boat. The yard touched up fiberglass work on the coach house and even faired it smooth with a pink colored fairing compound.
Just like when they painted the hull, they also primed it so that they can see any imperfections easier than with just fairing compound. This allows minor repairs and a new coat of fairing where needed. The photo above is a view from the side of the mainmast back toward the superstructure of the house. You can really get a sense of the new deck as well as the primed (Gray color) on the coach house as well.
One of the challenges we have had on DreamChaser is a rotted wall in the coach house. We could visibly see it from the inside when we bought the boat and knew it was going to be a major repair for us. For the last year, I have been contemplating the repair and was originally considering a complete replacement of the super-structure wall. After consulting with the yard, they offered some alternatives given that the entire structure was not rotted but rather the rot was more isolated to a few key areas. The primary areas of rot were directly below the fixed ports that must have leaked for several if not many of her 40 years of life.
With the boatyard securing the outer boards and glassing over the entire coach house superstructure and forming and bonding it directly to the deck in one continuous form, we have a much stronger coach house that allows for alternate methods of repair (rather than complete replacement)
Like most projects, it starts with proper planning and preparation for the work. The planning for this project was in the form of gathering materials for the job. It was going to require some new core material in our case I even just consider it filler as it is not driving much of the strength, but rather saving a bit of money on epoxy. Additionally, we made sure that we had our “epoxy box” which is what we lovingly refer to our storage container for all things epoxy related. We keep our resin, different hardeners, thickening agents, spreaders, fiberglass matt and cups, mixers, and rollers all in a single large bin that is leak proof to avoid any spills that could be disastrous.
 The construction of layers on our superstructure is as follows, starting from the inside of the boat. There are 1/2″ teak boards on the inside of the structure for the look inside. Attached to that is 3/4″ marine grade plywood, 1/2″ plywood, then 1/2″ teak boards that run horizontally on the outside of the house to give the house the beautiful teak look she had. The last layer is the one that we added and it is another 1/4″ or so of fiberglass with 3 layers of matt. The problem is that the 1/2″ plywood and where it was attached to the 3/4″ plywood was rotted. From years of leaking ports, it just turned to mush. We prepared the surface by scraping the rotted wood out with a long screwdriver and a series of scrapers. We used a shop vac with a narrow tip to suck out the rotted crumbs and pieces that we broke out with the screwdriver and scrapers. This now left a void right in the middle of the superstructure. This void started at the opening of the ports and went down about 7-8 inches to where the superstructure mates to the deck. In the diagram above, it is the lighter color layer of Core that had rotted and where it was bonded to the thicker layer of the core.
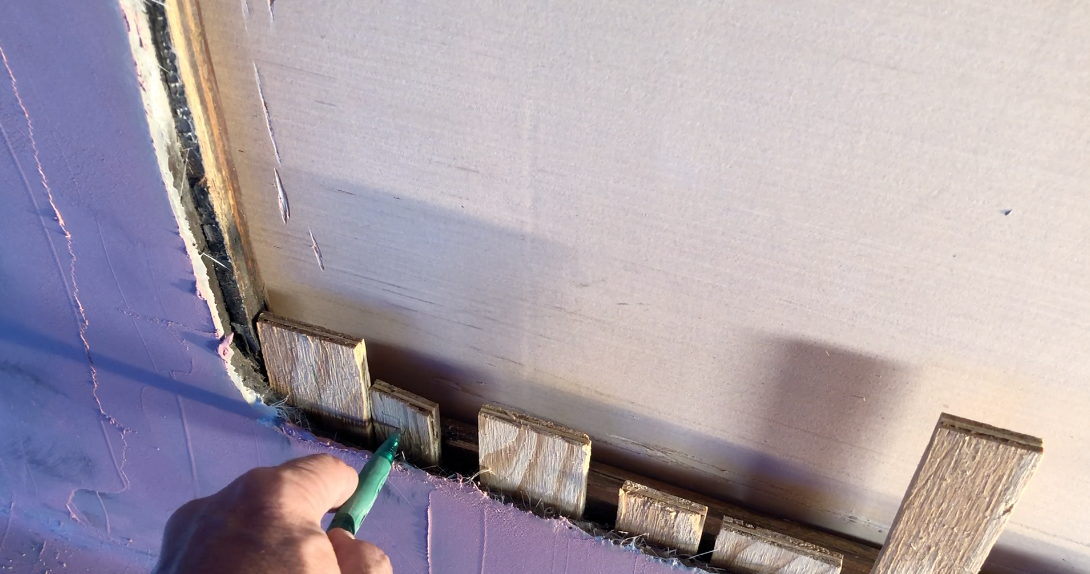 My solution for fixing this was to fill the void with small cut pieces of 1/2 plywood. I dry fit each one into the opening and marked them for height. (I was going to cut all of them about a quarter to half inch shorter than I needed them so I could shape the top surface and it would be solid epoxy and not have any of the plywood exposed. I didn’t want any of it to be vulnerable to future rot and by using this method, I believed it to be the best approach.
 Once each piece of wood was numbered and marked they were cut and laid out in a way that would allow the proper order of insertion back into the core. I cut each one and laid them out in order in convenient spot to get them epoxied into place. You will notice from the picture above, I am purposely leaving small gaps between each piece of new core. I am doing so to allow a place for the liquid epoxy to be poured in and allow it to flow down, around and on top of each of these pieces of core. The plywood will end up being completely engulfed in epoxy where it will never be able to get moisture in it.
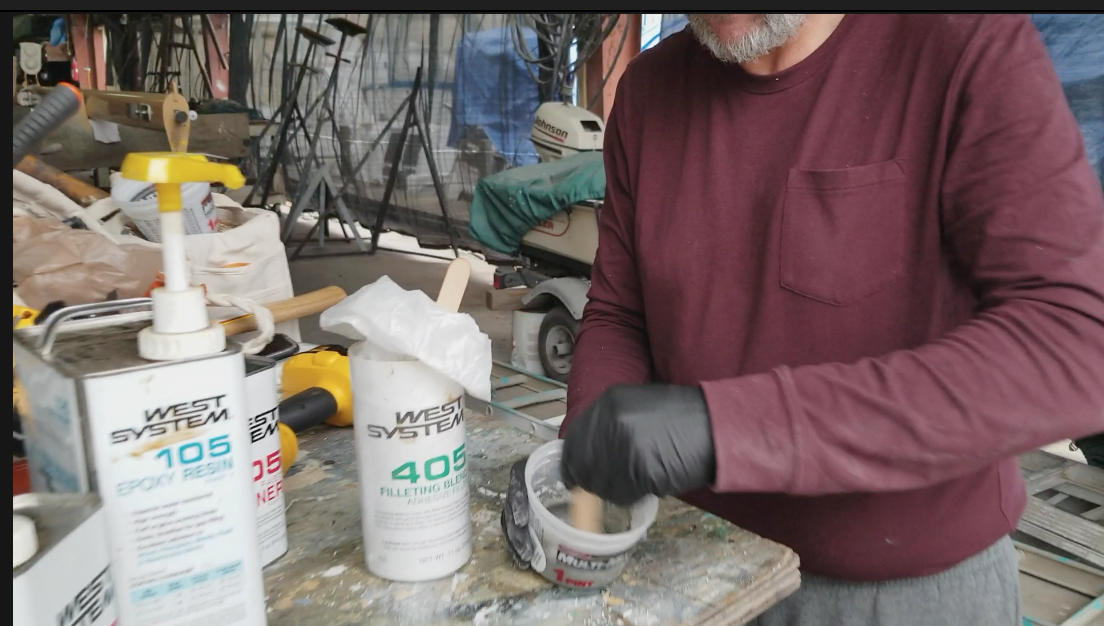 The next step is to mix up the epoxy. I prefer West Epoxy systems (not to be confused with West Marine, they are note related short of West being a reseller of Gougeon Brothers Products who make West Systems Epoxy products. I use the 105 resin and different hardeners depending on the job. Typically I would use 205 fast hardener for small jobs, but in this case, I used 206 slow hardener. This gave me a little bit more time with my mixed batch while I worked it onto each piece of new cut core. I like the pump systems for the containers with West Systems as it makes the mixing easier. 1 pump of hardener to 1 pump of resin. The pumps are calibrated to dispense the correct amount with each pump to keep the correct ratios. (As a side note 205 and 206 use the same hardener to resin ration, but 207 (Extra Clear) and 209 (Extra slow) have different mixing ratios and the pumps for those canisters automatically dispense the correct amounts.
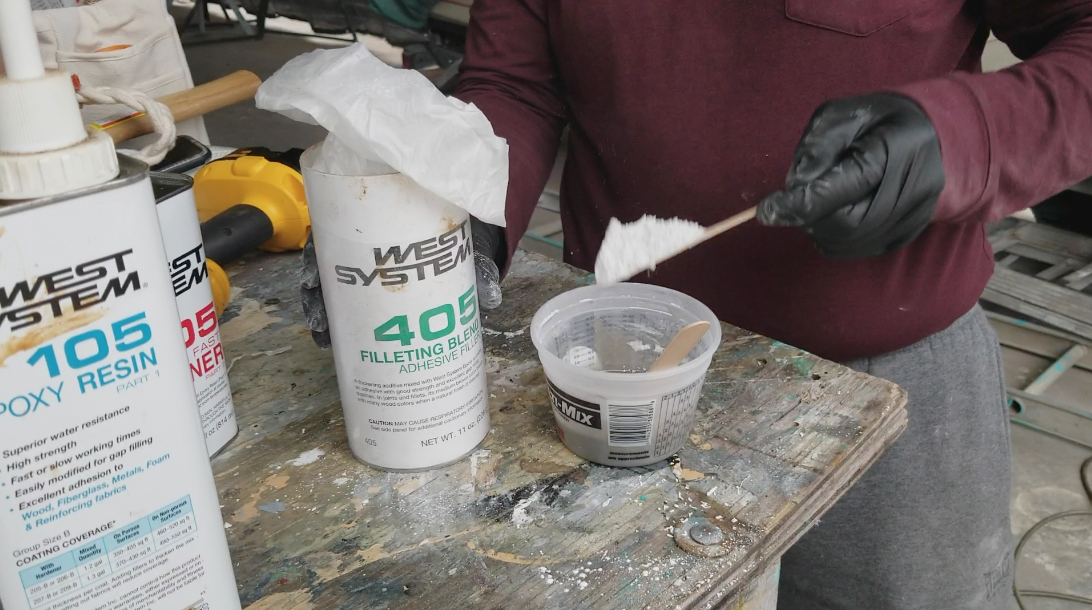 I also use a thickening agent. this can be a bit forgiving, and the West systems 400 series fillers can get costly. I typically buy larger quantities online and store it in my old 406 container from West. When mixing epoxy to be thickened, it is important that you add the resin then hardener and mix it thoroughly according to the directions BEFORE you add your thickening agent. For me that is small quantities of 7-12 pumps of resin each for about 4-5 ounces or so of material. I mix the batches with “popsicle” sticks and after it is mixed for a full 60 seconds, I then add in the thickening agent and thoroughly mix it to the consistency I need. In this case, it was a peanut butter/mayonnaise thickness.
 The next step was to “butter” each piece of core replacement on both sides with the thickened epoxy. I like to use craft sticks or popsicle sticks to do this. They are inexpensive and are the perfect size for most boat projects and jobs with epoxy. Amazon sells them at a great price. I always wear nitrile gloves that are at least 5 mils thick to keep my hands from getting epoxy on them. Once smeared with a healthy amount of epoxy on both sides, I would insert them down into the missing core area.
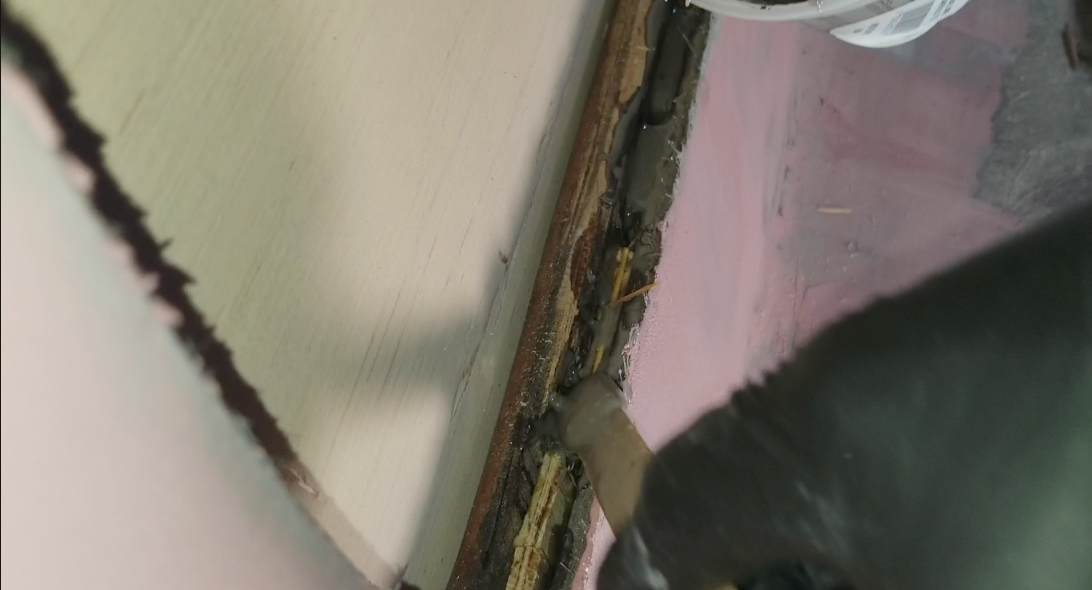 Each time I pushed these down, I used my gloved fingers to press the piece all the way down below the top surface. Any epoxy that slid up the wood as it was inserted sat on top of it but still below the height that the final frame will be at. This is again part of the reason for cutting all pieces slightly shorter than the final height. By doing so, the entire exposed ridge that will accept the glass for the port will be epoxy and leaks will not be able to get into the wood at all.
When the wood was all inserted into the core, I used the popsicle sticks to smooth the thickened epoxy over the top of them. I also used the popsicle stick to push any additional epoxy down into any voids, being cautious not to completely seal off the top of the exposed edge yet. I clamped the layers together while the epoxy set to ensure a good laminating bond between all the layers.
When this all drys, I will be pouring epoxy (non-thickened) into the openings between the core to completely fill the voids and turn this cored wall into a solid epoxy wall. This will have great strength and rot proof capability.
See this week’s video where we show all of these steps including the work we did on trimming around the ports that didn’t have core rot to be repaired and prepare them for the bedding of glass. Additionally, we test out the new LED spreader lights. We love them. They are low amperage draw and very bright when we need it.
[embedyt] https://www.youtube.com/watch?v=Qe_c1GixVxQ[/embedyt]