
After our exploratory holes to discover how the core was in the Coachhouse roof, we needed to take this to the next level. This is very similar to a process I followed when we did the boat deck as well, but now it was time to cut a larger hole and inspect this core much closer.
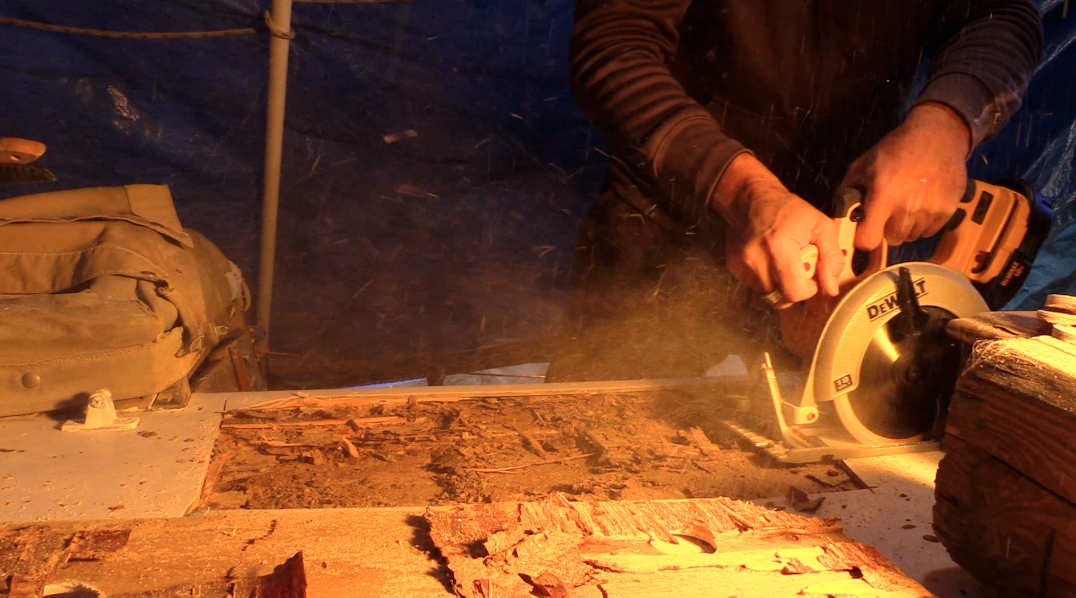
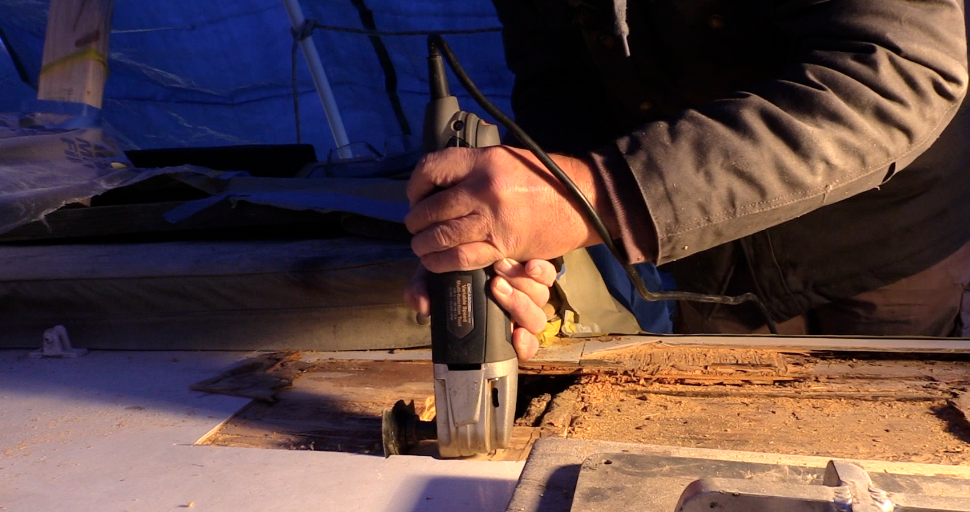
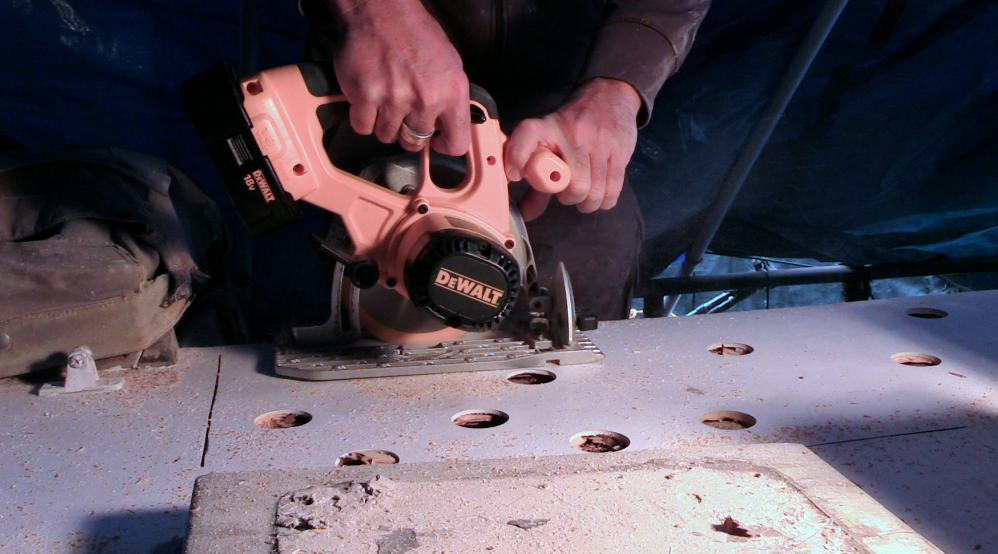 I have found that a circular saw works best for this task because it is quick and relatively easy to control. An oscillating cutter works as well, but the first cuts have been easier for me to use a circular saw.
I set the depth on the blade for the thickness of the fiberglass on top. In our case, it is about 3/8″ thick. I am using a Dewalt portable circular saw in this photo that we got from my father in law. I use mostly Milwaukee brand cordless tools but can’t find my battery charger right now. It is somewhere in one of the boats or the camper or wood shop, and I am kicking myself for misplacing it.
 I run the saw in each direction of a rectangle shape being sure to cut past the intersecting lines to ensure that the cut goes all the way through the skin on the bottom side of the cut.
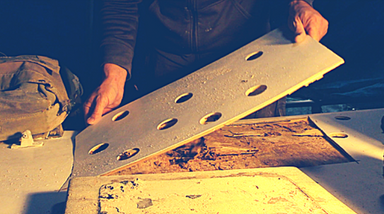
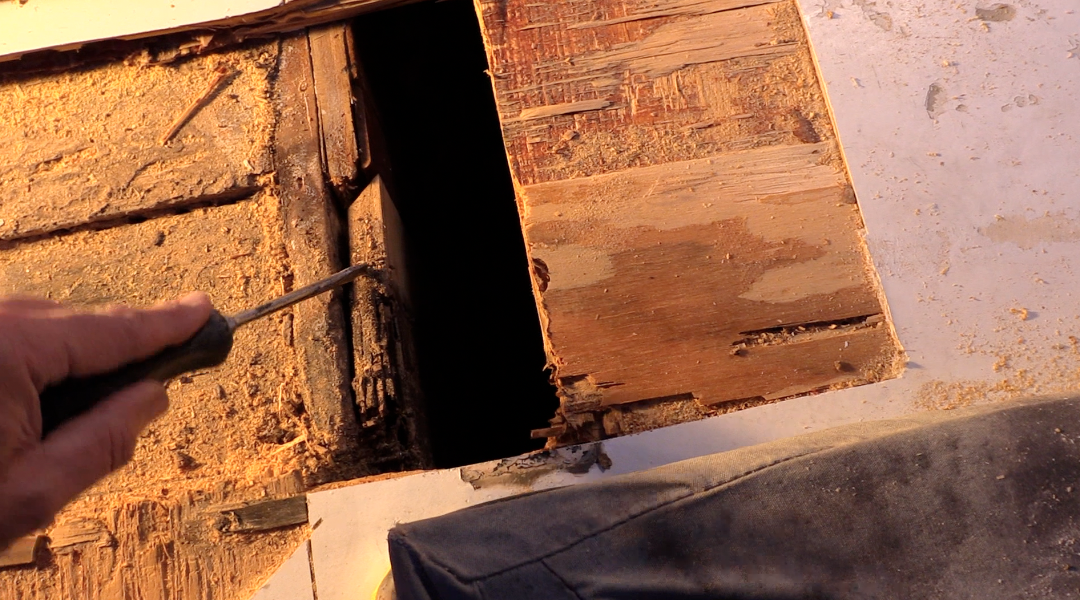
Using my favorite versatile tool, the Paint scraper, I pry up the top skin. If the skin is delaminated from the core, it comes up pretty quickly. If the area of inspection spans the lousy spot and any areas where the lamination is bond well, you may also need to use a “flat bar” pry bar between the skin and the top of the core. I use a rubber mallet when doing this to reduce sound and vibration with each blow of the hammer.
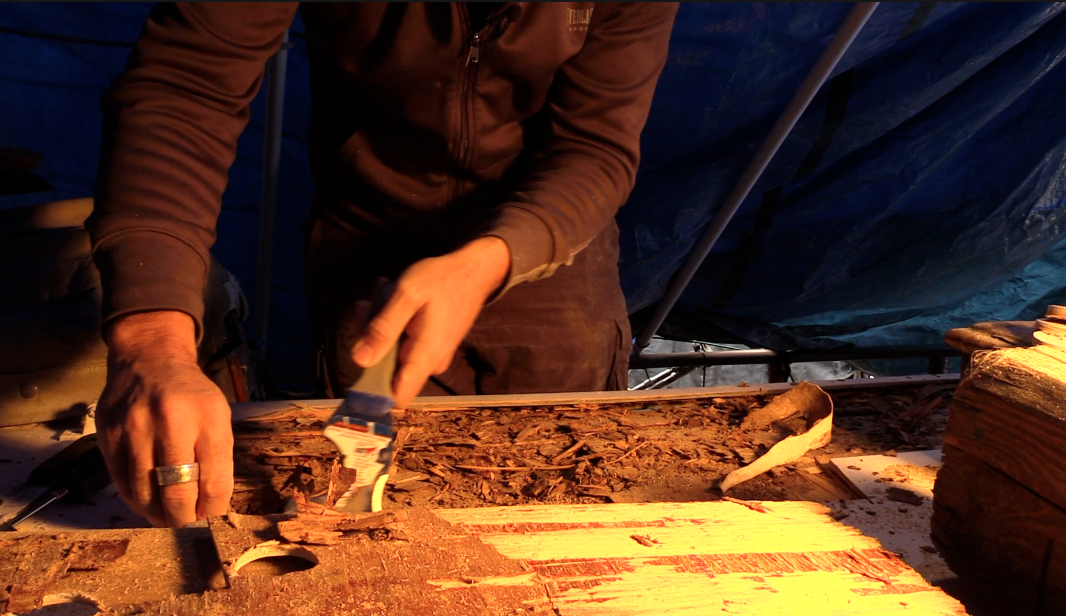 Once the top skin has been removed, it is time to inspect and remove the bad portions of the core. I typically use the sharp corner of the paint scraper to see if the core is strong or not, in the case of this photo, you can see that I was easily using my fingers to remove some of the core. The plywood was horribly delaminated. The good news is that the wood was completely dry and that surprised me a little bit. I suspected this problem was caused from years of slow water ingress and even though the boat has been covered up for three months or so, that didn’t seem like it would be enough time to dry the inside of the core.
 I continued cleaning up the core and scraping the top layer of plywood off of the mating surface below. I was working on an area above the mizzen compression framework so below this plywood was a series of hardwood supports that provide the rigid strength for the deck stepped mizzenmast. After cleaning out the area I had cut, I realized that the soft core expanded beyond the edges where I had cut. It was time to make the hole larger and continue inspection.
I decided that along the outer edge that overhangs the sides of the coach house, I would clean out most of the soft core there and pour epoxy into the void between the new plywood and that lower overhang or lip. Because the rim is lower than the center, gravity will allow me to pour the epoxy along the edge and have it seep into that entire lip creating a solid epoxy strengthened strip rather than cutting it completely off and reshaping the formed glass edge around it.
I figured that would be harder to match and wouldn’t look as good. The repair method should keep it just as secure as having wood to the outer edge.
Once I had the hole enlarged, I also noticed a problem in the bulkhead. Because I removed the core from the roof, I now exposed the upper edge of the partition and I could see where a repair had been done behind the beautiful teak facing that is over it. From the inside, it was hard to see, but from above looking down, it was clear there was a problem with a previous repair. In the photo above, I am trimming all of the core edges to be smooth and square to allow a flat butt joint with a new piece of core down the road.
As I was cutting the opening you see in the photo above; I noticed that the plywood core, was rotted all the way through. There was nothing below it like the mizzen compression structure to the right of that. Instead, I could see right into the galley. The construction of this was plywood with an outer fiberglass skin, but no inside skin. Interesting. I don’t know how common that is.
 I trimmed the opening to be smooth and flush with the next good section of core. I now needed to inspect that bad bulkhead. In the photo, you can see the portion of wood that I am touching with the screwdriver has a 45-degree angle cut on one side. That was cut to be the mating surface with the existing substantial portion of the bulkhead (above it in this photo orientation) It appears that the scarf repair was not gone correctly. There was not resin bonding this small piece to the rest of the bulkhead and the decorative trim had been placed over it (on the right in this photo) so from down below it was hidden.
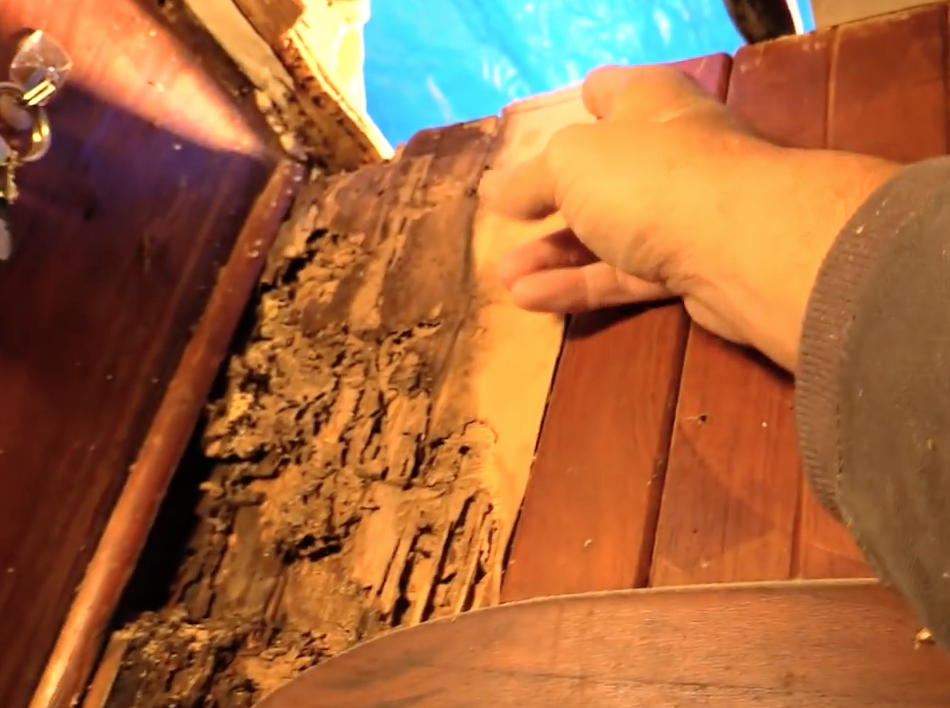 I removed the decorative teak and exposed the extent of the damage to that bulkhead. It appears that it was either the years of leaks and wet rotting core or maybe the repair was done with a piece of termite-infested plywood. It is odd that the new fix was rotted so much more than the original bulkhead it was sitting against. The piece of wood shows how bad it is on the left side of it, but everything to the right of my finger is solid as a rock. I started to suspect this may have been termites because of the way the wood looks. I am not an expert on this but decided that we should continue to look at more of the core to see if this is something that we see everywhere. Below where this wood was used for the repair, the bulkhead was soft about 1/3 of the way from the ceiling to the floor. I checked the base of it in the bilge, and it all seems to be strong there, so I suspect the problem is either water intrusion from the top or termites were in that wood that was used to repair it at some point in the past.