
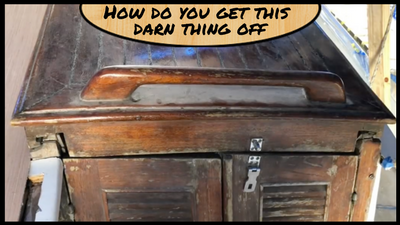
In the last blog post, we realized that we needed to replace the core a little further underneath the companionway slide rails. The issue we were having is that we were not sure how to get the thing apart.
On our Gulfstar it was kind of easy, there was a plastic cover that covered the entire thing. Once that was removed, it was apparent how to lift up the companionway. As a matter of fact, on “Last Affair,” our Gulfstar Sloop, the cover was what held the hatch down.
But that wasn’t the case on DreamChaser. The Formosa’s were designed to show off that gorgeous woodwork. The joinery on these are fantastic and was to be on display. So the construction must be different, it must not be visible, yet remain strong enough to walk on. It must also be able to withstand years of sliding open and closed (40+ years for our boat now). They must be secure enough that if you were to capsize or take a knockdown, that it wouldn’t fall off the boat. All these ‘must haves’ leave us with a more complicated joint and attachment method.
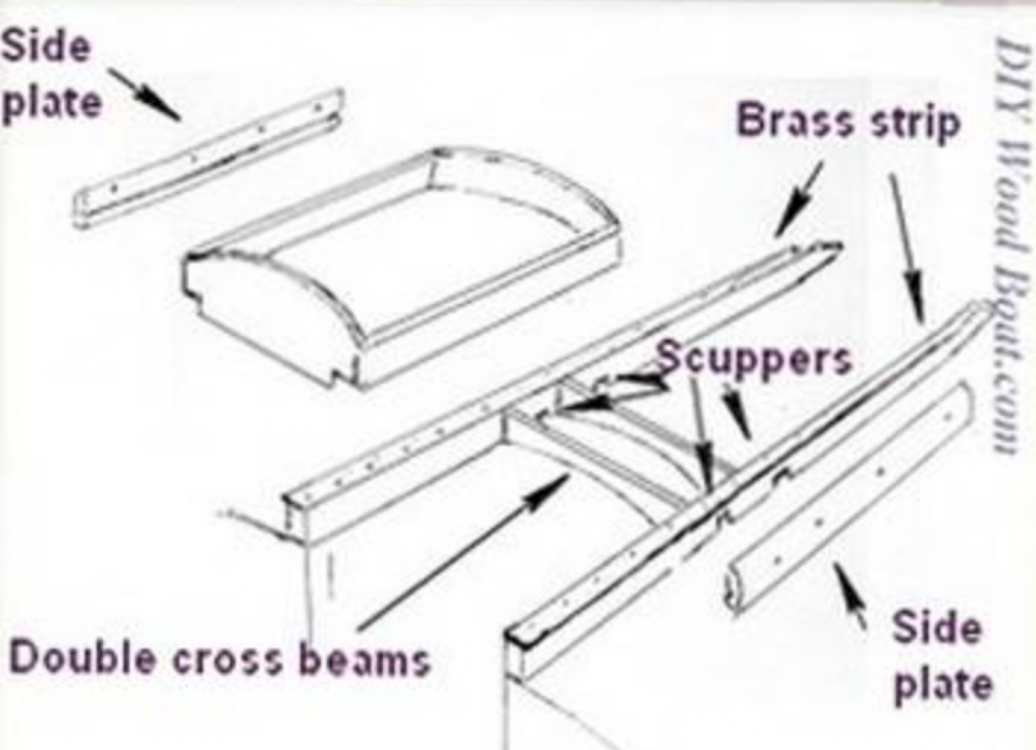
Diagram credit – DIY Wood Boat
I found a great resource called DIY WoodBoat Builder online. They showed closeup diagrams of construction methods. While DreamChaser is not a wooden boat, many of the techniques still followed that mindset. In 1978 many boat builders were still building boats in the classic wooden boat style. They used newer techniques of the day for the hull, but not other parts Our entire Coachhouse was wooden. We found with the hatches and companionway were more like wooden boats than newer fiberglass molded designs.
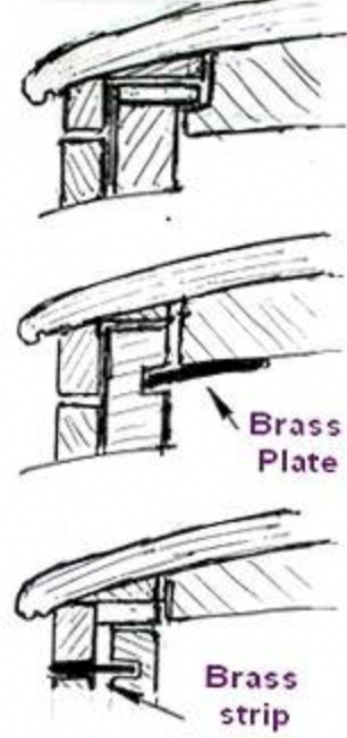
Diagram credit – DIY Wood Boat
As you can see in the first diagram, the construction was a solid wooden frame for most companionways. Ours was not different, and the structure is VERY similar to the picture for the overall assembly. We may need to rebuild the hatch down the road but won’t do that today. That is a project for another day.
The variation of these designs wildly varied when it came to the actual sliding rails. In most cases there is a bronze rail attached to the fixed rails. This bronze slide rail has more than one purpose. The first one is to lock the hatch to the boat. The second fundamental goal is to reduce the wear and tear from 2 wooden surfaces sliding against each other.
In most cases, the bronze (and sometimes brass) strip is attached to the base rather than the sliding hatch. Using this design reduces some of the weight of the companionway itself. As you can see in the photo with the three different models, that is not the only method.
 The commonality in design is that there are two sliding surfaces and a rail that fits into a groove to hold the companionway on and even.
In our case, you can see the closeup of our design. It was similar to the boxed construction of the first image on this post. For us, that is where we varied a bit from the other typical design methods. I can’t say which is better or worse, but ours was different. All methods shown appear to be of equal strength or value. If I were building a new setup, there are a few things I would consider.
- Keep the more components on the permanent rail side, to reduce the weight of the slide.
- Mount the bronze/brass strip to the fixed portion of the construction. This location makes it easier to clean (or wax) over time.
- Consider all screw locations and think about how you may disassemble it if you ever need to repair. It sounds silly to put down in the post, but you may not want to have to remove everything for a simple repair or adjustment.
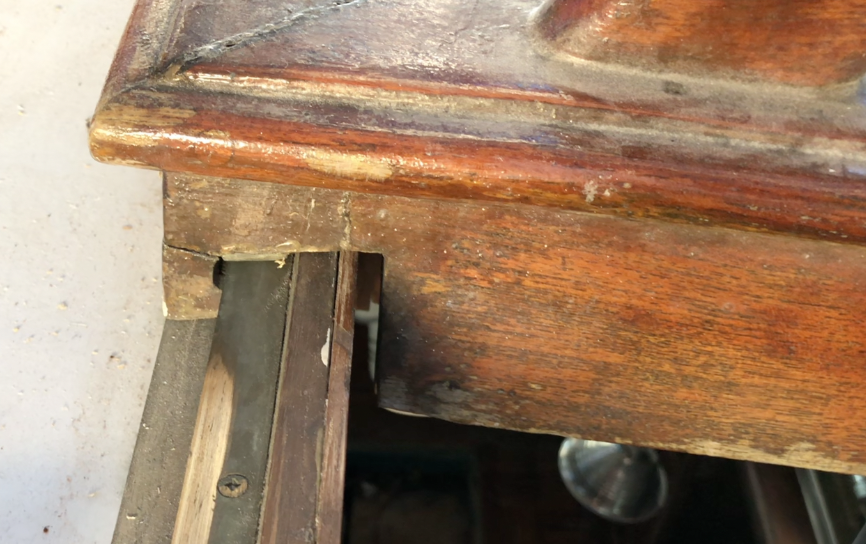
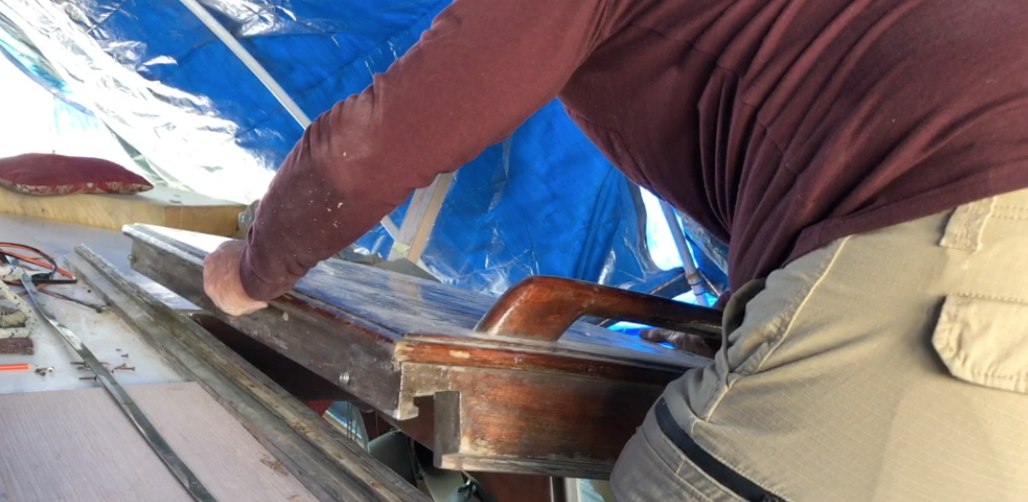
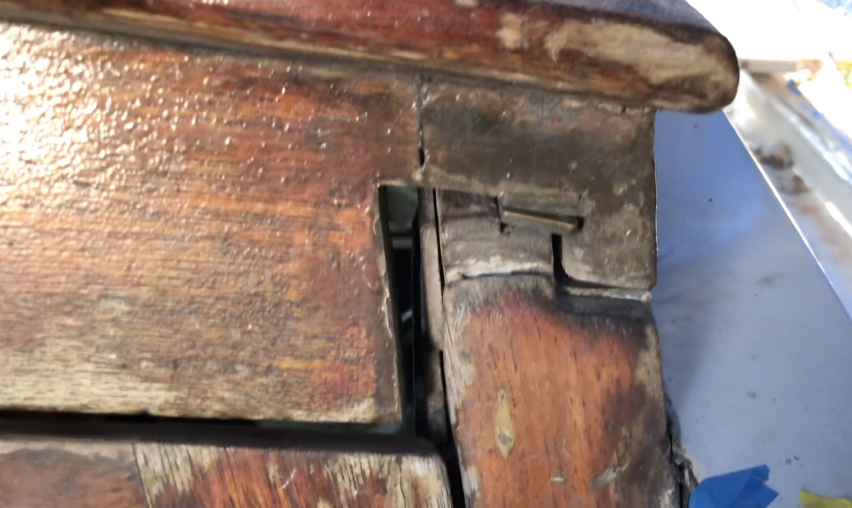 In our construction, the outer sides of the Companionway frame have a unique shape. The top is contoured to make the curvature of the hatch. The outer edge is vertical, but then it gets more complicated. The mating side (bottom) of the hatch slide rail, is a stepped design to slide on both the wooden track and the bronze rail. Notice the different heights in the photo. This notching is important for a smooth sliding motion. It could have been a straight line across the two sliding surfaces. Had that been done, there would have been some wiggle in the movement. The other problem is that the corners of the stepped surface would have a higher pressure on the wood and over time would have worn down more. Lastly, you can see that the inside horizontal surface has a “hook” design that locks over the bronze rail. The cuts would need to be a very if making your hatch frame.
With the anatomy lesson complete, it is time to remove it. As you can see being familiar with different designs, allows you to determine the best method for removal. In our case, it was to remove the bronze rails. I would encourage you to carefully look before you do this to see if you will have access to all the screws that hold it together.
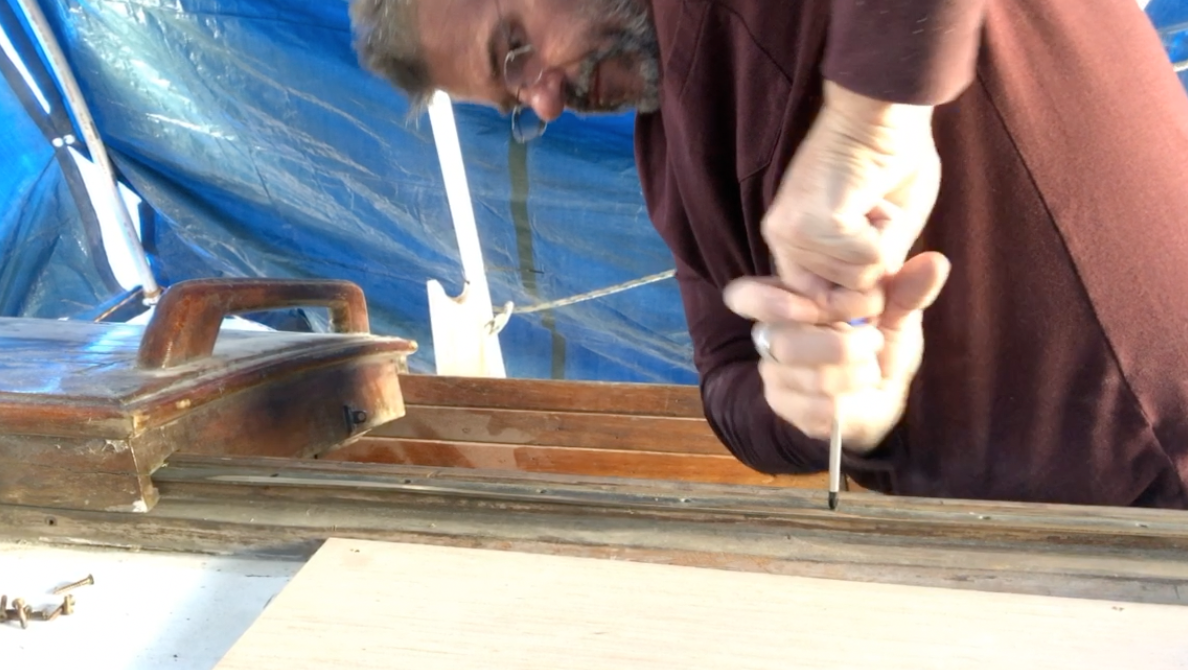 When my companionway was closed, I exposed a certain number of screws, when it was open, more were presented. The problem came when I measured the distance between the screws. I determined that there was likely a screw head that I would not be able to access. I decided to try it anyway. I removed each screw. If you embark on this kind of project, learn from my mistakes. Our screws were bronze as were most of the ones on the boat in general. That means that they are softer than most other metals that we use or see at hardware stores today so your not likely used to the finesse required.
 Use a hand screwdriver, not a screw gun. Go slow and if needed, use screwdrivers with a tapping surface (Also called “Demolition Screwdrivers” so you can give it a tap and get the bit to seat well in the head.
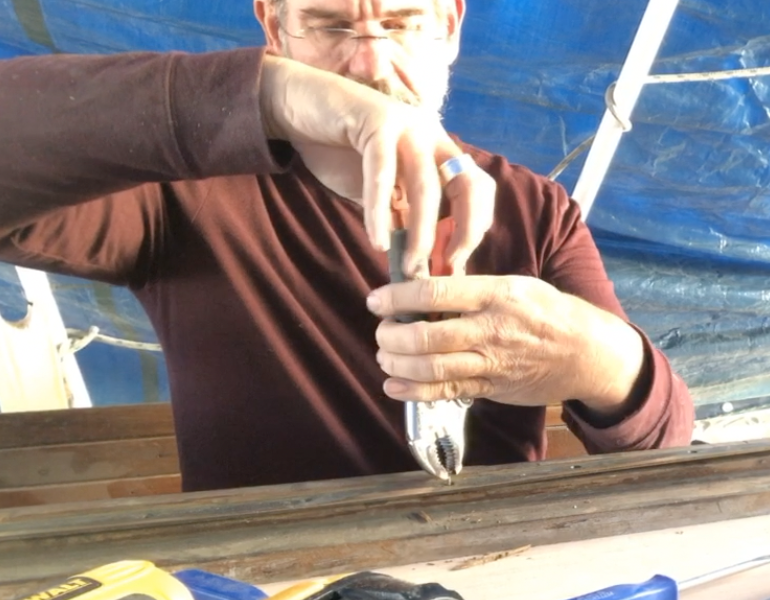
In the end, you most likely will still end up breaking or stripping at least one screw. If you do, use small scrapers or screwdrivers to lift up the corners of the screw head. You are attempting to expose enough of it to get needle nose vise-grips onto the outer edge to remove it that way.
 Once all the screws were out, at least all the ones I could get to, I wiggled the bronze rail. It indeed wiggled with the companionway hatch slid all the way open. It pivoted back and forth with the pivot point where I was afraid there was still a screw. I took a chance. I planted my feet firmly in front of the companionway. I pulled the rail horizontally without bending it up too high. The direction I pulled was parallel to its mounting surface. My expectations were low. I figured that screw that I couldn’t get to was going to thwart my efforts.
But, the boating Gods smiled upon me, and it slid right out from under the hatch. The lesson for me was that if I was not able to get at that screw, neither could the boatyard, and that was a good thing. The rail didn’t have a screw through that one hole. It didn’t weaken the overall strength of the joint or mechanism by leaving it out. There were still about 12 screws in this 6-foot length of bronze.
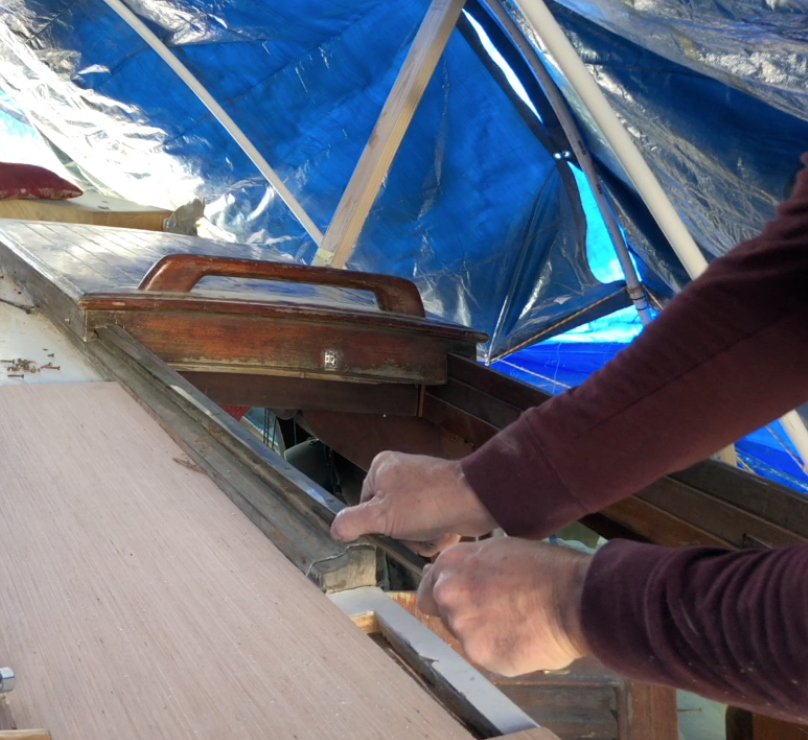
 Amped up on from unexpected victory, it was time to remove the hatch itself. As you saw in the first close-up photo of our companionway, the last thing I wanted to do was lift one side much higher than the other. If I did that too far, it would be possible to break off that milled lip in the outer frames of the companionway. That would make this project MUCH larger. By lifting up the one side of the companionway that had the removed bronze strip, I was able to slide it toward the side that still had the bronze on it. All we had to do was move it about a half inch to the right (toward the hull) and was then able to lift it straight up. After doing this alone, I would recommend having two people attempt to raise the companionway. Given its size and weight, it was difficult to hold the hatch level. I was surprised that the hatch weighed about 60-75 pounds. It is solid wood with a plywood core and teak mounted on top of it, so I guess I should have expected that. But I didn’t, and it was pretty heavy to lift while leaning over far enough to hold it parallel at its center.
With the hatch removed, I can start the process of removing the lower slide rail and the core below it. But more on that, in the next blog post.