
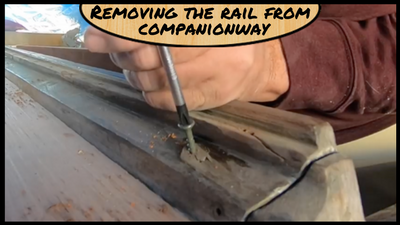
I suspect that several of us have had an opportunity to remove our Companionway hatch. By opportunity, I mean we likely went kicking and screaming into the task. What surprised me was that this was going to be the easier task in the companionway work. I also needed to remove the rail that is attached to the boat and is the resting point for the sliding part of the hatch.
I have found that the construction of most boats is one of a few similar variations. For example, it is typically a cored fiberglass deck (if not a wooden boat). The hull if often solid below the water lines, or in my opinion, should be. What I didn’t know until working on our boat, was that a lot of it followed wooden boat building techniques. I guess it makes sense; production fiberglass boats were still a newer concept in 1978. It makes sense that the construction of fiberglass boats evolved from wooden boats. On our boat, our coach house is not cored? It is a wooden structure built on the ship. It was not something that was molded into the hull and decks fiberglass components.
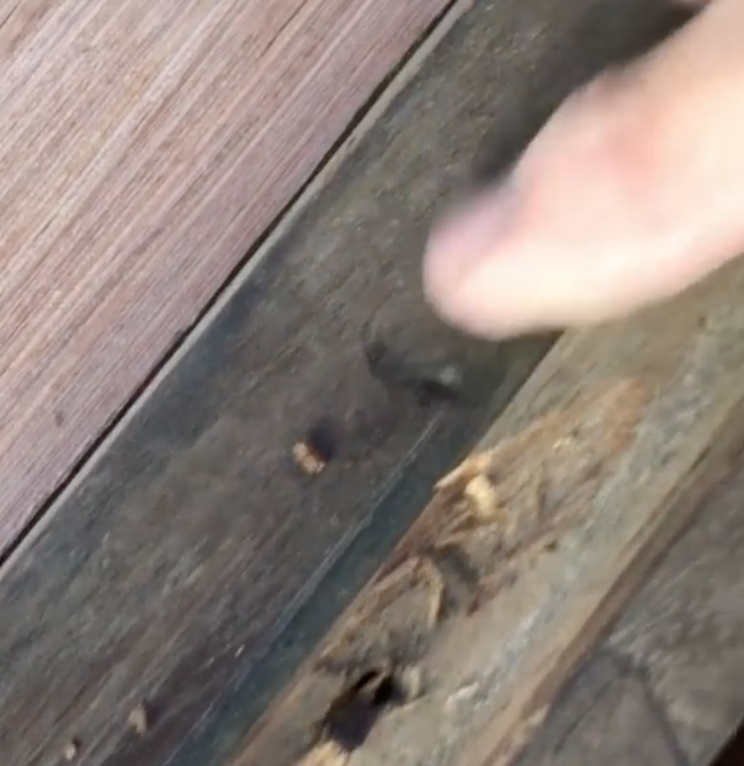
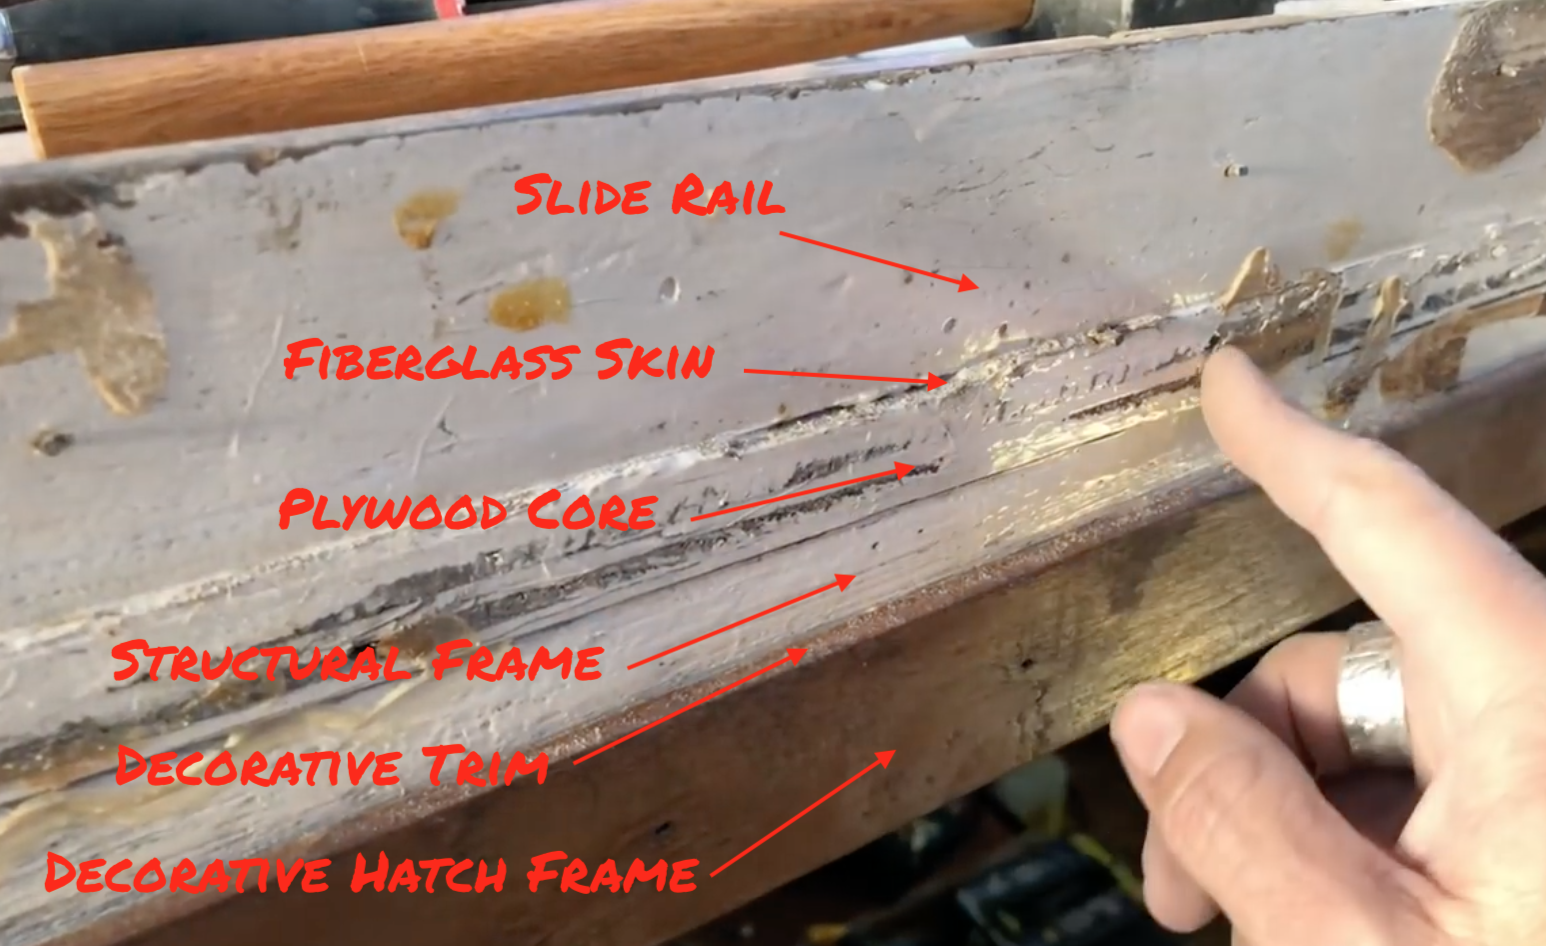 I took this photo to show a cross-section of the deck and the slide rail I am attempting to remove. My finger is pointing at the core in this photo, but as you can see, there is not a “skin” of fiberglass on the bottom side of it. The entire deck of the boat was a wood cored fiberglass deck with a top and bottom skin. In this case, it was mostly plywood attached to the beams and structure of the coach house. That entire surface had been covered in fiberglass. Doing so helps the water run off the roof and extend the life of the wooden roof. Below the core is the main structural beams of the coach house as well as decorative trim work. The entire surface in these two photos gets covered with decorative teak. The teak is to hide the layers that are shown in the picture.
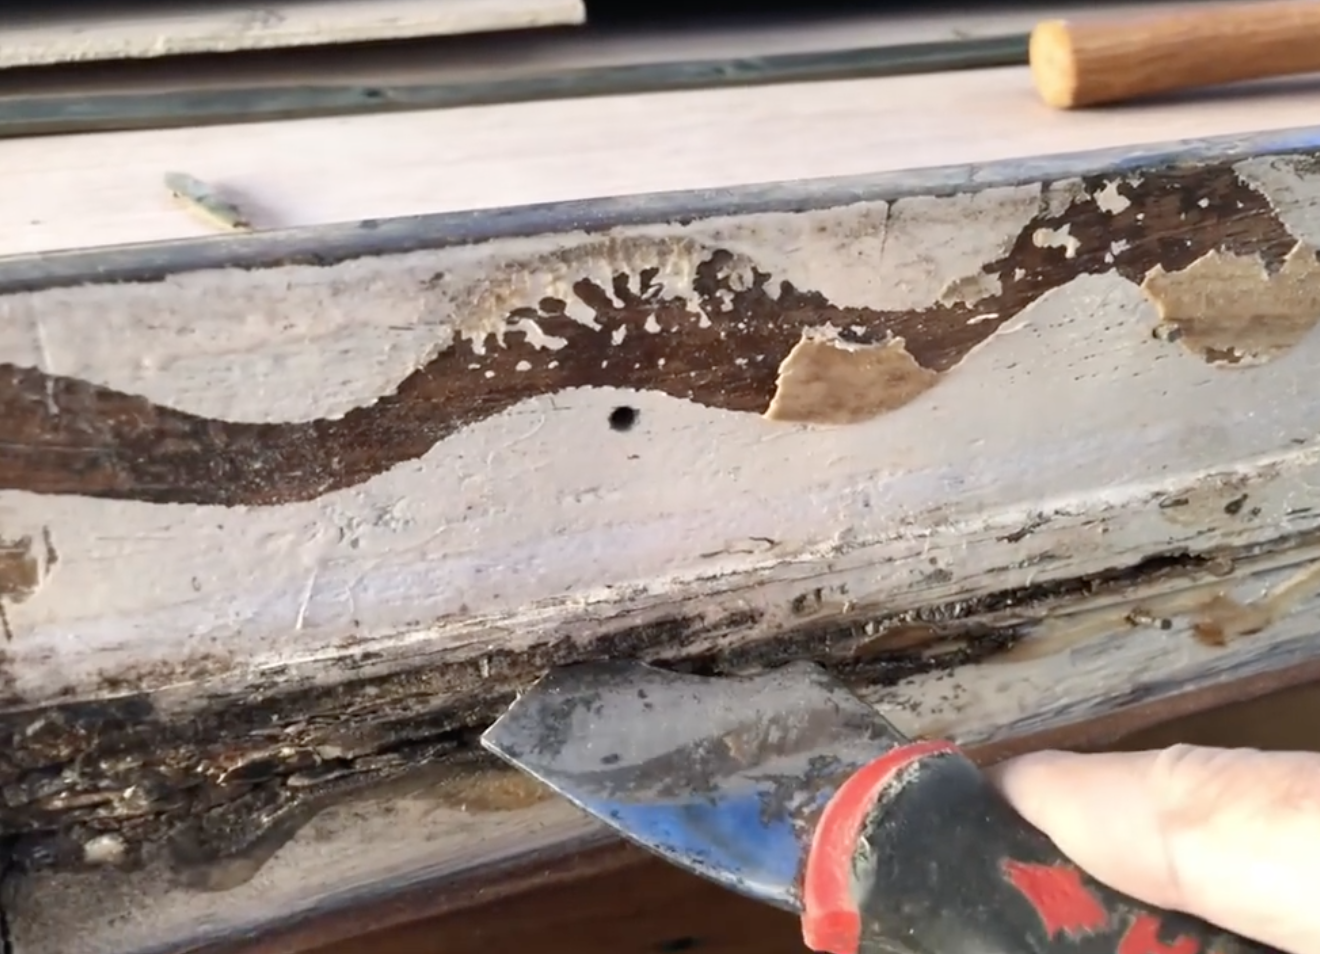 So with the parts identified, it is time to show why we are even digging into this. It is due to a section of this core that is close to the opening of the hatch. As you can see n this photo, I have a rigid scraper that I use when testing the strength of plywood. I use this broken scraper due to how hard it is and push the corner of it into the cross-cut section of plywood. If the plywood gives to the tool it is often a sign of previous rot or moisture. While not a scientific method for testing, it has served me well. It has identified more areas in need of repair than I would have hoped for.
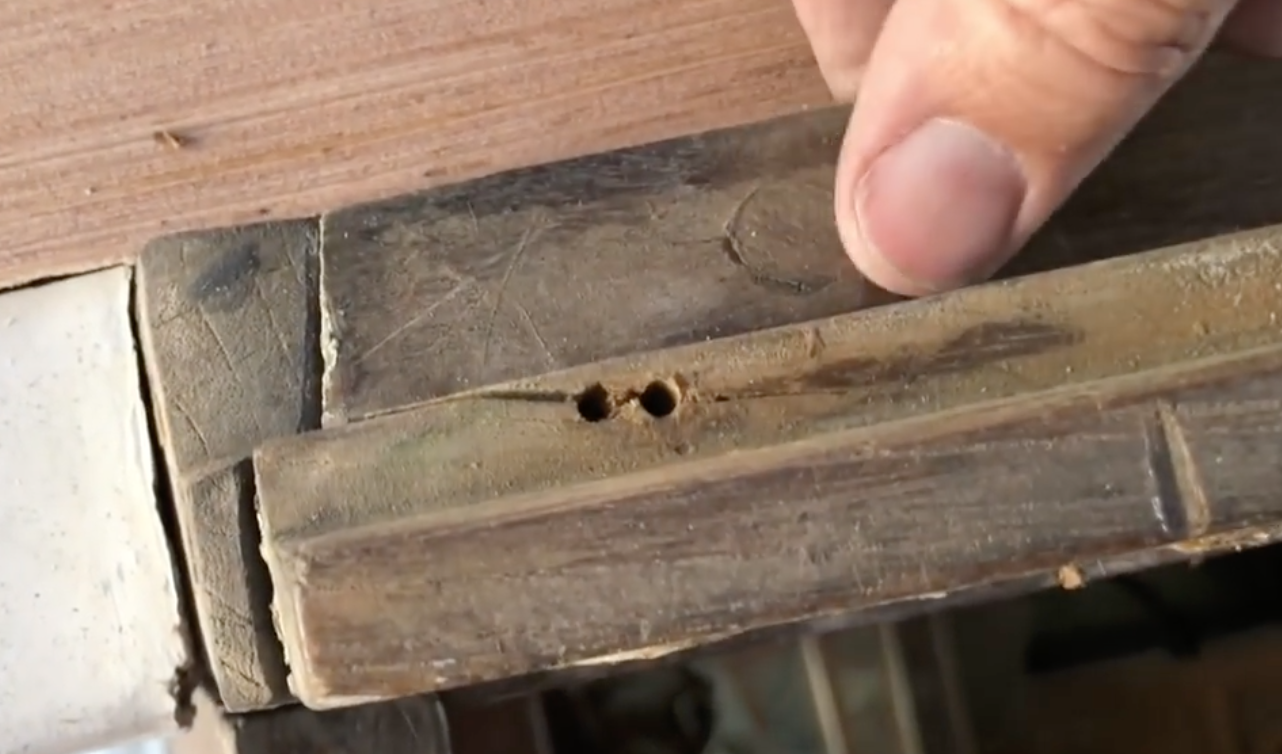
In this case, the area is about a foot long and extends under the companionway slide rail. When I was doing the core replacement on deck (See post here), I identified core to be replaced in this general area. I had cut the core out right up to the companionway slide rail in hopes that it would be enough. I recognized that it really needed to be replaced right up to the edge.
The first step in making this repair is to identify the location of the screws holding this sucker down onto the deck. It starts with a scan of all the possible bungs hiding the screws.
 Common sense has me beginning near the edges and working my way toward the center. I usually use mineral spirits on a rag to wipe the surface. Doing so helps knock off some of the dust. It also allows the openings around the bungs to get wet for a second and the circular patterns seem to show up easier. Keep an eye out for things you don’t expect as well. For example, it would stand to reason that you may see screws that align to the beams below, or about every 12 to 16″ apart. But in some cases, you will run into something that doesn’t make sense or seem logical.
That is what I ran into here where there are two bungs so close they almost touch one another. Removing these always seems like a chore. There are videos out there as well as documented tips and tricks. I have likely tried most of them, and my experience has varied. After a lot of contemplation and a few expletives mumbled and in some cases yelled, I have come to some conclusions.
No one solution works all the time
You have to do a little exploring and think before you pick your method
once you find a solution that works for your boat, it will still only work 70% of the time
Each boat builder (not the company, but the individual person, may have varied techniques for installing bungs. This leads to inconsistency from one part of the boat to another.
Take your time and know how to recover mistakes you will make. And you WILL make them.
With those somewhat negative realities behind us, let me share what worked ok, but not great for this job. Almost all tasks to remove bungs starts similarly. Identify the bungs to be removed. I like to mark the centers of each one with a center punch. You can get a small handheld, spring-loaded unit that you push down on and when it clicks, it makes a divot. These work great for centering a drill bit.
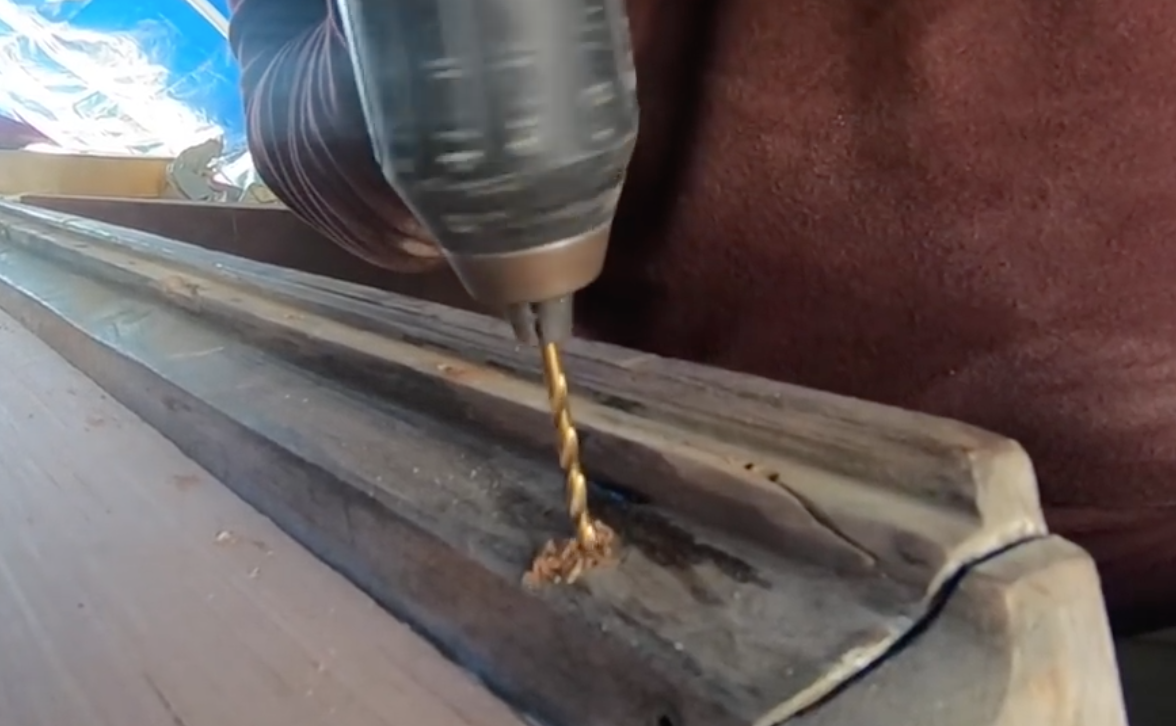 Once the mark is made, I usually drill a hole right down the center with a drill bit a 1/16″ smaller in diameter than the bung. This time I tried something different because of bullet two above. After looking at the surface, I believed that there was not epoxy holding the bungs in place. So I opted for a neat little trick that I have used on bungs inside the boat on trim work. I drilled a small hole, just as wide as a “deck screw” or you can use a drywall screw. It doesn’t matter what kind as this is only a tool for removing the plus and won’t remain on the boat.
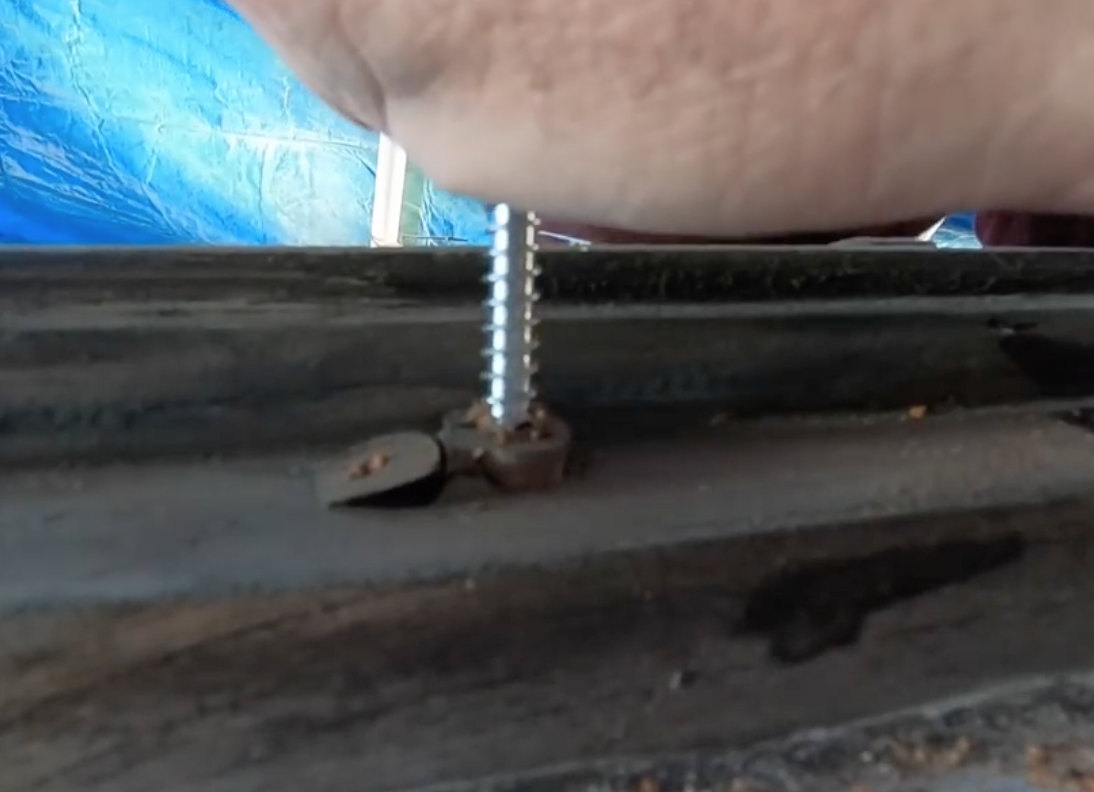
Drill the hole carefully down the center of the bung until you feel it hit something hard. That hard thing is the screw head. Now turn that screw into that hold with a hand screwdriver. Don’t use power here. The slow motion of the hand screwdriver works much better.
If all the stars align and you are having a good day, the threads on the screw will act as an elevator lifting the bung. When it works, it feels pretty magical, and you can almost hear a heavenly choir start to sing. Once the plug is elevated above the surface pulling up on the screw will usually remove the bung as well. This worked on about half the screws for me. The others had some residual bung in their hole. Yep, I just said bung and hole in the same sentence and my inner 14 year old couldn’t ignore that.
There other challenges that I faced and you likely will to from time to time. Sometimes the bung has been glued in. The method that some use here is to put a drop of glue in the hole and then insert the bung. Or they dip the bung in the glue and put it in the hole. The problem with both of these methods is that it gets glue into the screw head grooves making it harder to remove. So I broke several of the screws or just couldn’t turn them.
 When that happens, it is time to cut those suckers out. I have finally found an excellent way to do this. I love my oscillating tool, and if you don’t have one, you should get one. I use a cheap one as I have found that they last a long time. They mostly do the same as the ones that cost 3 to 4 times as much. But here is where you can spend some money. Get a purpose-built blade. When you go to your local home store, you will find packages of blades. They often are cheap and work good enough for the occasional wood plunge cut. But in a case like this where you need to get between 2 surfaces and you have to cut metal, quality matters. I have found some that work well for this. The good news is I have seen some that work well and have tested them out. If you have ever tried to cut a screw with one of those “For Metal” blades that come in those inexpensive sets. You will work on it for 20 minutes and when you give up. Your blade has a divet where it was hitting the screw and the screw is still standing like the mighty oak tree.
Once the screws are out or cut, it is time to remove the parts from the bedding. If you read our blog post or saw our video on removing the mizzen mast step, you know that we had some super adhesive to deal with. I have found that it is too rubbery to cut well. You can’t just use brute force, or you may break the item being removed. What has worked well is slow and constant expanding pressure. It seems that if you stretch the bedding, it starts to give way easier.
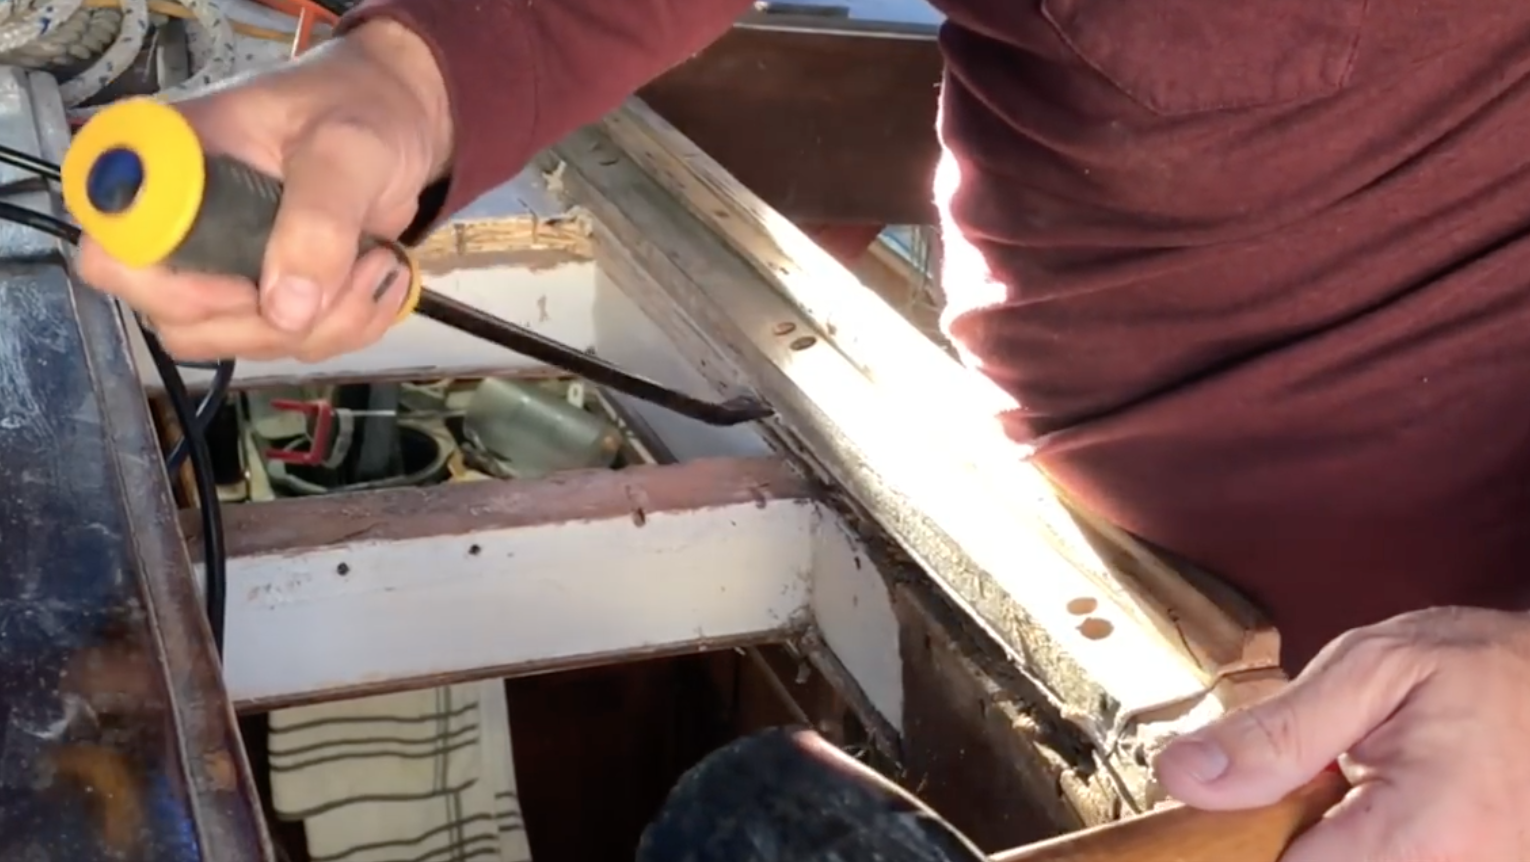 I use a series of pry bars to start this process and expand the gap. Don’t be mistaken by the thought that you have the flat pry bar and crowbar only. That is what I initially thought and learned there are other types of pry bars and fell in lost with mine. I included a link to the “pry bar set” I purchased. It was inexpensive which is a requirement for me when I am getting a tool that I don’t know I will need to use often in the future. For those tools, I buy high quality, but for these single or rare use tools, I typically choose inexpensively. This pry bar set consists of 3 bars in various size starting with something about as small as a medium screwdriver. They go up from there. Each has a slight bend to it for leverage during prying. Additionally, they have comfortable handles with a solid tapping surface. This allows me to use a mallet to hit them into the surface I need. This step is critical, so I suggest a decent rubber mallet too. You boat neighbors and your ears will thank you.
The process I use it to tap the thinnest bar into the gap between the surfaces. Right next to that, I will tap into the next larger size, and as the gap expands, I will use the thinner one to repeat the process next to it. As I get a section starting to show a gap, I will put the largest of the prybars from the set into the first opening. I alternate and move these around spreading the gap to the thickest bar. Sometimes with a gentle pry, they will come off at this stage. There are times when I have needed something even thicker. In those cases, I use the old “flat bar” from the hardware store and a thicker old school crowbar as it is the thickest. These also give me a bit of leverage if needed.
I hope you found this helpful. If so, feel free to use one of the share buttons below to help others on the social inner-webs 🙂