
As we were making templates for the new core on our coach house roof, I came to a conclusion. Actually, this may have been more of an “oh shit” moment at first. It turned into a conclusion after some thought.
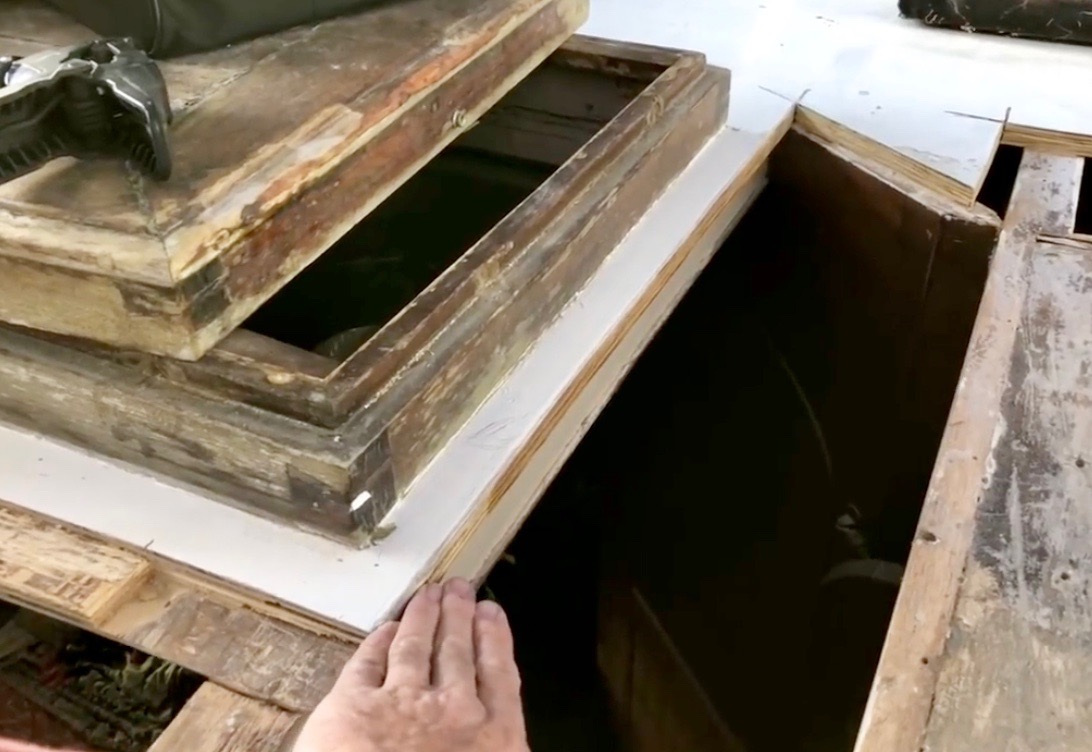 As we replace the core most, all sections have an edge that aligns with a beam or bulkhead. This allows for the core to be screwed down to the deck while the epoxy cures it in place. As I was making the templates, I realized there were a few spots that did not. In this photo of the hatch, you can see the edge of the excellent deck core. It is about 3 inches in front of the hatch and without a beam below it, I would have an unsupported joint in this location. It is not likely a real problem since this spot is behind the mizzen compression structure. It is also in a space that is about 8 inches from the hatch to the mizzen and under the boom. Its location makes it unlikely anyone would stand there. But regardless, it has room for improved strength.
If there is a joint between 2 beams, it is a weaker spot than other parts of the repair. Butt Joints are the weakest of all joints that can be made when attaching wood. In other woodworking projects, there would be dowels or something that would be used. These would align the two surfaces and hold them tight up against each other. In our case, it would be difficult if not impossible to put dowels or biscuits in place like you would in furniture work.
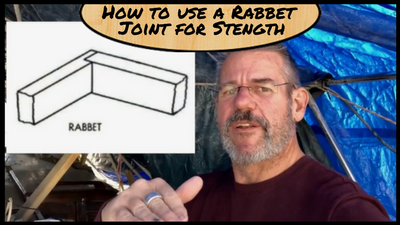
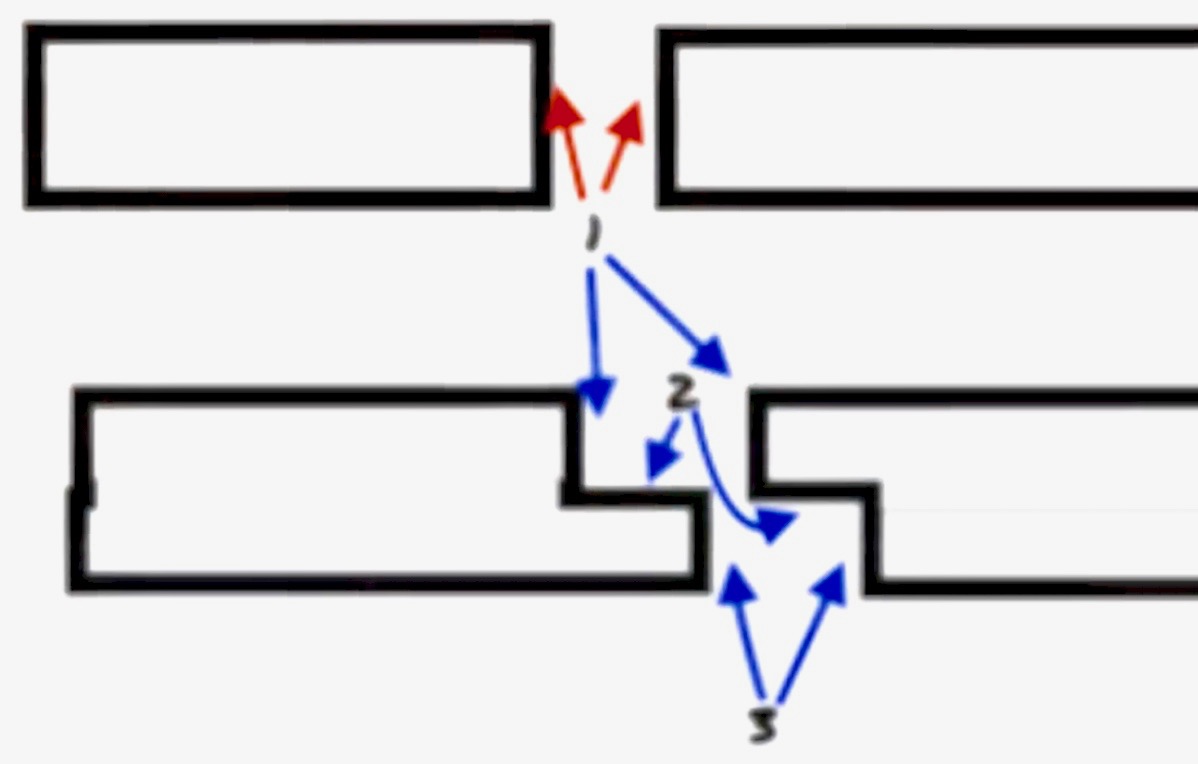 In this diagram you can see how creating a rabbet joint can add strength. A rabbet joint is an offsetting step cut in the base material and an upside down match to it in the mating piece. The Red arrows show how a butt joint allows me to use a thickened epoxy to mate the two surfaces together. This works, but it provides only a single vertical bonded surface. In the bottom section of the diagram showing the rabbet joint, you can see the difference. In this configuration, the blue arrows indicate that the rabbet joint allows three bonding surfaces. Not only does this give me more surface area for bonding, but also allows the existing core to support the new core.
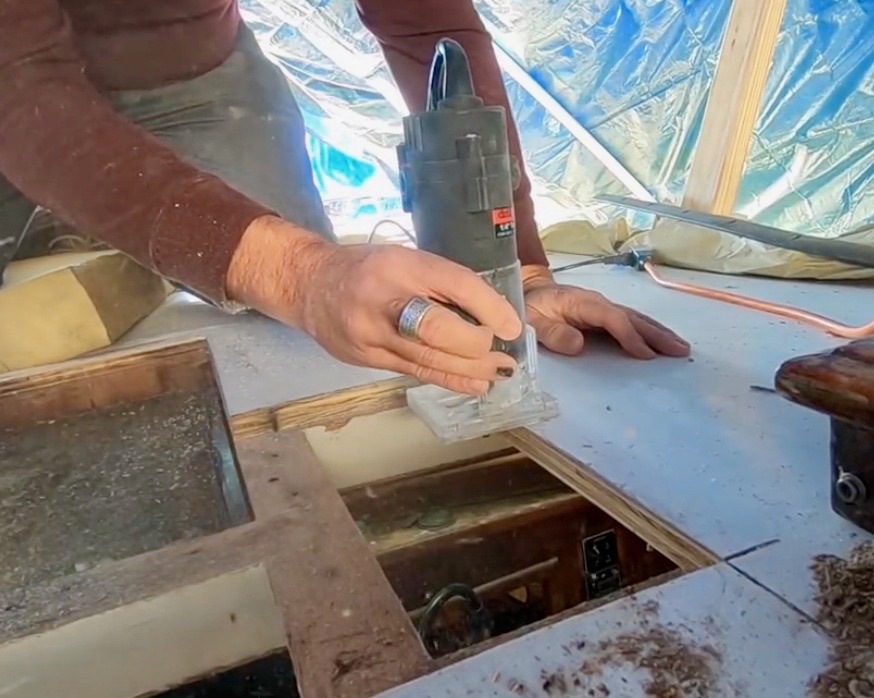 Now that we have a plan, it is time to identify the locations where this option needs to be considered and created. There were two places that we needed to do this. In this photo, you can see us using a simple and inexpensive trim router and a rabbeting bit. The cut was created along the mating surfaces of the 2 locations identified. We would have to do the opposite cut on the new core. If you do a project like this, don’t forget the changes this has on the templates and new core sizes. We made our templates before this step, which meant they were now wrong. I measured the additional length created from the rabbet and marked that on the corresponding templates. For us, that means that on 2 of the templates for the length of one side, we needed to extend it 1/2 of an inch. Our rabbet was 3/8 of an inch deep and a 1/2 inch long.
 As I inspected the insides of the roof where the core had been removed, I found another opportunity. I am starting to call them that because problems have a negative connotation. In this photo, you can see the gap. That gap is the inside of the coach house core. In an earlier post a few months ago, we found something similar below a leaking port. In this case, like the last, we will pour a thickened epoxy down into this core to make it a solid epoxy wall. The good news is that structurally this is strong and does not add to the compression structure. That is all self-standing and supporting, and with the fiberglass over the existing house, the whole house is substantial. To add to that strength, this will be filled as well. We ended up pouring epoxy down into it and using a massive metal rod to ensure that it seeped all the way down to the bottom of the coach house wall. We also have a great video on how we did all this located here on our youtube channel. This link will take you right to it.
In the next Post, we will show how we cut the core and start to get it installed.