
Deb and I have liked the idea of solid lifelines on our boat for quite some time. We gave some thought to doing it on Last Affair (our 43′ Gulfstar) and have talked about doing it on SVDreamChaser. There are several reasons we wanted to consider it, but having the boat in the yard has increased our desire to get it done
- The Lifelines on most boats are about 34 inches high and a little low to feel secure
- With the grandkids living aboard with us, we wanted them to have something stable and rigid to hold on to.
- The gap between the deck and each lifeline was about 16 to 17 inches and seemed too large for the size of the kids
- Security, for some reason having the solid rail to lean against, provides an additional sense of security on deck
- More Handholds. The deck on DreamChaser is so expansive that it almost feels like there is nothing to hold on to when walking forward without it
For all these reasons, we started to give some serious thought to replacing the lifelines. We wanted to get rid of the always loosening top cable lifeline and replace it with something solid. The other significant consideration had to do with our old stanchion bases. They are solid bronze, but they mount to the deck. Installing them to the floor means that each one had four bolts that went through the deck and fastened below. After all the core and fiberglass work on the boat, we didn’t want to drill new holes in the bridge if they could be avoided. There were 16 stanchion bases with four holes each meaning we would be putting 64 holes in our brand new deck. That was a non-starter for us.
I will go into more detail in a future post about how we are going to mount the stanchions on the bulwarks rather than the deck. For now, we are focusing on the layout and shape of the design.
We started by looking at the shape of the boat and ensuring that whatever we do enhances the vessels natural lines. We love the look of these boats, and the last thing we want to do is detract from her beauty.
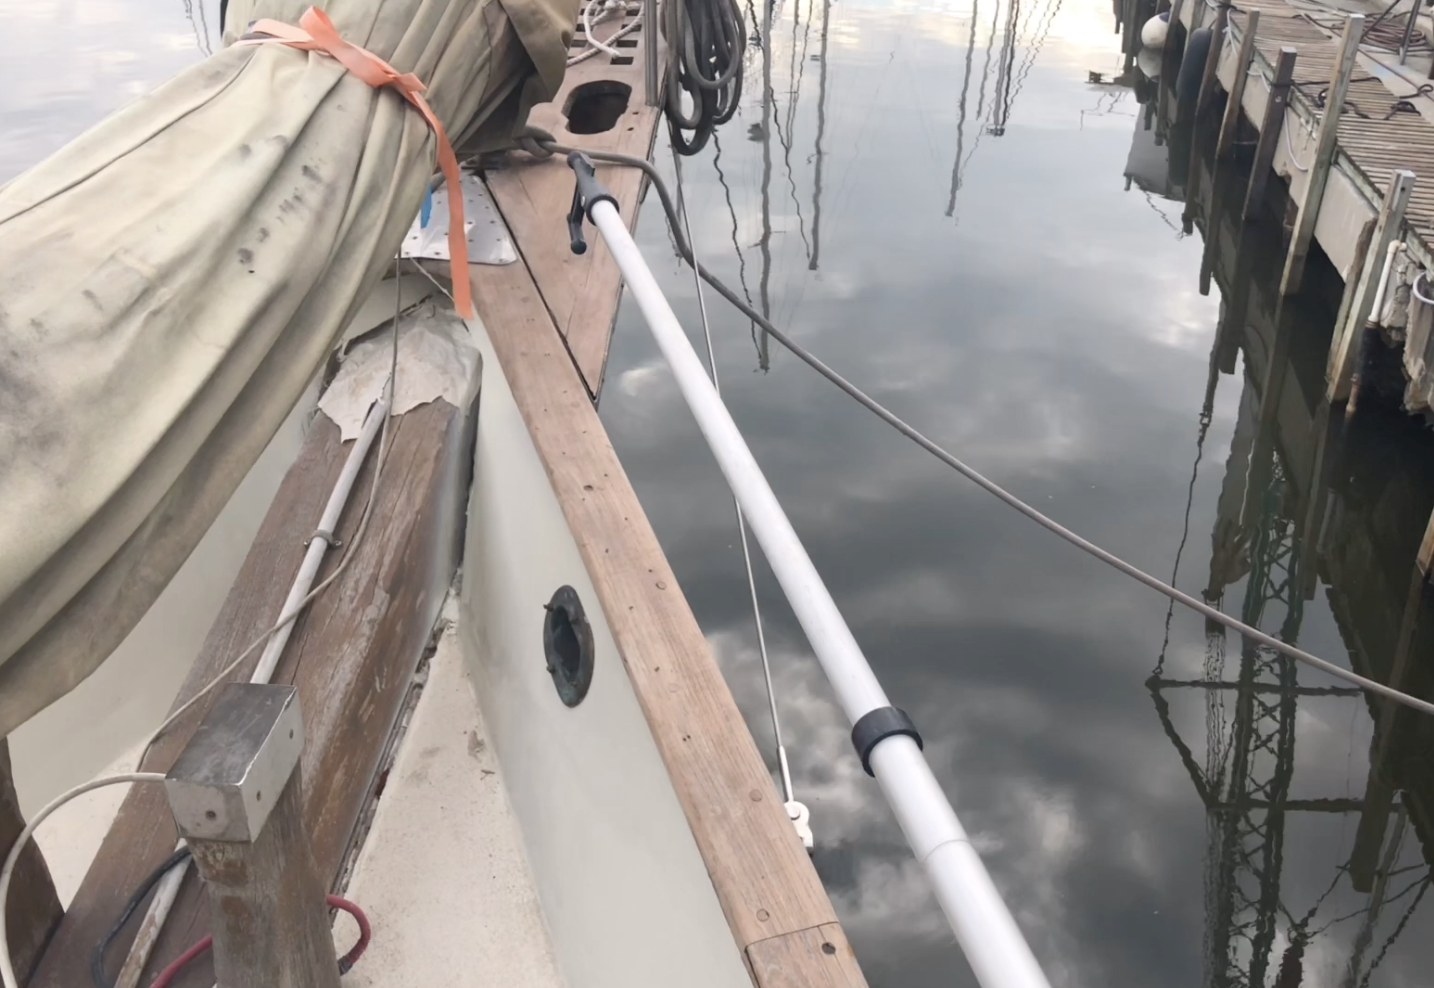
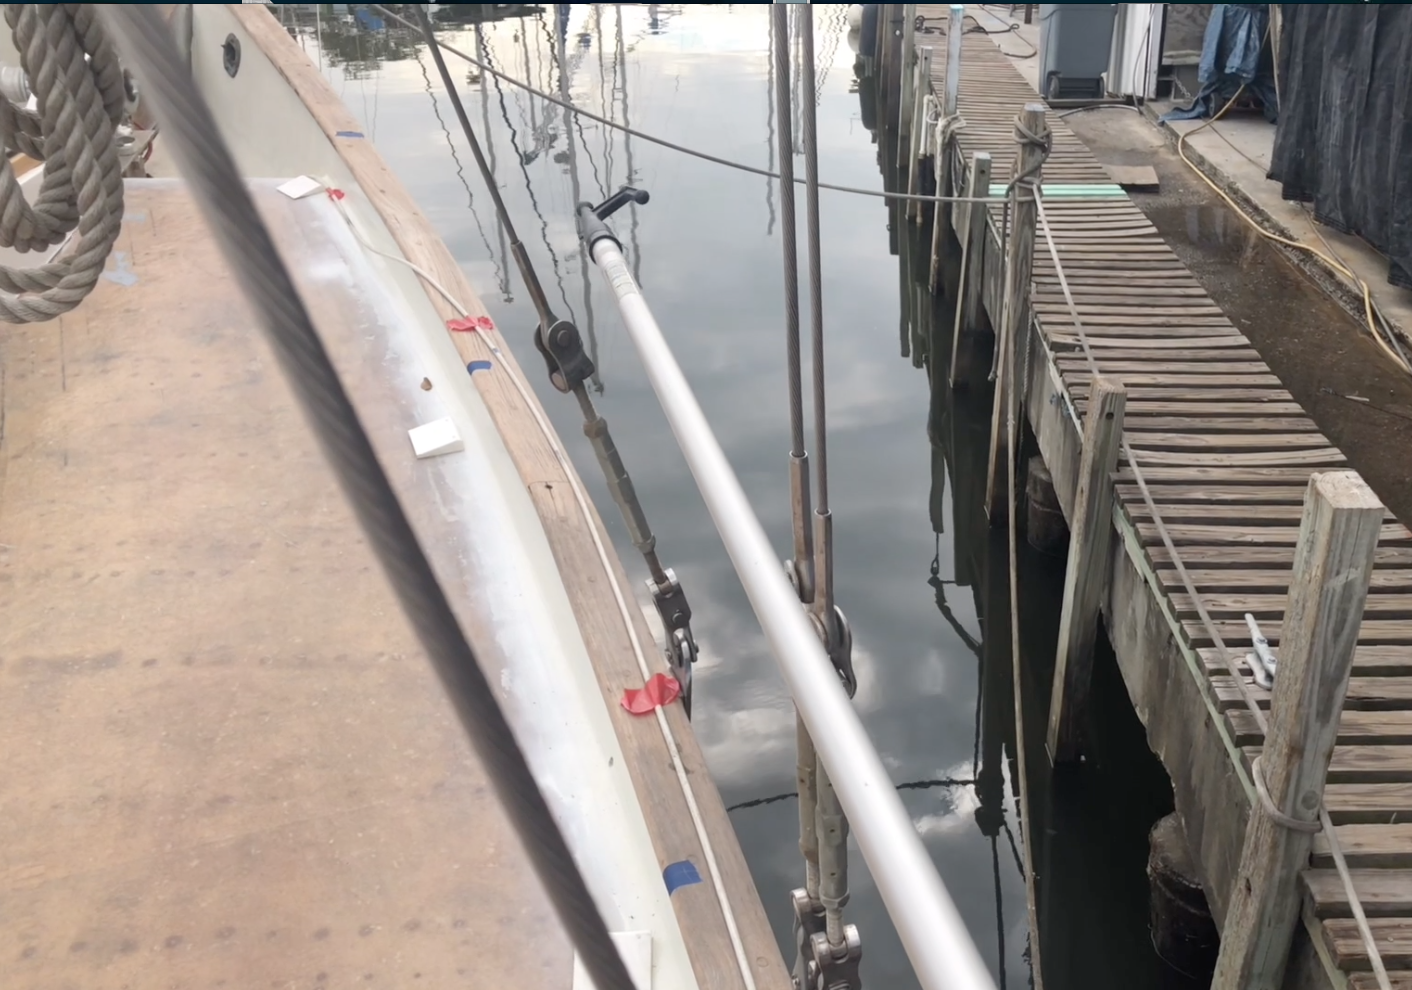 To do this, we wanted to have the rail closely follow the curve of the boat. We decided that meant following the toe rails. There was one spot that we had to consider and that was the section near the shrouds on the main mast. The lowers (outside ones) come in at a more pronounced angle than the uppers (center ones). We used a boat hook to get a sense for what the rail may look like if it were between the uppers and lowers. The good news it appears to look good, and the shrouds don’t get in the way of the rails. At the height we are going to be putting the rails, it fits perfectly between the shrouds. It will continue to allow us access to the shrouds as needed and still provide a good hand hold when working along the side decks of the boat.
 The next step was to determine the actual number of stanchions needed, as well as their location. I didn’t want to be presumptuous and put them back where the old ones were. If we are going to be making changes to the boat’s layout, now was the time to consider other things as well in our design. For example, we are going to be installing tide flexing stairs to go from the deck to the dock. The stairs we are going to use are wider than the old lifeline gate. We decided to make the boarding gate opening 2 inches wider than the boarding steps and their associated platform.
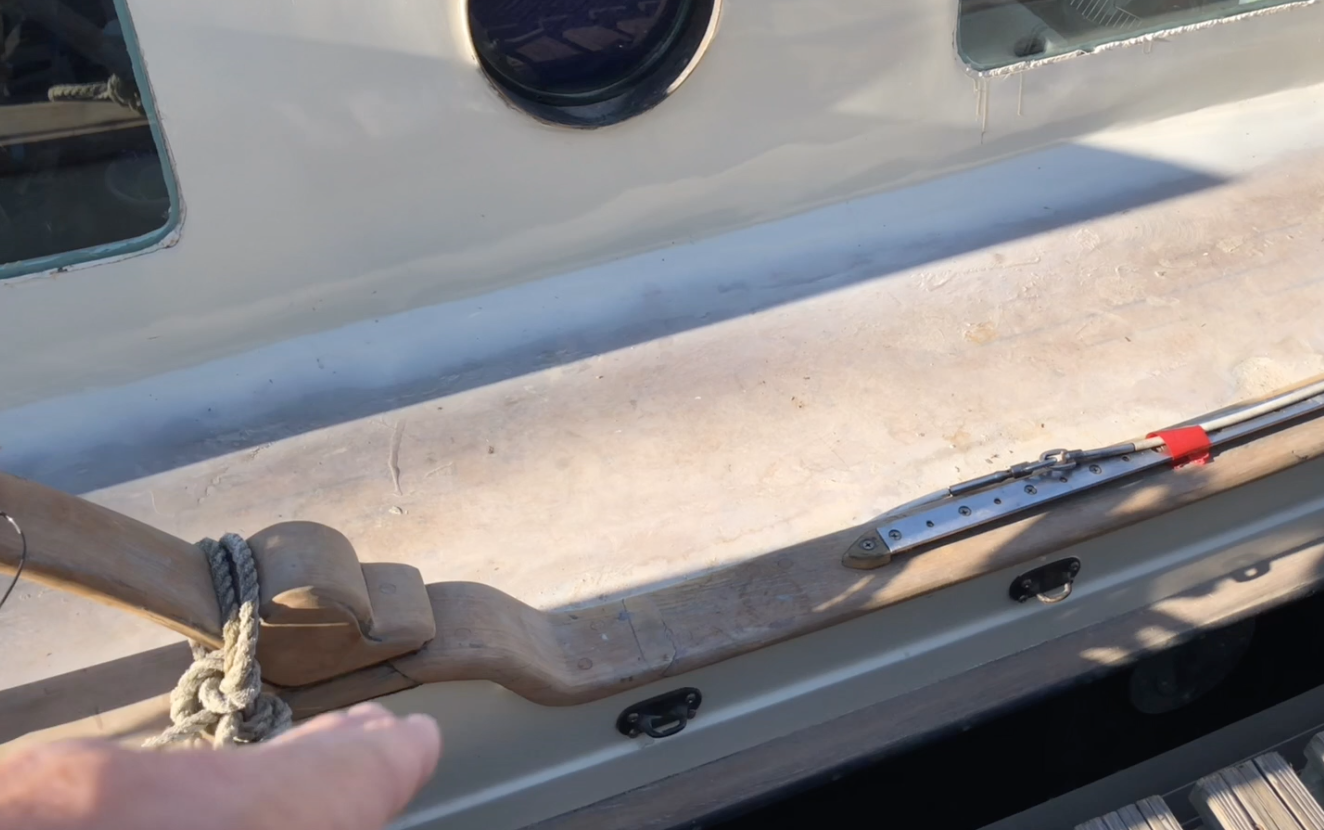
 We also needed to think about how the new solid handrails would attach to the bow pulpit. When the boat had lifelines, the lifelines attached near the top of the pulpit rails. This was ok, but a bit awkward as they were wide and did not provide a good hand hold when walking through the anchor well to the bowsprit. We realized that we could not follow the toe rail all the way up to the pulpit. While the lifelines were too broad at this part of the boat, following the toe rail would make the new handrails to narrow. We needed a way to walk through the anchor well onto the bow pulpit and have enough room to walk around the inner forestay and sail.
 We again found our solution in compromise. We decided to follow the curve of the toe rail, right up to the small stay that helps stabilize the bowsprit. This will keep the rails from sticking out too far to be comfortably used. It will also give us enough room to walk around the forestay with something secure to hold on to. We believe that this will enhance the look of the boat AND add to the security and usefulness.
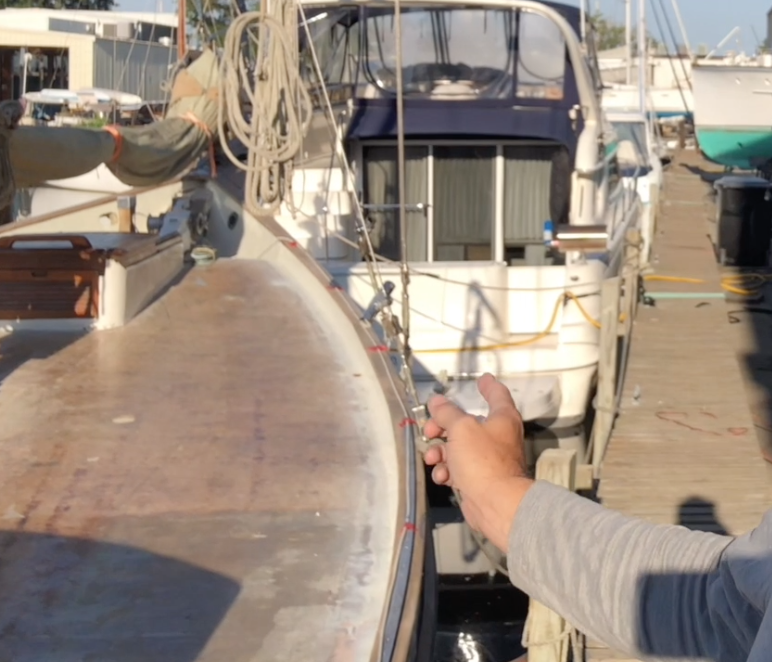
Once that was measured and marked, it was time to start working out the number of stanchions that would be needed. We needed to have the solid rail go from the forward side of the boarding gate all the way to the pulpit. We knew that the forward most stanchion was going to be just behind the step down into the anchor well. We marked both the forward stanchion location, as well as the forward side of the boarding gate.
Once that was complete, it was time for some simple math. We measured the distance between the two and made sure to follow the curve of the boat).
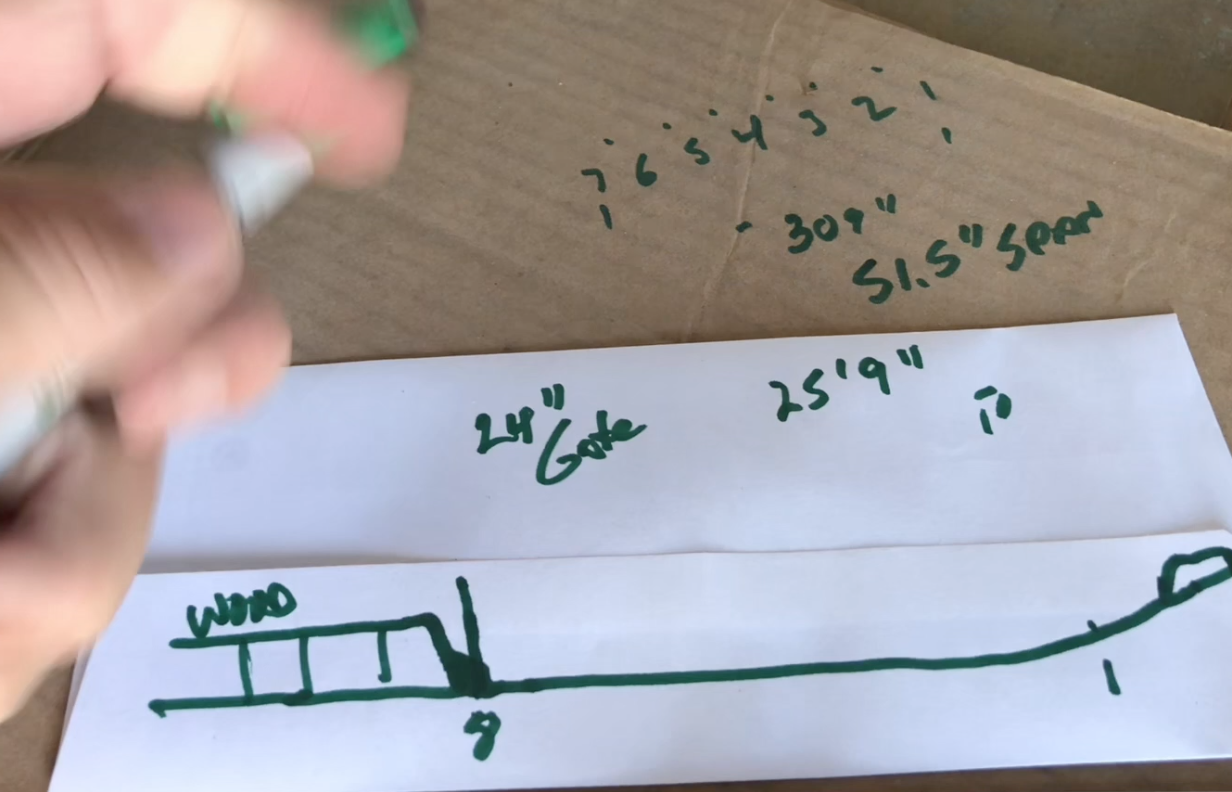 With that number determined, it was now a matter of dividing it by the number of “gaps” between the stanchions. For us, that meant that each stanchion should be 51 and a half inches apart. We marked those locations all the way along the toe rail and used tape to note their location. We then determined if any of those locations would interfere with anything on deck. Sadly, it did, so we had to adjust a bit.
On our deck we have several deck fills and some scuppers that allow water to drain off the deck. One of the stanchion locations was going to be right in front of a scupper. We adjusted it aft about 2 inches and then changed each one in front of it as well to make each one equal distance from the other. By moving the one stanchion back, it allows a free flow of water along the deck out the scupper.
Now it is a matter of getting with Nick the fabricator and share the locations. We shared how we marked them and made sure that there were no concerns he had that we hadn’t thought of yet.
So far so good. Let the progress begin!