
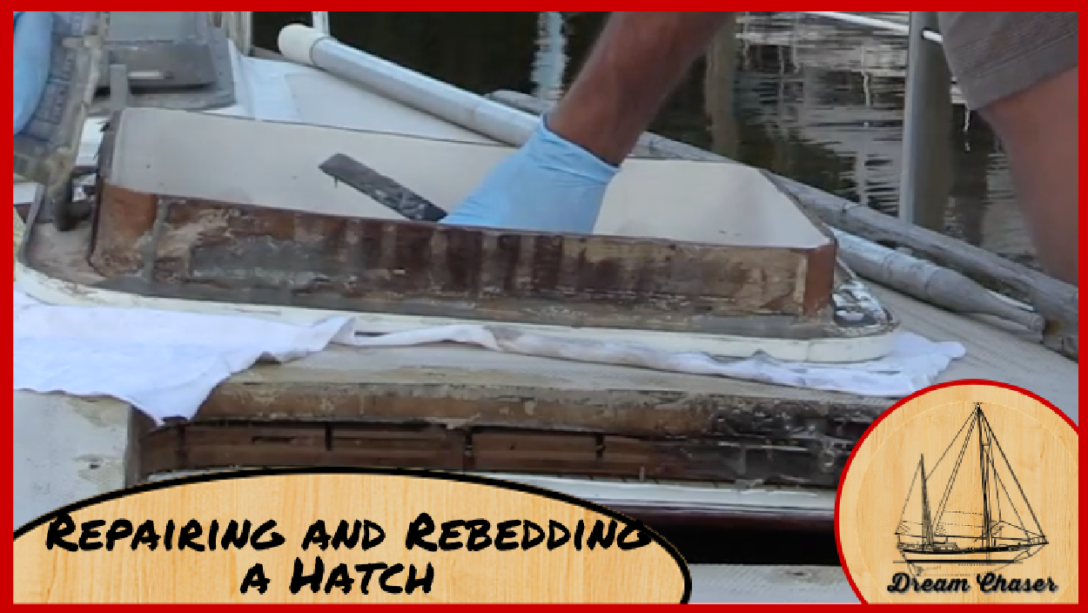
If you are reading this article, I hope you have come here from Part 1 that covers Removal. It can be found here at “How to Fix a Leaking Hatch – Part 1.”
In our last blog post (and accompanying video) we covered how to remove the hatch from the boat and clean it. In this post, we will talk about the repairs and the assembly. The next 2 steps to a dry boat are repair and re-installation.
With the parts all clean, the next step is to focus on the repair. Two primary repairs may need to be done depending on what you uncovered during the identification of the leak, and it’s source.
- Your leak is coming from the seal between the lens and the frame (meaning there is not a good seal between the 2) or
- Your leak is coming from between the frame the boat deck itself meaning you have a bedding issue.
This blog is going to cover the leak coming from between the frame and the boat itself. If you notice the leak coming from the space between the lens and the frame, click here for our post on that topic. Everything you need to know about Bedding a hatch lens
Assuming you have followed the steps in Part 1, let us start repairing.
Most hatches are made of an aluminum or plastic frame with the vast majority of them being aluminum. If you have a plastic frame, care will need to be taken in the following steps to ensure that you do not gouge the frame while cleaning them.
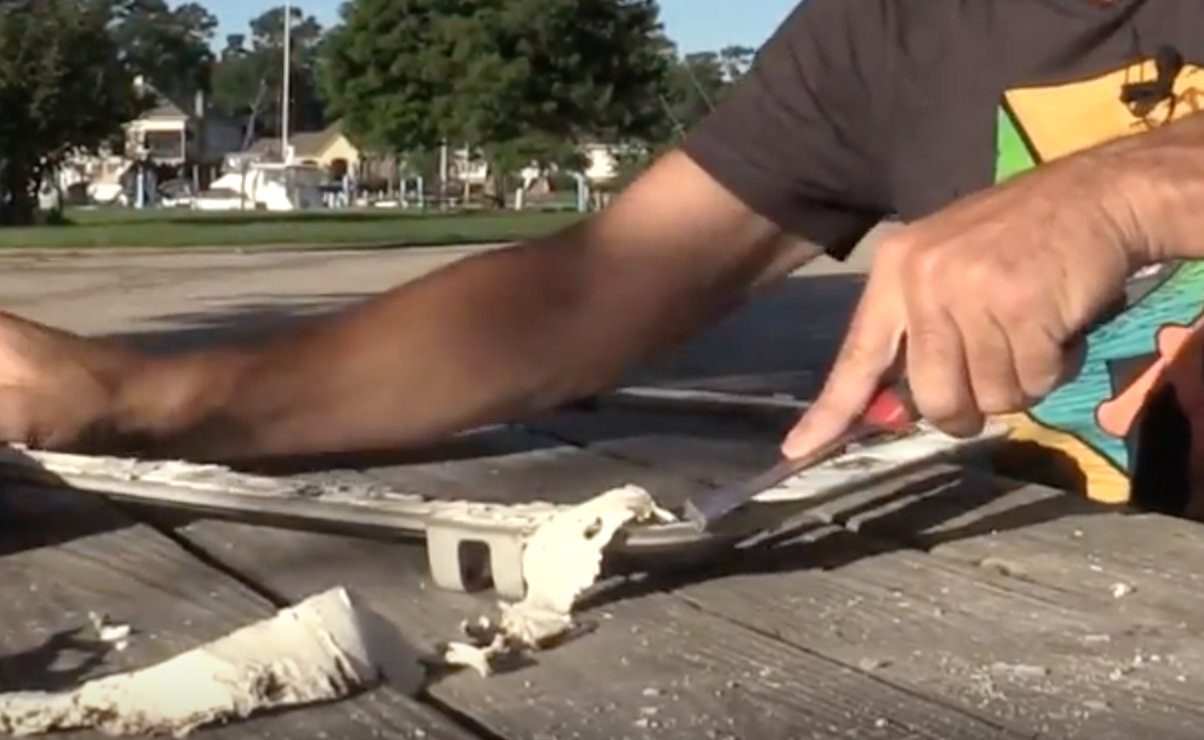 Scrape and remove all previous bedding material from the bottom (mating) side of the frame. I typically do this with a straight razor or paint scraper. Do the same thing on the mating surface on the boat itself. Take note that many boats will have a non-skid pattern in the top layer of the deck that will make it challenging to scrape all material from the low spots in the non-skid pattern. What worked best for me was scraping as much as possible. I would then scrub it with a 3M Scotch-Brite pad or something similar using acetone to break up the rest of the old material stuck in the low spots. I use gloves most of the time when doing this kind of work. I am not sure if latex works, so I always use nitrile gloves and keep them on the boat for these types of jobs.
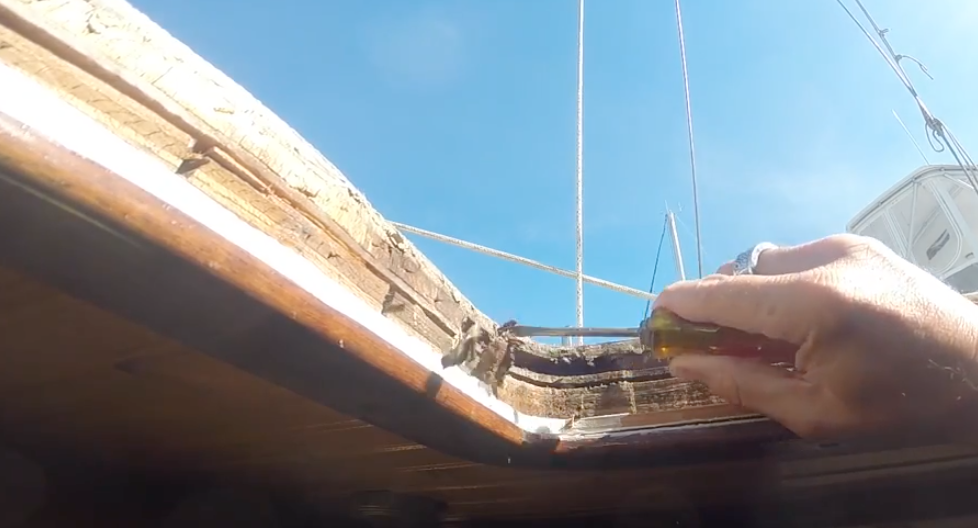
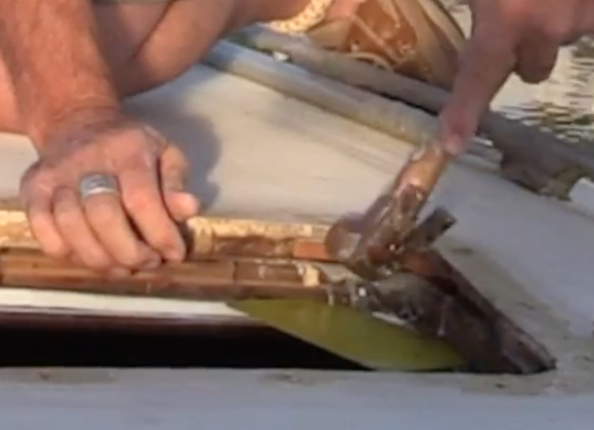
Clean all surfaces with acetone and inspect the area for additional repairs. In our case, we had some core at the hatch opening that was wet. The core was an easy fix and done by scraping out the wet wood, drying it out and replacing the core. I scraped out the wet core with a screwdriver and scraper. Use a shop vac to suck out any dust or small portions of the core that may be left. I continued to use the screwdriver and scrape out the core until I got to the core that was hard and not soft. The soft core was about 3 inches or so in from the opening for the hatch. For us, it was only on one side and one corner of the hatch opening. I then used cardboard pushed into the opening and marked with a pen as a template for the replacement core.
Tip: Rather than attempting to put in one piece of replacement core, make 2 or 3 small pieces to make it easier to insert and fill the voids entirely. The epoxy you use will make it one solid repair when cured
I used some mahogany hardwood that I had left over for the new core, but you could use plywood as well. If you do, I would recommend painting the cut edges with epoxy (where the laminate layers can be seen). The most vulnerable part of plywood and the place that wicks moisture into the material the easiest is on the edges.
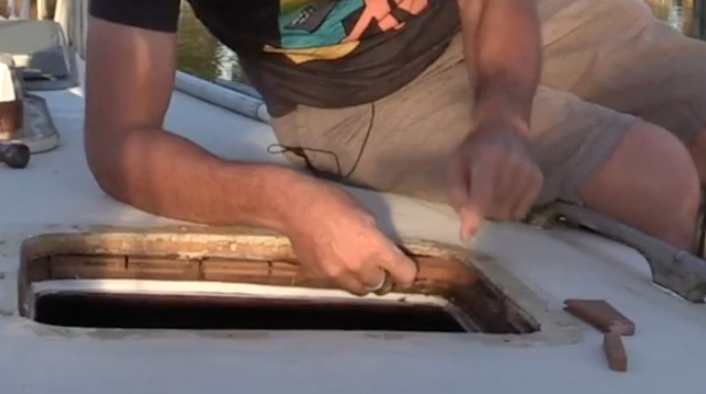
To insert the core, I dry fit each of the three pieces I cut to ensure they would fit well first. I then mixed up some thickened epoxy and pushed some into the openings where the new core material would go in. I then spread (buttered) each piece of mahogany on all sides and slid it into the opening. I repeated this same process with all three pieces and tapped them in tight with a hammer and end of a screwdriver.
 I then spread a bit of the thickened epoxy on the inside exposed edge of the hatch opening to provide a smooth surface where the three different pieces of core were not an exact match. I was able to create an epoxy contour of the hatch opening cut into the fiberglass.
On our Gulfstar, we had something a bit unique in that there is a spacer that goes into the hatch opening on the deck of the boat. It provides a decorative trim ring that is visible from inside the boat and also provides a raised flat surface to install the hatch frame. I suspect that this has two purposes on this boat. The first being the decorative ring that protrudes through the deck reducing the amount of fine trim work to be done down below. The second benefit is that it has a slight taper on the top surface. It allows the decorative ring to provide a flat surface for the hatch since the deck of the boat has a slight contour. Most boats won’t have this so I am not going into detail in this blog post on how we worked on this part. If interested, you can see it in more detail in the videos related to this story (See below).

Contoured the repaired edge with thickened epoxy
With everything clean and repaired, it is time to rebed the hatch. If the company that manufactures your hatches is still around, check with them for their recommendations. Sadly most of these businesses are gone these days, so I will share my experience as a boat owner.
We wrote an article about sealant types and recommendations on what ones to use in which situations. I like butyl tape for most bedding jobs. However, I want to ensure something is going to have constant sandwiching pressure when using it. It is NOT an adhesive so keep that in mind when using butyl tape. Because we had two different surfaces that needed to be bedded, we chose the material that made the most sense for each of these.
On the decorative ring that mounts to the deck and through the hull, I used BoatLife Life Seal. Without going into all the detail on sealants here, I will just let you know I did this because of its combination of high sealing ability based on Silicone and it great holding ability based on Polyurethane. Since posting our video on this subject, others have shared with me that Dow 795 is also a combination material, but I have not used it personally. The advantages of the Dow product is the variety of color that it is available in where LifeSeal is only available in clear.
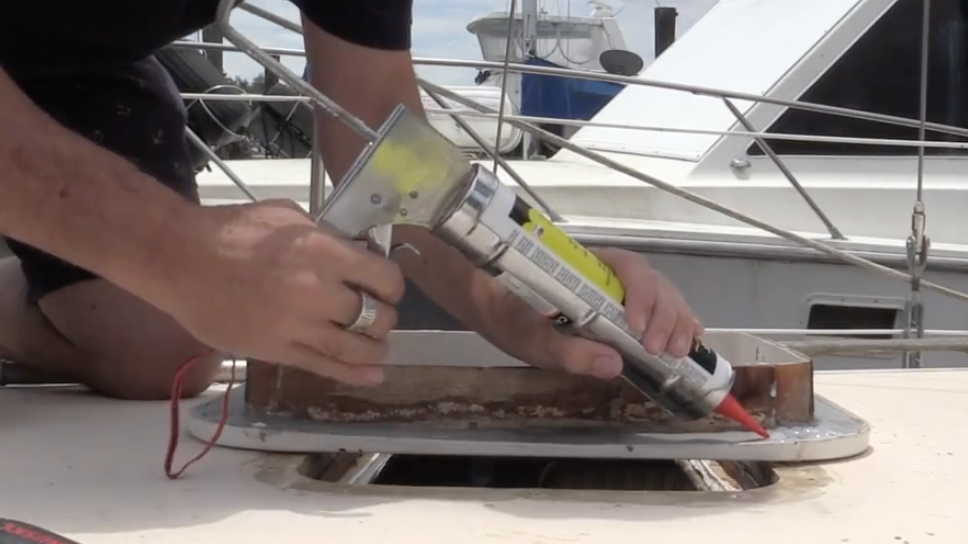 I applied a thick bead of LifeSeal around the underside of the decorative ring and inserted it into the opening on deck. I tightened the screws loosely and let it dry for about 3 hours and then cranked the screws tight. Doing this allows the material to start to harden and allow the screw pressure to compress the material further.
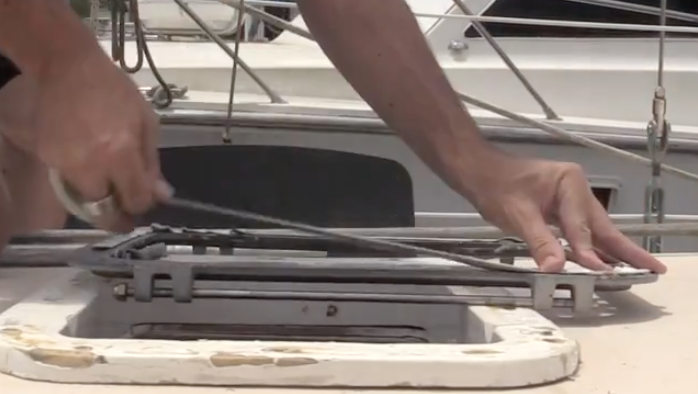 To install the hatch, I used butyl tape. The surfaces between hatch frame and top of the decorative ring are both flat and smooth. The hatch is held down with a dozen or so screws that go all the way through the ring into the core, so there is a source of constant pressure. To apply butyl tape, just apply it along the outer edge of the frame and leave the paper coating on the top side in place to avoid getting any dirt on the sticky surface until you are ready to mate the hatch frame in place. If your hatch frame is wide enough to use two pieces of butyl tape side by side, go ahead and do that, but only if you can put the two strips next to one another.
When ready to mate the surfaces, peel the protective paper film off the tape and set the hatch in place. I also will wrap butyl tape around each screw just below the head to ensure that more butyl tape smooshes down into the screw opening as well. Most hatches will have a countersunk divot that the screw head goes into and you don’t want water to seep in around the screw head. Compass Marine did a great write up on bedding with butyl tape and use transparent surfaces so you can see what happens on the mating surfaces. I encourage you to read it here.
Many years ago, I had bought butyl tape at an RV supercenter and did not have good luck with it. It dried out in no time and just didn’t seal well. Then I found the site from Compass Marine where they sell their Bed-It Butyl Tape which is formulated for marine use, and I haven’t bedded with anything else for years. You can order it from Compass Marine.
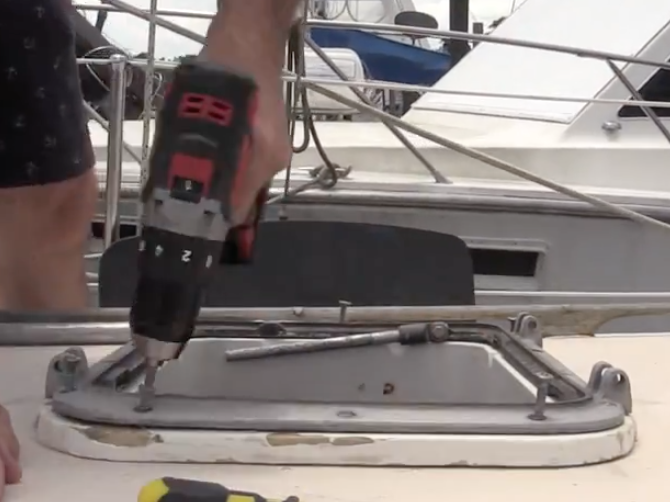 Now tighten all of your screws or bolts down and you are set. Some hatches will be through bolted; others will be with large screws that attach to the core. Whichever your boat has the process is very similar. A small amount of the butyl tape will come out the sides of the frame, this is normal. The cleanup is a lot like you used to do when you were a kid and needed to clean bubble gum off your face when the bubble popped. Take a small dab of butyl tape and roll it between your fingers into a ball, now dab that onto the portion that has squeezed out from below the frame and pull. The butyl tape will stick together and remove the part that is coming out from under the frame. Repeat this process all the way around the hatch.
We had one last step because of our sealant choice on the decorative ring, and that was to put one additional bead of lifeseal all the way around the decorative trim and the deck of the boat.
I hope you found this article useful and if you did, by all means, please share it with others that may also benefit from it. One other note on sealant materials. Beckson makes ports that have plastic frames, and we had these on one of our boats. Beckson specifically recommends silicone only for bedding. I won’t post anything in opposition of the manufacturer, but I may not agree 100% with that recommendation given the advancements in adhesives and combo adhesives mentioned above.
Check out the video for Part 2 as well.