
Have you ever wished you had just a little more confidence in doing fiberglass repairs or felt comfortable fabricating parts for your boat? Well me too, But to make it worse, we are about to embark on laying fiberglass down on the whole deck.
I couldn’t help but worry if the first fiberglass project I did was the actual deck of my live aboard crusing sailboat
In addition to needing to re-glass the deck of the boat (insurance against the possible leaks that may be formed by the removal of the old worn out teak decks) we also want to make another deck box to hold chairs, life jackets, a hammock, propane, etc. We want matching deck boxes on both sides of the boat outboard between the coach house and the mast. The thought then went to making a small box that we can use as a test (Even before we make the large deck boxes) our of thin plywood and reinforced and waterproofed with fiberglass.
This job should allow us to learn all the necessary skills needed.
- Design and construct the rough structure in inexpensive material
- Prepare it for fiberglass laminating
- Creating fiberglass fillets
- Using Screws and glue to hold pieces together until Fiberglass cures
- Hand laying of fiberglass (blending resin and materials together)
- Fairing the surface
- adding framing or creases for increasing strength
- Gel coating and finishing options
The project did not disappoint in all of those goals. To share the good, the bad and the ugly, I will share the way we went about this project. I will also share what we think worked well and what did not. I also recorded all of this in a 3 part video series that may also benefit you if you are doing any fiberglass over wood project.
The video series can be found HERE on our Youtube Channel “http://youtube.com/svdreamchaser
If you find any of this useful please do subscribe to our channel by clicking here.
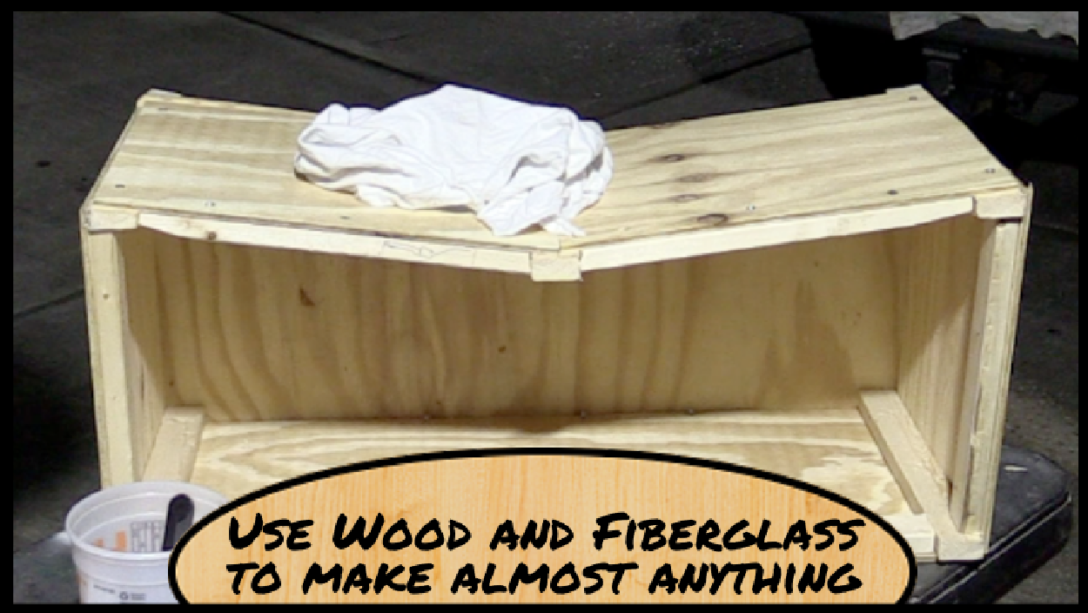
The first thing required was to come up with the dimensions and the design for the box. We decided that we wanted a small box that would be just a little wider than the butterfly hatch on deck and that would sit between the hatch and the coach house. Rather than create a rectangle box on this part of  the deck we wanted to have the deck box have the general shape and contour of that part of the deck. The coach house is longest toward the bow in the center of the boat and then angles back toward the gunnels. This allows for a breaking wave coming over the bow to be “plowed” to the sides rather than hitting a flat surface. So the design of the box needed to have the inverse of that. We decided on a box that is 27″ long across the front and 14″ wide on the sides. Then the back is not rectangular. Those 14″ wide sides come down to about 11″ wide in the center.
The box was assembled with 1/4 inch plywood and cheap pine 1 x 2 pieces cut for support in the corners. Usually you would think that all this should be hardwood being exposed to the elements, but in this case, we intend to cover this entire thing with Fiberglass making this only the “core” for the glass box. I used stainless steel wood screws that I countersank flush to the plywood so that the glass could be smoothed right over them.
One lesson learned would be to use wood glue or thickened epoxy resin to glue the plywood to the 1 x 2 supports in addition to screwing them.
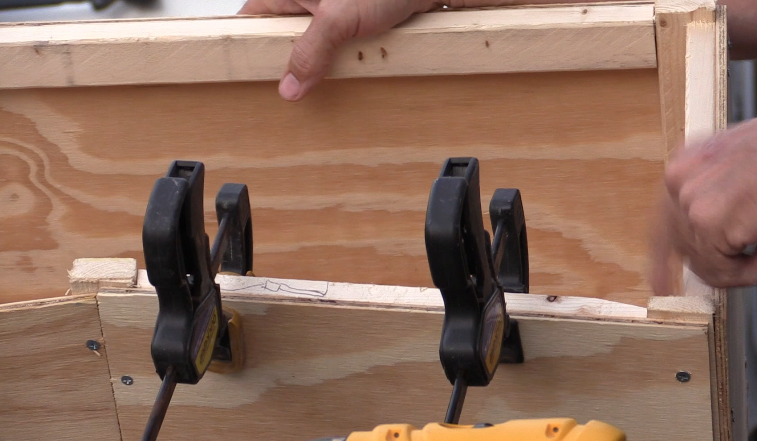 After adding the plywood “bottom” to the box, I also decided to add a 1 x 2 frame along the upper sides to provide for some more strength and allow the deck box to double as a bench to sit on as well. The photo here shows the 1 x 2 supports being screwed to the plywood and being held by clamps, so they don’t move while attaching them in place. Adding this frame made the fiberglass work a little more tricky, but I believe this was the right way to make the box stronger.
The last part of the wood work was coming to a closure, and I realized that I needed something to allow the deck box to sit “sturdy” on deck. Because the boat deck contours from the center down toward the sides, the box may sit like a teeter totter on deck with the center of it resting on the deck 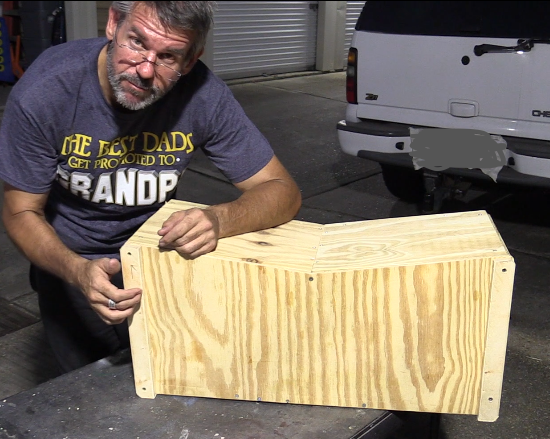 and the two outer edges above the surface. To account for this, I added two 1 x 2-inch legs that run for and aft on the box. This will allow them to set firm to the deck. If we take water over the bow, it would be free to run under the deck box toward the coach house and out along the gunnels as designed. In the photo to the right, the box is sitting on the front side, and the bottom is toward the camera. You can see the two outbound legs that are positioned to take the weight of the vertical supports as well toward the top of the box.
This finalized the wooden portion of the project, and it was time to start to get some fiberglass onto this wood. I decided to use Polyester Resin rather than epoxy because that is what we will be using on the deck of the boat. It seems a little less forgiving in its mixing and requirements so I wanted to be sure that we wouldn’t have any issues with it. Don’t get me wrong, it is not hard but given this is a “practice run” we wanted the practice of what we would be using.
In the next blog post, we will start the process of fiberglassing the box as well. Click here for “How to Make a Fiberglass Deck Box for your Boat – Part 2.”
There is a full list of materials and tools we used on this project (HERE) along with links to most of them on Amazon for your convenience.
If you prefer to watch this in video form, Video 1 corresponds to the topics described above.