
After the last week’s discovery of the additional problems with Rot, we knew we had to rethink our next steps. After speaking to the yard experts and starting to form our game plan for the roof, we decided to also focus on the money and how much was (or wasn’t left).
We talked to the yard about the work we still wanted to get done and received firm prices to complete any of those items. This allowed us to prioritize the work as well as discuss next steps. Michael suggested getting the ports back in if we are going to work on the roof so that when the sanding is going on, it doesn’t get all that dust back down below again. This was a great idea and allowed us to focus on something other than the roof for a week or 2.
We had trimmed the ports already and dry fit the glass to be sure that the windows all fit into each opening. Because we had modified the coach house openings as well as had new glass cut, everything had to be fit for that specific port and opening.
This kind of reminds me of the 100-year-old house we used to live in. Nothing was square, and everything was just a little bit unique to the similar item in the next room. These ports are no different. While the two front ports are mirror images of each other, they didn’t fit in both openings the same.
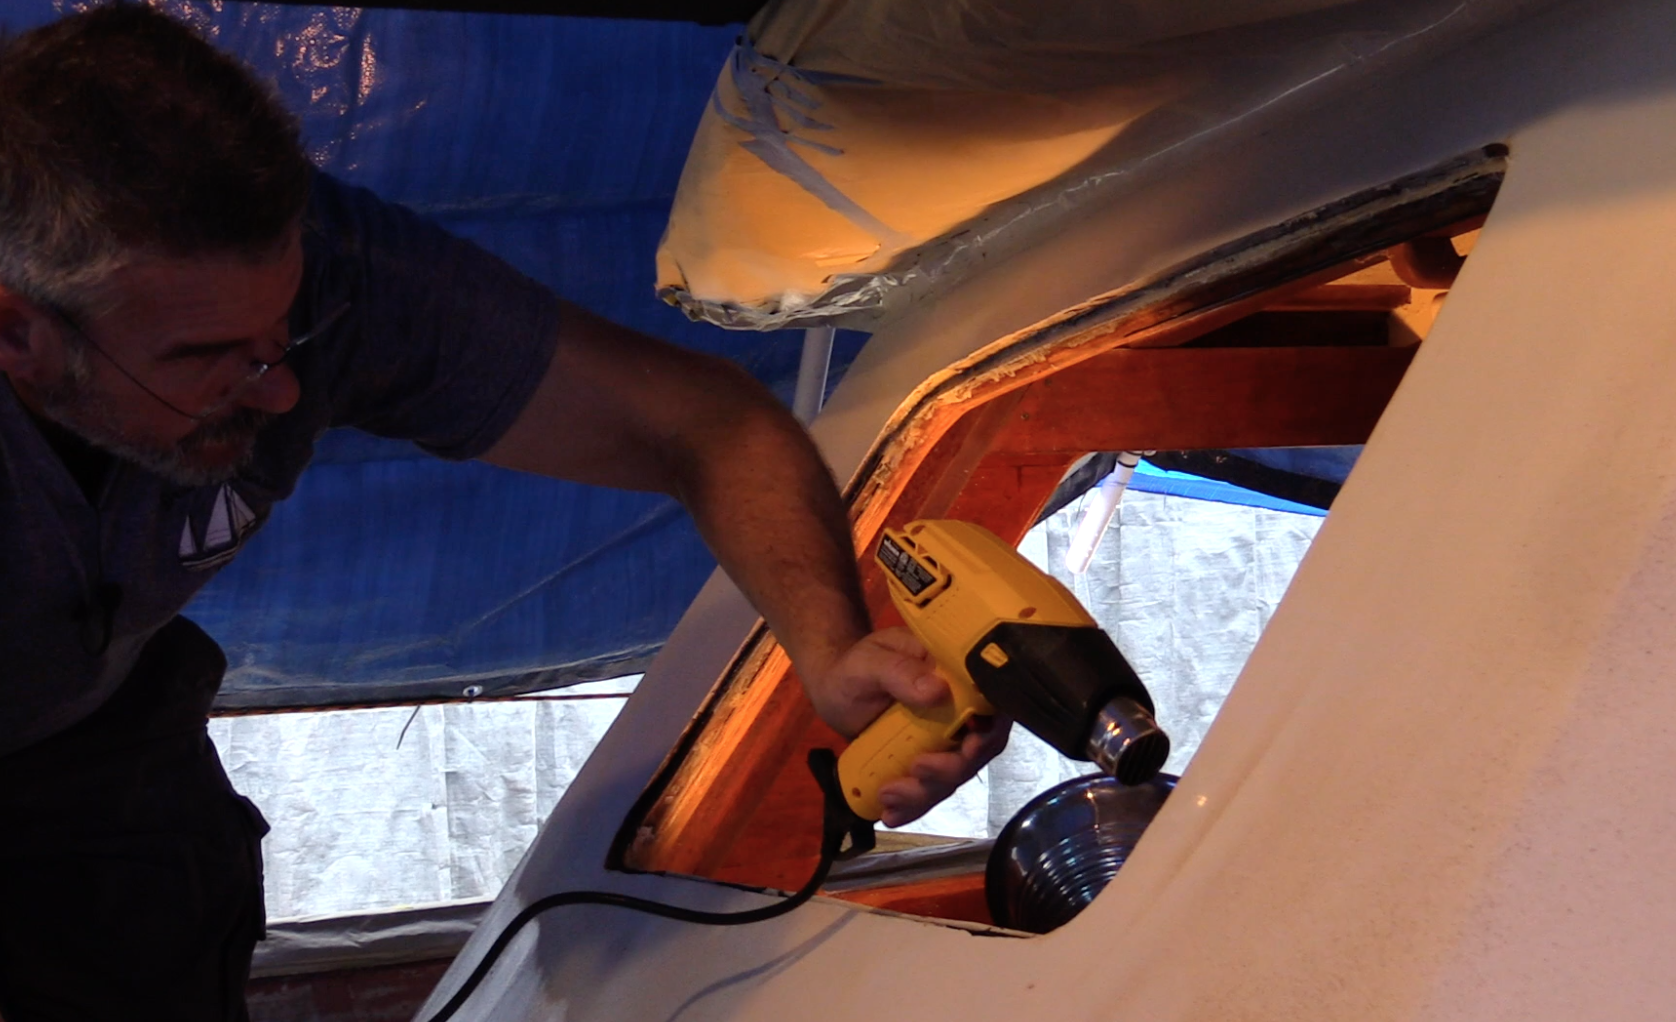
I marked each port with a dry erase marker and wiped the frame down with Acetone. After getting each frame wiped down, I wanted to be 100% sure that they were completely dry before installing the sealant. I did this with a small heat gun. These are inexpensive and serve several great purposes on board a boat. I also use mine to evenly seal heat shrink rather than a lighter and they are great for scraping old varnish by heating it just in front of the scraper.
 I tried several different methods for installing the ports. Because of the size of these glass panes, they are a bit heavy. If I just set them into the sealant, the weight of the glass would likely allow it to settle all the way to the lowest point resting the lower edge of the glass along the fiberglass base. I didn’t want this for two reasons. First was that it would not allow enough room for sealant and I was worried it might develop a leak at that spot. Secondly, and more critical for me is that I didn’t want to create any “hard edges” where the edge of the glass was making direct contact with a hardened surface. With the boat beating into rough seas or in a storm, I didn’t want to chance any flexing in the vessel to allow those two hard surface to hit and potentially crack the glass. I used suction cup handles on both the inside and outside of the glass to allow it to be more comfortable to manage when in the actual opening.
 To give the glass that space or cushion all the way around it, I needed a way to hold it in a suspended state while the sealant cured or 24 hours. I used small tile spacers that were 1/4″ in thickness. They worked great. I put some along the inner lip to keep the glass from sitting all the way on the lower edge of the lip as well as the bottom of the rim. These are cheap and were an absolute godsend for getting this job done well. The best part is that they are made of foam so very easy to cut out with a razor blade if for some reason you get some sealant on them and have a hard time pulling them out when it cures.
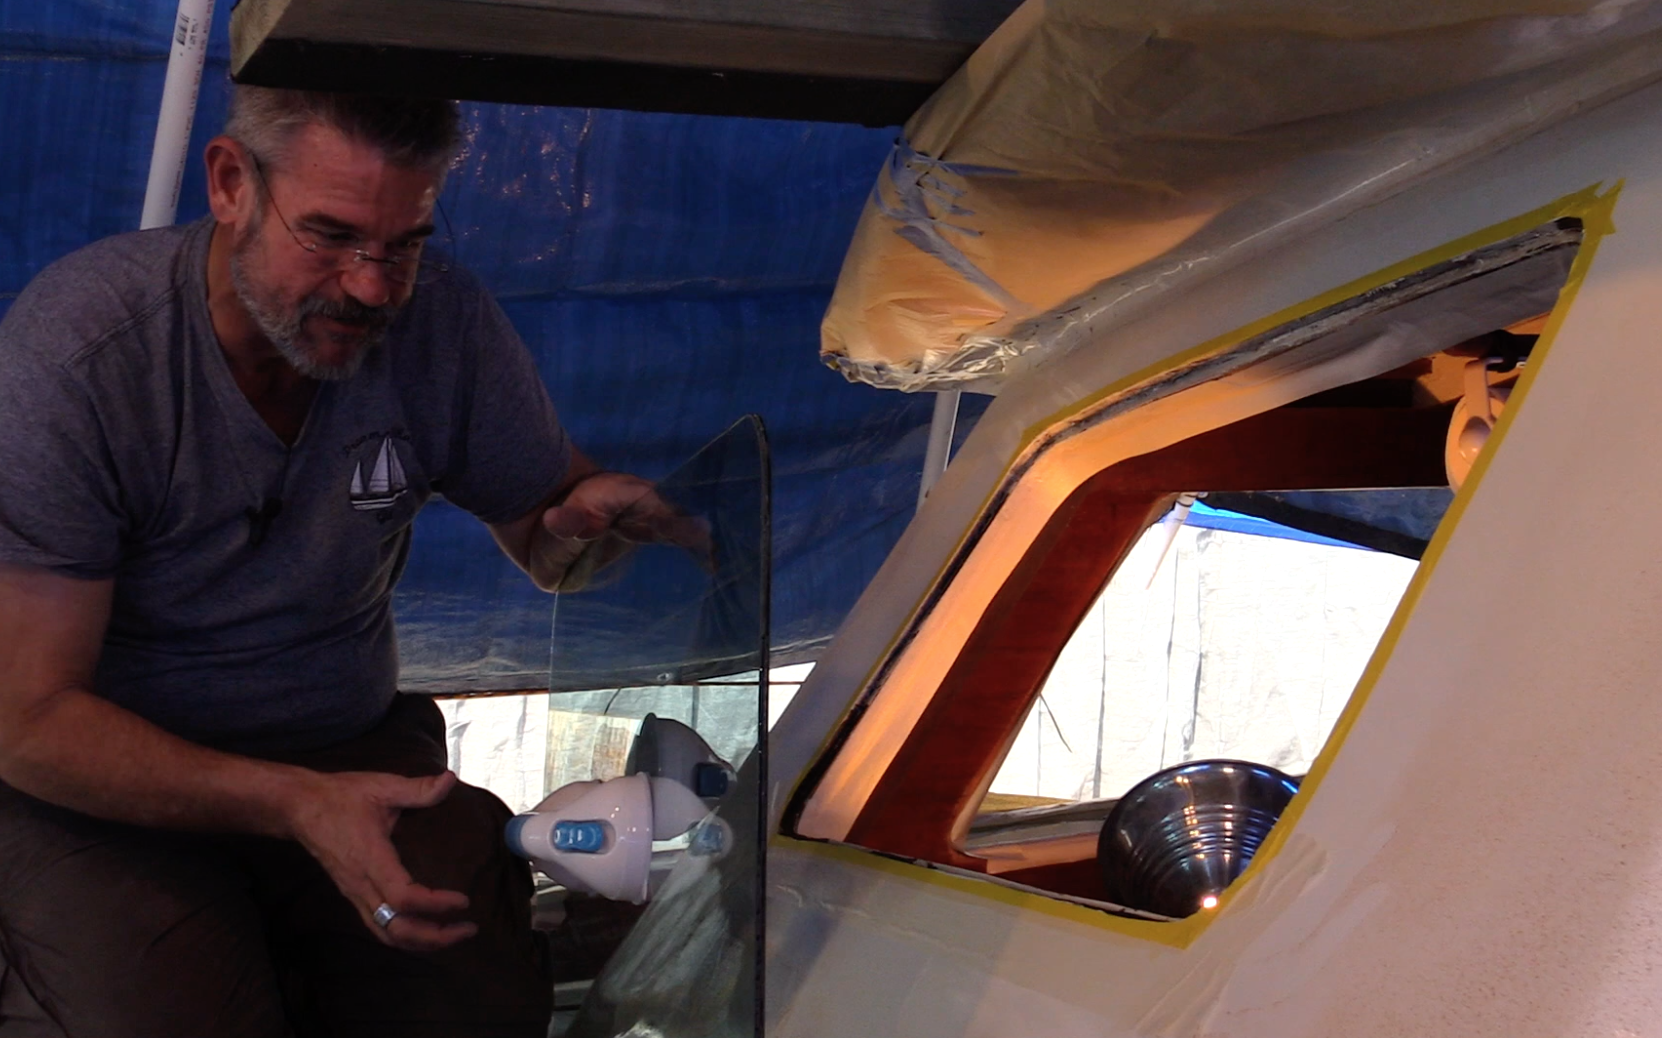
It was now time to put the bedding material in the opening. I removed the glass and focused first on the inside channel of the opening. Specifically, the part that the inside edge of the glass sets into. To ease cleanup, I added a painters tape around the outer edge and inner edge of the opening so that any squeeze out would be easier to clean up.
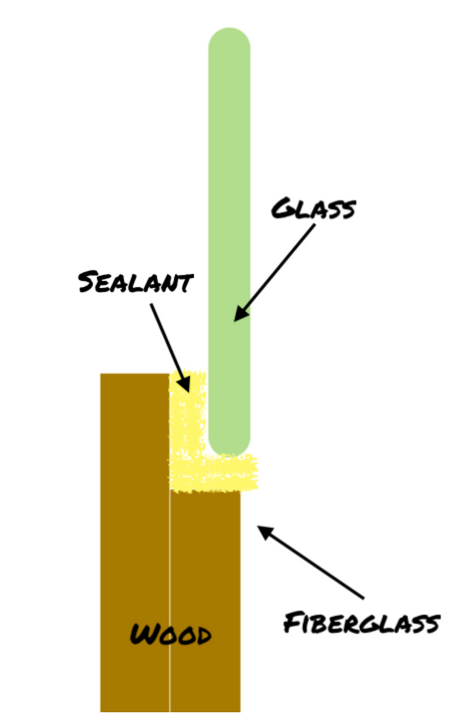
In the diagram, you can get a closeup view of what the surfaces look like that are being sealed. They were initially wood, but if you recall from an earlier blog post, we sealed the inside edge with epoxy to ensure that there was not a path into the wooden core of the house if the port should develop a leak. (or at least not a simple path)
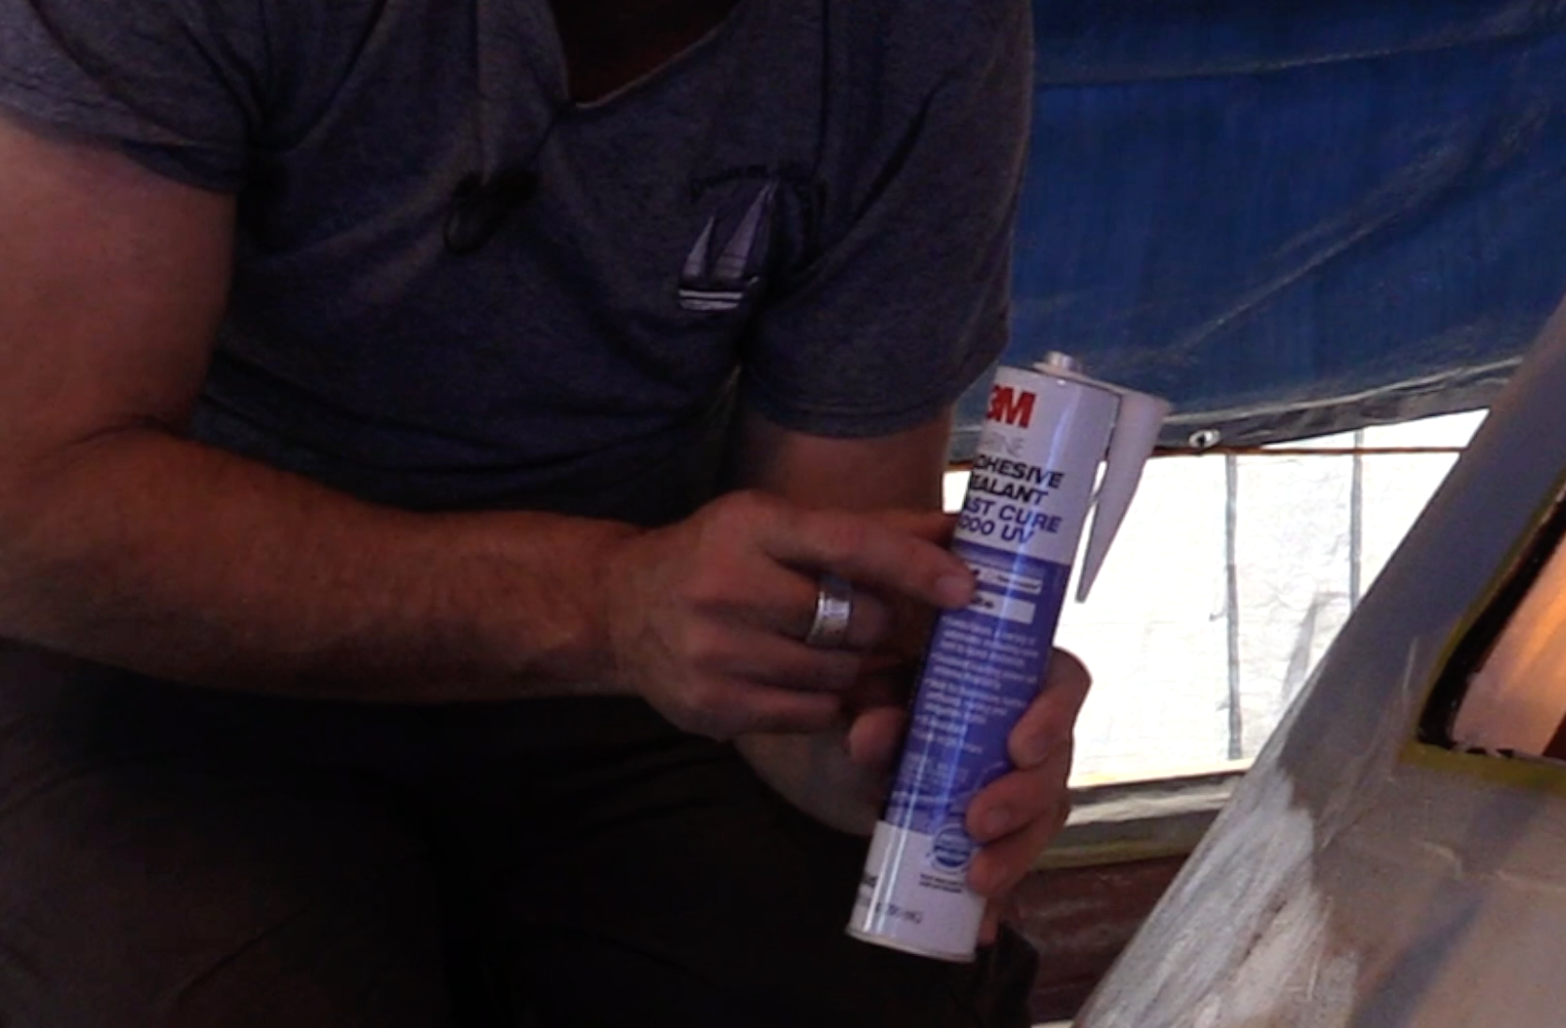 I chose to use 3M 4000 UV sealant for this task. We did an extensive video on the proper sealants and adhesives to use depending on the material you are bedding or sealing. It is important to note that there are two ends of this spectrum, Sealants & Adhesives, There are combination products, and for most bedding of glass into a frame, it is a combination of these two that is needed. Normally I have used Boat Life’s Life Seal. However, I noticed that West Marine is no longer carrying this. (at least not in my local stores.)
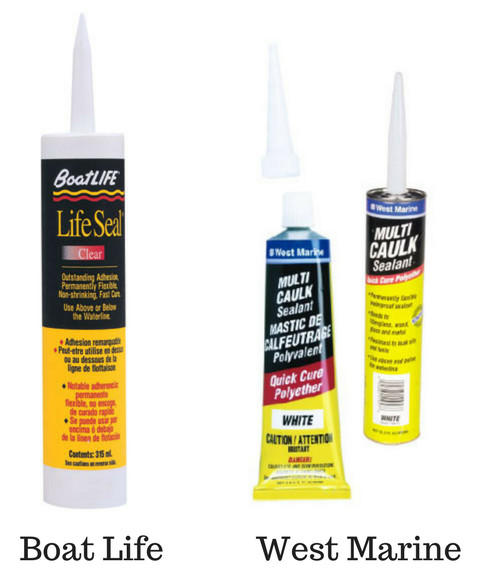 Additionally, and I think this is a bit sneaky, they have rebranded the West Marine packaging of their in-house product to look just like the Boat Life product line. Seems a bit shady to me.
The 3M product line is known to most boaters. We have all heard of 5200. I like to call it Devils Juice because of how hard it is to clean up and remove if you ever need to. 5200 is the perfect sealant for bronze fittings below the water-line, but if you ever need to remove something that was adhered with 5200, you will need to cut or grind it off. It is Permanent. (with a capital P).
4200 is the more helpful sibling to 5200 and remains somewhat pliable over time. This is a common material that is used for above the water-line bedding and repairs of things like rub rails, stanchions, etc. The 3M 4000 product is similar to the 4200 in that it is semi-permanent and can be cut with a knife if needed after it cures. Additionally, the 4200 product remains pliable to absorb flexing without cracking. I am sure this is within a reasonable tolerance, but feeling the cured product you can immediately tell that it remains rubbery and flexible. The last benefit of this material and why it is especially useful for bedding ports is it also has a UV protectant added to it to help extend life in the harsh sun. Click HERE for the Data Sheet on the product and additional specifications.
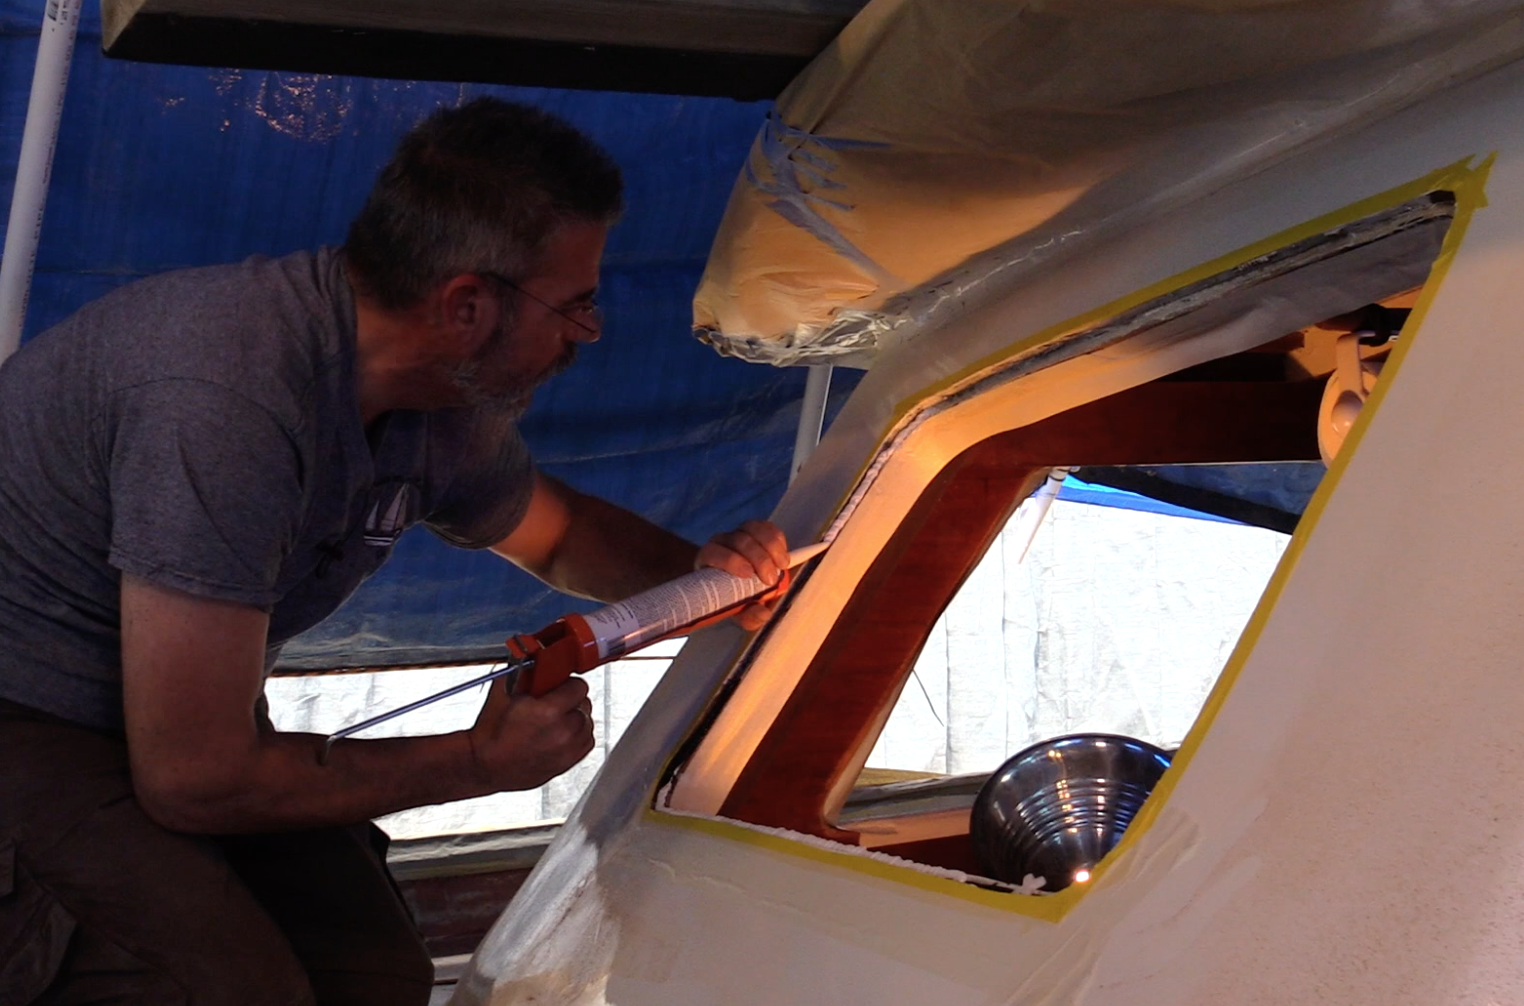
After applying a bead all the way around the port and ensuring that I had my tile spacers all in place to hold the port at least a quarter of an inch away from all surfaces, it was time to now run a bead on the outer lip as well. This may have been overkill as I believe I wasted a bit too much of the material but I wanted to make sure that these ports did not leak. In the photo of me applying the caulking, you can also see the wide masking tape that is run along the inside of the port. This is the area that I had sanded previously and I didn’t want to try to clean the sealant off the bare wood if there was squeeze out, which I thoroughly expected.
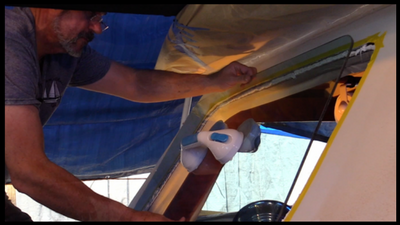
 I gently put the port into the opening, and as you can tell from the photo, I was still very leery of relying 100% on the handles that were attached to the glass. While they worked great for moving the glass around and minor adjustments, I would not carry the glass by the handles only. After all, I had all new safety glass cut to fit each of these openings, and while I felt like we got a great deal on it, I certainly didn’t want to drop one of these panes after spending $600 on all that glass. Once I laid the glass into the opening, I validated again that all of the spacers were still in place. Several of them had slid around slightly as I positioned the glass into place and had to be repositioned of fully inserted to do their job.
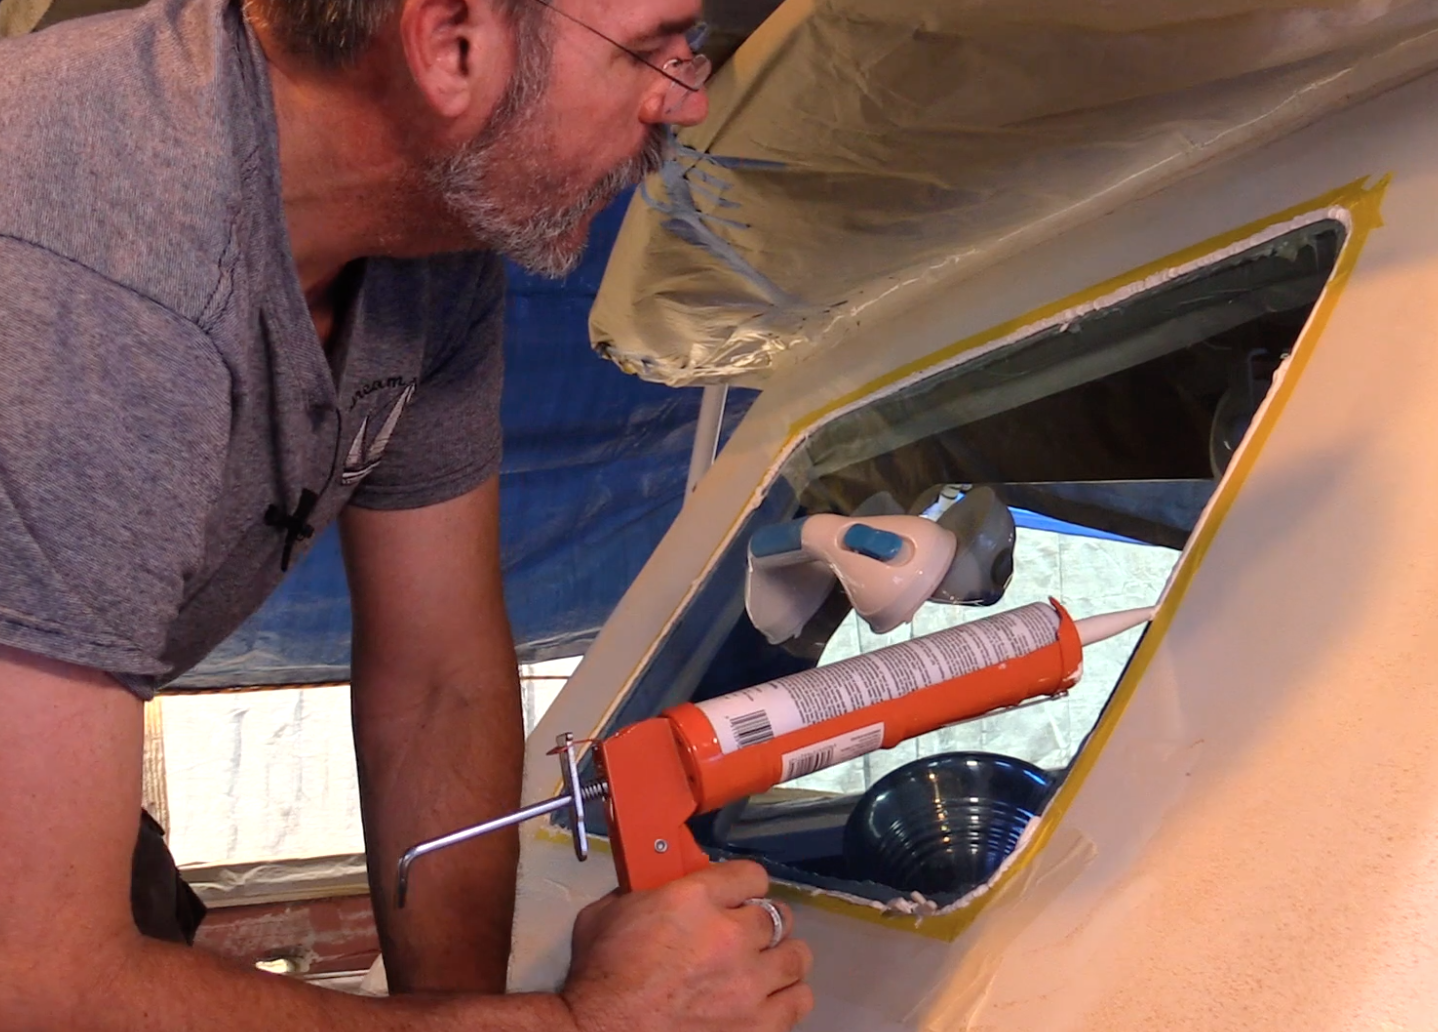 The last step was to apply another bead of 3M 4000 around the outer edge to fill in the rest of the gap between the outer edge of the opening and the outer edge of the cut glass. I purposely applied a very thick and generous coat of sealant in this application moving slowly with the gun to ensure that the material was put in under some pressure to ooze into all the gaps and openings. In some cases, I could even see the stuff making its way around the side of the glass and behind it which was a great way to see that it was filling the void completely. I also applied it thick enough that the caulking was sticking up above the glass and fiberglass edge. When it cures, I will come back and cut it.
But More on that in the next blog post as this dries and I move on to the next ports.