
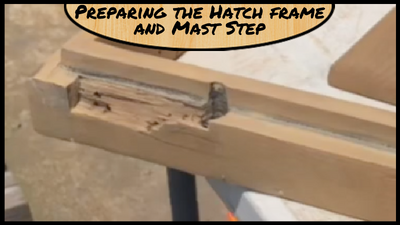
About a year ago, we had an issue and broke our hatch frame. Our hatches are all wooden, and while they hinge, they don’t have a stopper. That means that the hatch can open all the way up and to keep it open, it must be propped with something.
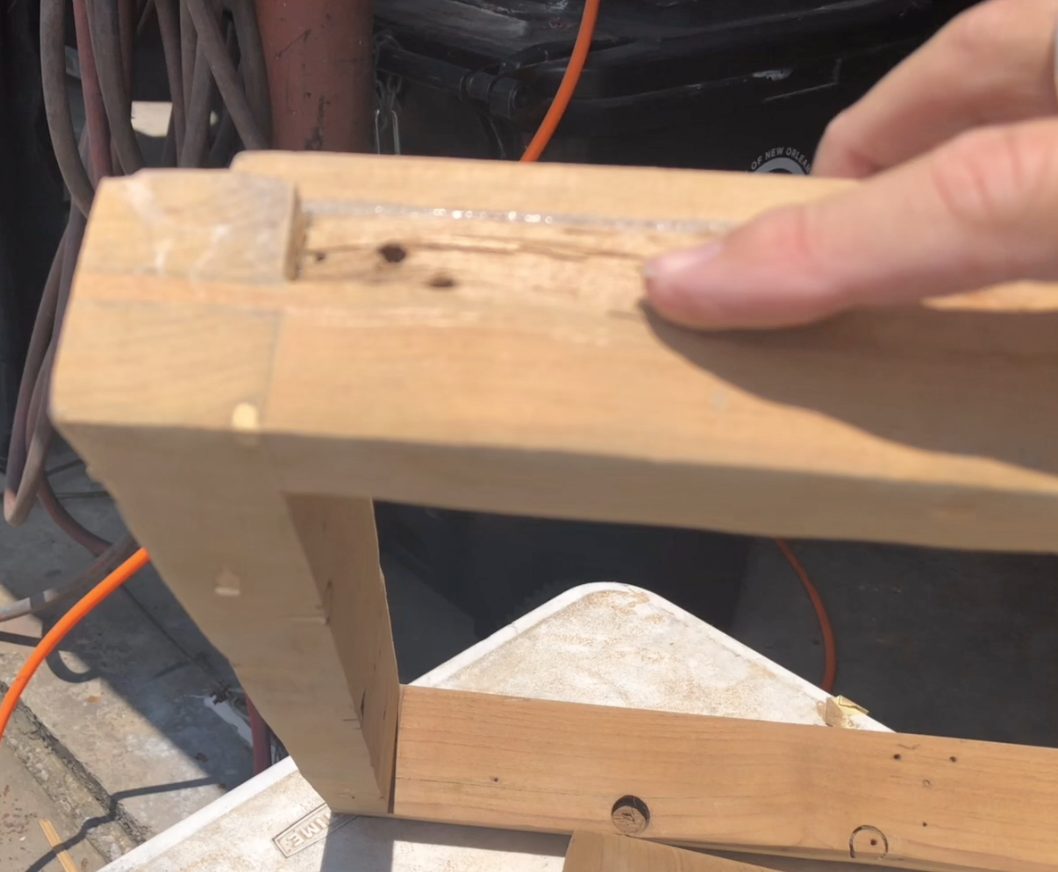 The downside is that the hatch won’t open 180 degrees. It only opens about 120 degrees, and then the hatch hits the frame due to its shape.
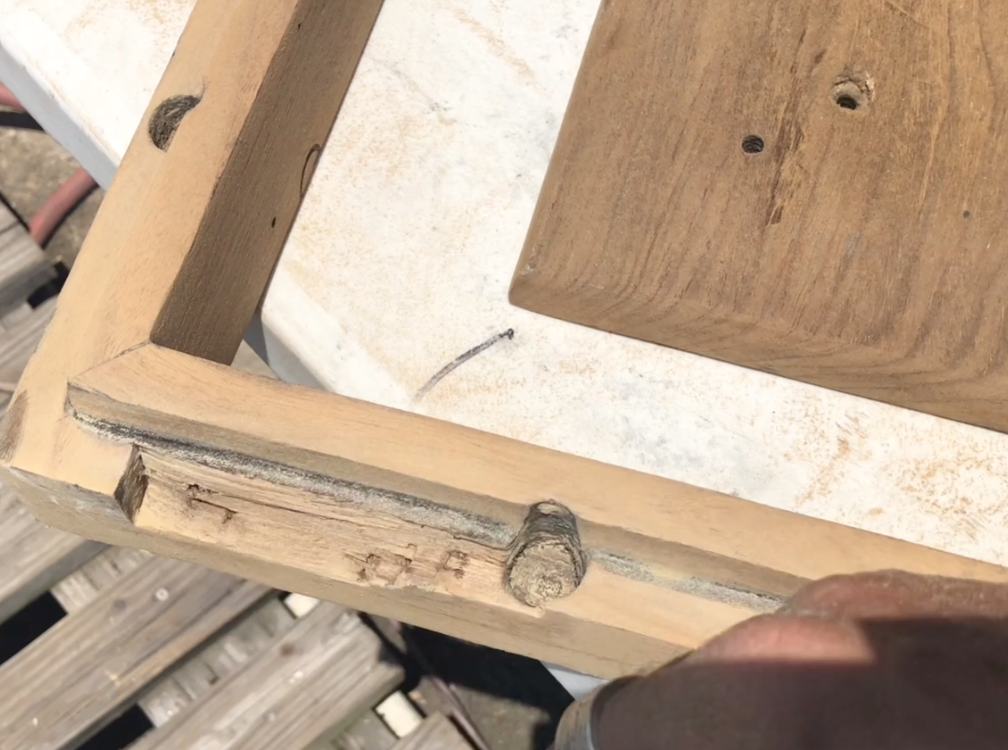
So now it is time to fix this mess. I sanded the frame down to bare wood and evaluated my repair options. I considered cutting a piece out flat with a chisel and epoxying a new piece of wood in there. This would have been a repair a lot like the “Mizzen repair” we wrote about earlier in this refit.
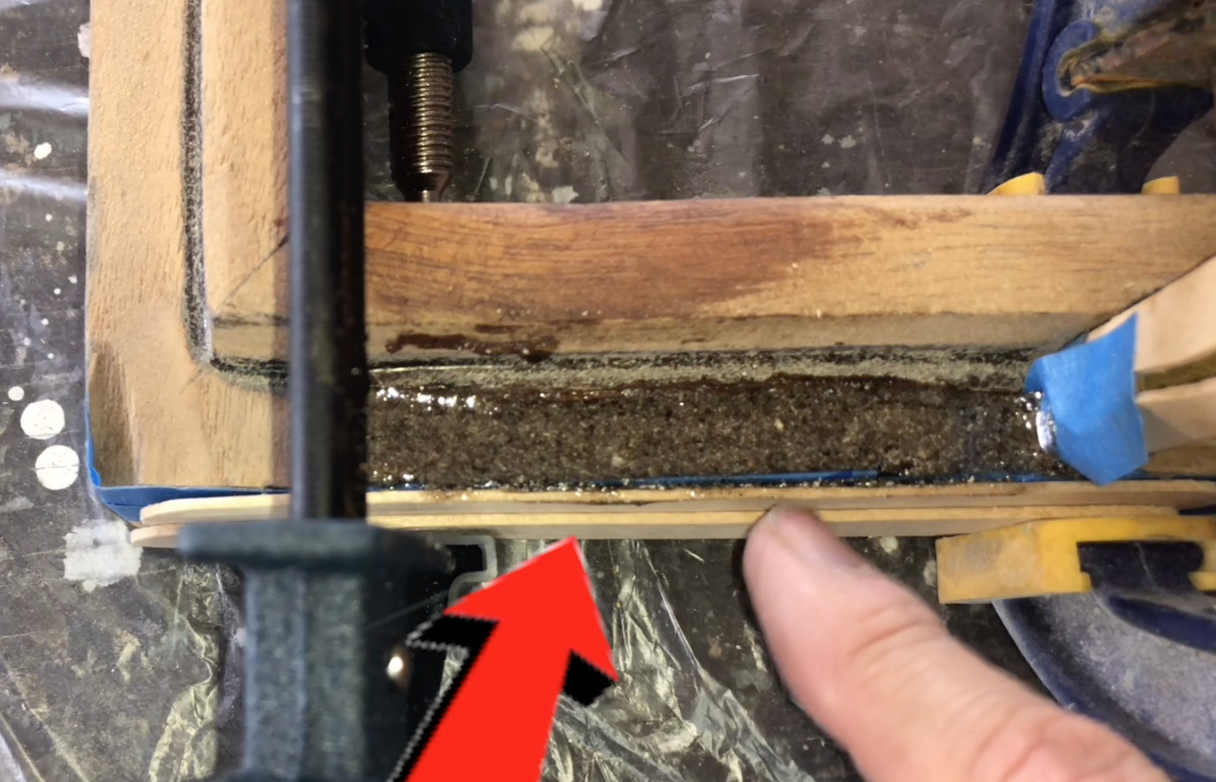
Instead, I decided to fix it with epoxy filled with sawdust to “try” to match the color of the teak. While the repair worked very good, I didn’t get the color quite right. To make this repair I used clamps and some popsicle craft sticks lined with painters tape.
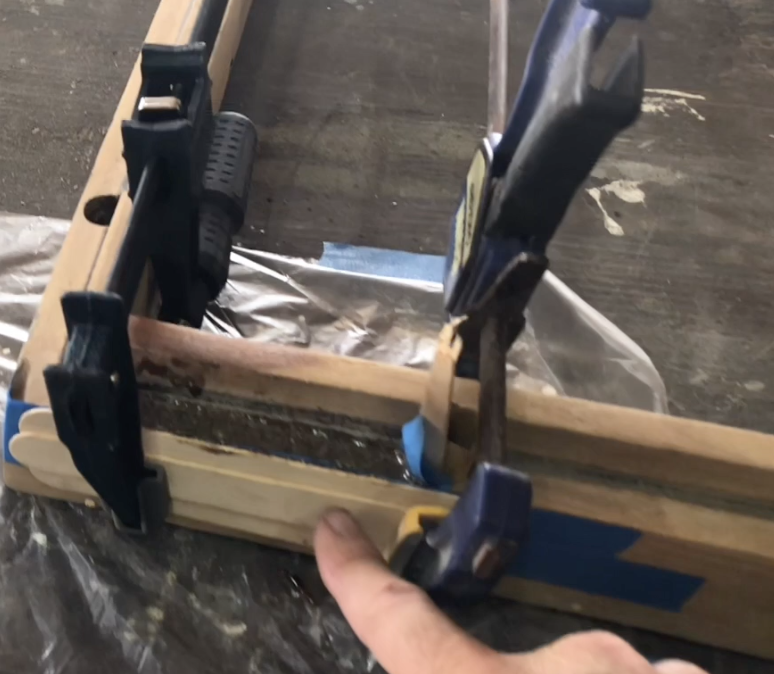 The tape prevented the epoxy from sticking to the wooden craft sticks.
The idea for this repair was to build a wall that would hold in the epoxy while it cured. I lined up the popsicle sticks two thick so that they didn’t bow out in the center leaving a raised section of epoxy. Epoxy is much harder than the wood itself, and it takes longer to sand than wood. The flatter I got the epoxy in there, the less I would have to sand. (And that was important to me).
I also lined up the horizontal edge of the popsicle sticks with the top of the frame edge. This is the flat edge that the lid of the hatch seats up against. By making this part flat, it allows me to “scrape” the epoxy flat again reducing the sanding. This would be a tricky area to sand, and the last thing I want to do is hand sand epoxy for 3 hours trying to get it flat.
 Now that the surface was prepared and my little epoxy dam was built, it was time to mix the epoxy and fill the hole. This is relatively simple like most epoxy mixes. It is a matter of combining the epoxy resin and hardener together and stirring according to the manufacturer’s instructions. I am using West Systems epoxy, so I mixed it in a small cup with a craft stick for 90-120 seconds. I then used sawdust from the frame and mizzen step to color the epoxy. I had used an old sock attached to the vacuum port on the sander to catch it. I mixed it until it was a ketchup consistency. I wanted this to remain a bit runny so that when I poured it into the mold, it settled flat (again to reduce sanding).
 In the end, I didn’t get the color quite right. What didn’t dawn on me until I saw the final product was why my tone was so dark. It turns out that when I mixed up my sawdust into the epoxy, it contained more than sawdust. If you remember from the last post on sanding the mizzen step, there was a black adhesive material on there. That black dust was also mixed in with my sawdust and caused this color to be much darker than I wanted. In the end, it is not enough for me to want to do the repair again, so I will live with it.