I was shocked at how hard it was to remove the Mizzen Step. After removing the mizzen step, it was time to remove the core from under the mizzen step. If you recall an earlier post when we cut the top skin from near the companionway, we saw some gaps and soft plywood core under this area. It has us concerned that there was weak rotted core or termite infested core in this are. We weren’t sure, but before we stood a new mast up on this step, it made sense to.
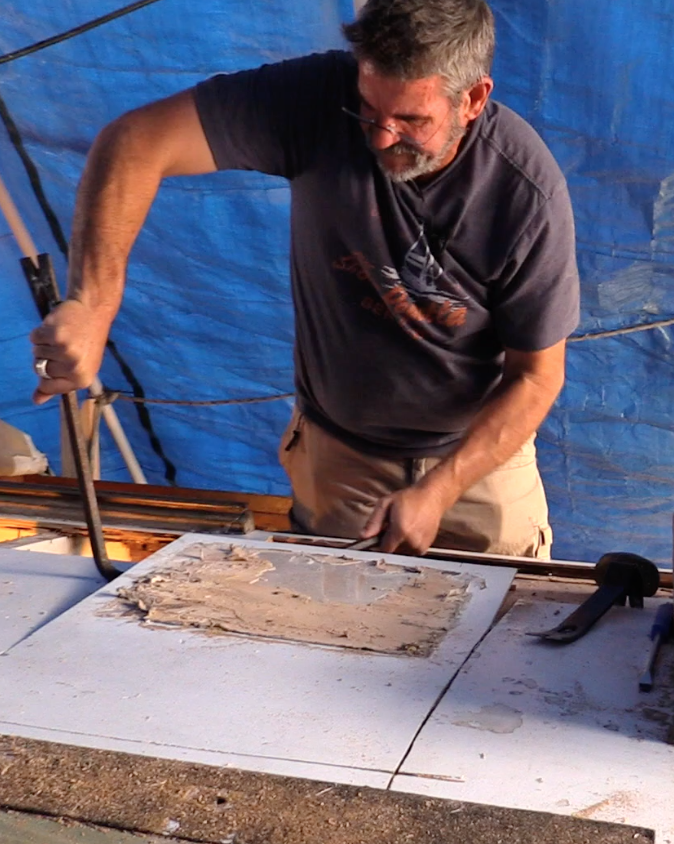
 It was time to go a little deeper as they say to remove any bad spots of the core. In previous blog posts on the coach house roof I mentioned doing it all while in here. I went about cutting the bad sections out of the roof, but this time did something a bit different. I didn’t set the saw blade depth thicker than the top fiberglass skin and removing the glass first. I opted to cut all the way through the top surface and core. I have done enough of these holes in the roof now that I knew the thickness of the glass throughout. This was important as it lets me gauge the depth of blade setting. Once I had the cuts on all sides, I started with pry bars (Insert link here) to remove the core. I like this set of thin angled pry bars for getting under tight surfaces. Once I have put the small one in, I continue to move to thicker pry bars and work my way up to the crowbar. The crow bar gives me the leverage I need to finish the job usually.
 This photo shows the core removed. The bottom side of it had an adhesive in a square and X pattern between the core the compression structure. This adhesive was fantastic stuff. It was still pliable when I removed it. The adhesion was so strong you could not force or pry it up. No, the only way I found to remove this stuff is to stretch and expand the gap. Then steadily increasing pry bars helps with that task. I have used the same method when removing aluminum port or hatch frames. By prying all the way slowly around it, increasing the gap, it reduces the chance that the frame will be bent.
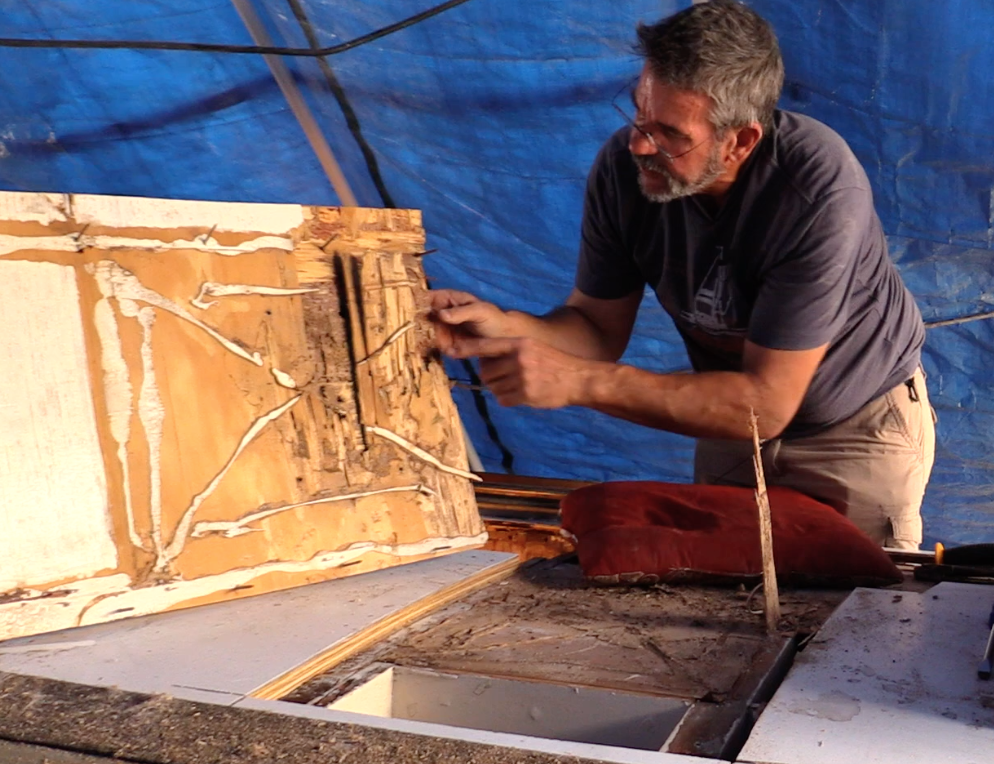
I am glad we decided to go a bit further than planned with these cuts. As you can see in this photo of the core from a side view, you can see just how rotted or termite damaged that piece is. The area I am pointing to in this photo was right under the starboard side of the mizzen step. Not exactly the foundation one would want for the spars and rigging for the mizzen. The damaged area or gap extends about 10-14 inches in from the area I am pointing to. It likely went all the way across where the mizzen step would have been. The good news is further to port it became completely solid, and the core was in perfect shape on the other side.
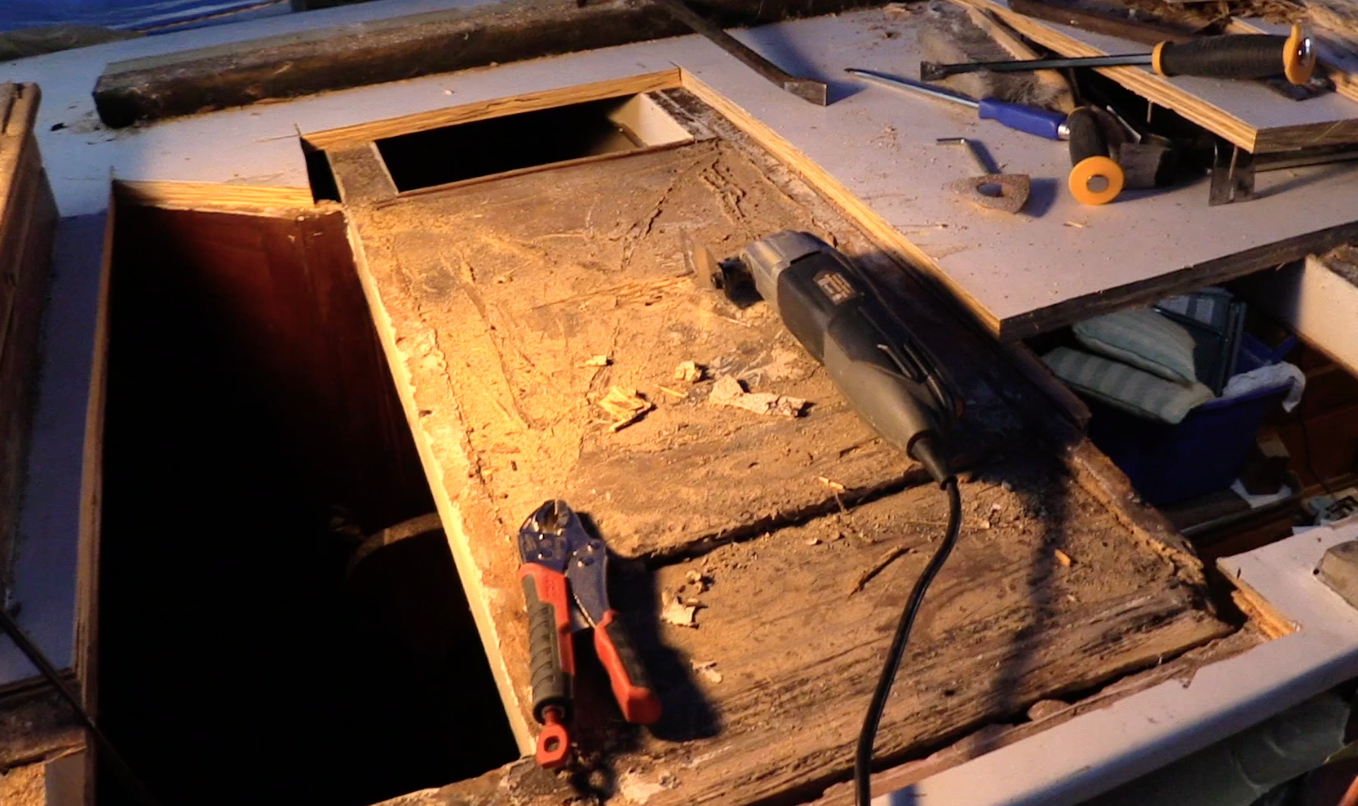
Once removed, I felt good about how far I had extended the cut to the port side of the boat. Doing so did expose an area aft of where I had cut and forward of the hatch where I still had a bit of soft material. It wasn’t as rotted or damaged as the earlier picture. But since this work is being done, we want to do it right.
I am historically bad at wearing safety equipment when doing woodworking. This is odd given that I won’t go on deck at night or offshore without being tethered and wearing a life jacket. I will cut away with a portable circular saw over my head without so much as safety glasses. The last cut but had a piece of sawdust launch up into my eye, so I decided it was time to put on the safety glasses. I always wear eye and usually even face protection when working on the lathe. I have good quality glasses that are comfortable, wrap around and work great, I need to wear them more.
With the blade depth already set from the previous cut, it was time to repeat the process. This time I was cautious as I wanted to cut one side at an angle to align with the top of the bulkhead below. This particular bulkhead forms the angled wall between the owner’s stateroom and the rear head. By cutting the roof core right above and along the center line of the partition, I would be able to adhere and fasten it down to the surface below it.
The good news is the horizontal cut running port to starboard just forward of the hatch was a smooth cut but did NOT line up to a cross member beam below. This was going to need a unique joint to give it more strength than a simple butt joint. I was not worried about the loads from the mizzen on this small part. That is all absorbed by the mizzen compression structure below it. Given that there is under a foot of space between the aft side of the mizzen and the forward side of the hatch, nobody would likely be walking in this spot either. That said, I still wanted to do something to improve the strength of any joint that didn’t have beams or a bulkhead to sit directly on top of. More to come on that topic in a future post.
As you can see by the photo, there is quite a bit removed in this section. It also means that there will be a great new core and plenty of area to replace and fair out the new fiberglass. Some people may wonder why in the lower part of this picture, I chose to leave the fiberglass strip that is about 3 inches wide. Why not just cut that entirely off and fiberglass over the edge?
The reason is that the edge is well shaped. By adding thickened epoxy inside that area before putting the core in, it will save money in labor to shape the cornered edge. I was able to hollow out the fiberglass so the core can will be slid right into that gap.
The thickened epoxy make it as strong as doing it the other way. There will be one primary difference, and that is quite a saving in labor to do all that glass work and shaping, faring and what not.

